Have I told you that I like pretzels? I know I’ve mentioned potato chips before. I grew up in central Pennsylvania, which is home to lots of potato chip and pretzel companies. So I’m a little bit of a connoisseur of snack foods, if there is such a thing.
While I don’t eat them as often, I am also a big fan of soft pretzels. With the doughy inside and the crunchy outside, what’s not to love, right? How much do I like soft pretzels? On a trip to Germany twenty years ago, I managed to score a real German pretzel. And by real, I mean gigantic. And by gigantic, I mean bigger than my head. That’s not an exaggeration. I have the photo. I don’t remember what tasted it like or how long it took me to eat it, but I’m sure the answers are “delicious” and “not that long considering the size”.

Mixing the dough.
In all of my baking adventures, baking pretzels is one that I had been wanting to do, but hadn’t gotten to yet. My wife even got me a pretzel making kit a while back which included a recipe and some ingredients. One of those ingredients is lye, which is why the kit also includes plastic gloves. I won’t lie, the lye scares me a little bit which is why I haven’t used it yet.

Ready to rise.
While I was wanting to make pretzels, I wasn’t intending to at this point. I actually found the recipe by accident as I was looking through my to do list. I was looking at a particular cookie recipe, and on the side of the page there was a picture for this other recipe which caught my eye. It looked awesome. Pretzel-y goodness, check. Adorable mini size, check. Easy looking recipe, check.

It has risen!
So I decided to make this recipe. And in particular, I decided to make it for my gaming group. One of my other hobbies, besides baking, is role-playing games. You know, games like Dungeons & Dragons. It’s a lot of fun. It involves imagination, creativity, teamwork, math, laughter, dice-rolling, and ridiculousness. And usually lots of snack foods. This particular group has been playing together for many years, but hasn’t met in a while. So this was a reunion of sorts, and I wanted to make something for it.
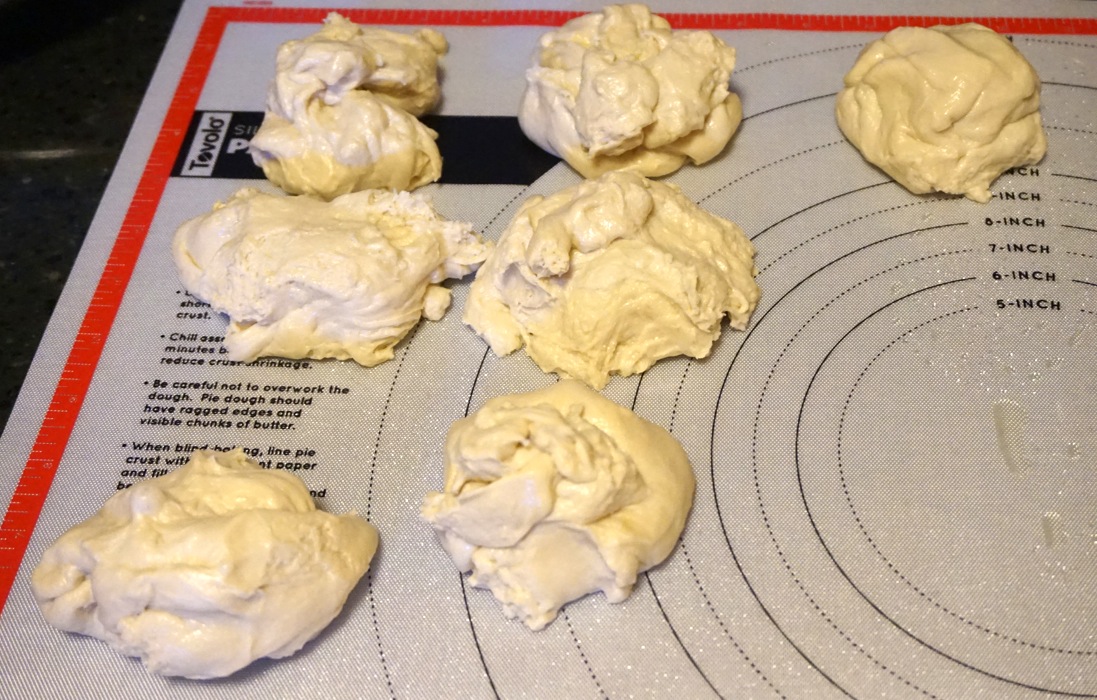
Splitting the dough.
It turns out making pretzels isn’t difficult, but there is a bit of labor involved. There are many steps. Briefly summarized, it’s making the dough, letting it rise, separating and rolling it out, boiling it, salting it, and baking it. Each step was pretty easy, but it does take an investment of time.

Rolling out the dough.
My good friend KitchenAid helped me make the dough. (We’re not Facebook friends or anything, but we are friends IRL.) This was actually my first time using the dough hook. Fun! (Whirl, whirl, whoosh, whoosh!) As you may know, I’m a big fan of the KitchenAid, and I use it a lot. I just hadn’t had the need for the dough hook yet. I’m glad I did though, as I’ve used the other attachments, and I didn’t want this one to get too lonely.

Cutting the dough into bite-sized pieces.
After making the dough, you let it rise. After an hour, it didn’t look like it had doubled as it should have. So I moved it to a warmer area and let it sit for another 20 minutes or so. While it didn’t look it, in the end it was enough.

Close-up!
I split the dough into 8 chunks (weighing them out to be sure they were even), rolled them all out, and cut them. It was fun! I rolled them out to the suggested 22 inches, but they contracted. The first few I cut, I measured them carefully by using the measurements on the pastry mat, but after that I just eyeballed them.

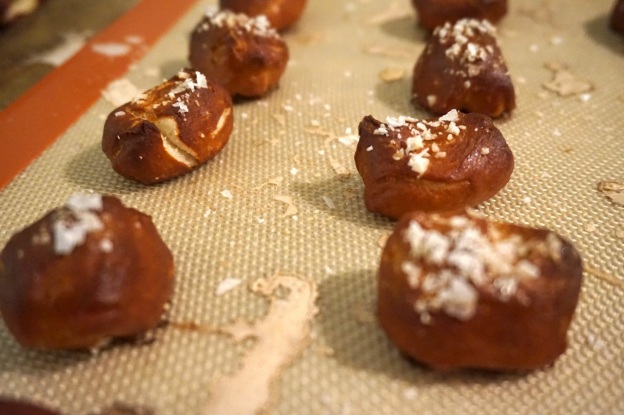
After being boiled, getting the butter wash, and being salted, they’re ready to bake.
I didn’t have a good roasting pan to use, so I used a pot to boil them. Adding the baking soda to the water is fun! It’s like a little chemistry set in the kitchen. 🙂 As I was boiling all the pretzels, the water started to turn brown. Pretzel color in fact. I started referring to it as pretzel water, and eventually pretzel juice. I jokingly asked my wife if she wanted to drink any. She humored me, but politely declined. (I think that was the smart choice.)

Pretzels!
After boiling the pretzels, the recipe calls using for an egg wash, and then sprinkling salt on them. Instead of an egg wash, I used my soon-to-be-world-famous butter wash. I’ve used it in the past, and it’s done the trick quite nicely. I just melted a tablespoon of butter and mixed with some water.

They looked and smelled delicious while they were baking. I baked them for 15 minutes and they were perfect. The smell in particular reminded me of something, but I couldn’t quite put my finger on what it was. And then my wife nailed it: Auntie Anne’s pretzels. It’s a chain of pretzel shops, and I used to eat their pretzels a bunch back in the day. I’m not sure what it was about these pretzels that reminded me of those pretzels in particular, but it was a strong connection.

In any case, these pretzels were absolutely delicious. The look, smell, taste, and texture are exactly what you want from a soft pretzel. Crunchy, chewy, yummy goodness. I had one fresh from the oven, and I had some later with some deli mustard. Yum all around.

Since the gaming festivities were the next day, I had to figure out how to store them overnight. After some research, I settled on wrapping them in parchment paper, and storing them in a paper bag. I stapled the bag shut overnight. I had to wait till the next day to see how they survived, to see how they reheated, and how people liked them.

It turned out that the paper bag worked relatively well for storing them. After much research, I had settled on reheating them by microwaving them with a damp paper towel on top. However, when I actually took them out to reheat, they seemed to have retained much of the moisture, so I microwaved them without a paper towel.

People were impressed that I had made them, but I don’t think they were as good as they were fresh. Later on, I figured out that I hadn’t microwaved them enough. One minute in the microwave, uncovered, on a plate seemed to be the magic formula. They came out close to fresh at that point.

Oh, and I would be remiss if I didn’t mention my wife here for all of her help. Thanks for oiling the bowl while my hands were knee-deep in yeasty dough. And thanks for all of your help with the cleaning, there was a lot.

The recipe ended up making about 7 dozen pretzel bites. They were a little bit of work, but they were totally worth it. They were fun to make, very yummy, and IMHO, they were very impressive. They looked fancy, cute, and professional. Like real pretzel bites. I kinda can’t believe I just made pretzels.

Sealed up in a paper bag overnight. BTW, Russ & Daughters is an awesome shop. If you’re ever in NYC, definitely check it out.
Have you made pretzel bites? Have you made pretzels? What’s your recipe look like? How do you keep them fresh? How do you reheat them? Why are soft pretzels such magical foods and why do they not last so long? These questions and more will soon be answered, with your help!
Recipe courtesy of Two Peas & Their Pod.