To paraphrase, these aren’t the pastries you’re looking for. I mean, they are. They are buttery, flaky goodness. But they’re not some fly-by-night pastry you can have a passing fancy with. If you want these, you need to make a commitment to them. You don’t have to move in with them or marry them. But you have to be committed to going the distance. They’re a lot of work. I’m sure it gets easier as you make them more often, but there’s no getting around it being a lot of work. So why would I spend many hours slaving over this delicate pastry?
One reason is that I like a challenge. Another reason is that I enjoy learning how to do new things, like adding new recipes to my repertoire. But primarily, this is something I made “because you asked”. Well not “you” the reader, but “you” my friend who asked. It started with an innocent enough post on Facebook a little while back which said, “I am not a baker. Will someone who is PLEASE make this for me?”. To which I responded, “Oooh! That looks fun and yummy. I will totally make those.” And so a few months later, when I had time to, I did.
Actually, there’s one more reason. As some of you know, linguistics is one of my other interests. And a French pastry with a name that most English speakers would find unpronounceable piqued my interest. For those of you wondering how it’s pronounced, it’s roughly “queen a-mahn”. Why the interesting spelling and pronunciation? Well it’s a specialty of the Bretons, a Celtic people who live in northwestern France. Say what? That’s right, Celtic. If you’re interested (as I am), you should definitely research the history of these fascinating people and their language. (I did.)
It’s also worth seriously researching (by which I mean trying) their food. It’s delicious, as I can attest to from the kouign-amann. So on to the pastries! Which reminds me. I guess I should mention that this post inaugurates a new category on the site: pastries. Yum!
My friend had originally posted a particular recipe for kouign-amann. I looked at that one, but then I also looked at some other recipes to see if there was one I liked more than the others. I stumbled across one that looked good from Bon Appétit. But what really made it stand out was this cool feature they have which has step by step instructions. Instead of having to go back and forth between the ingredient list and the directions, they have a step by step guide which walks you through it, listing the ingredients with the exact amounts right in the directions. It’s kind of awesome.
I’ve linked both the main recipe and the step by step guide below. I’ll also link the step by step guide here, in case you want to follow along. Just click on “Step-By-Step” at the bottom of the page. Where I mention particular steps below, I’m referring to the steps in this guide. Because this recipe has a lot of steps, a lot of this post will be about the details of making it. I also took lots of pictures, so you have fun stuff to look at as well as read.
Thankfully, I had most of the ingredients on hand. Despite its richness and complexities, it uses very few, simple ingredients. That’s a testament to those who created this pastry, as they managed to turn the mundane into the amazing. I did have to get yeast and Kerrygold butter. Well, I didn’t have to get Kerrygold per se, but I needed to get high-fat butter. And Kerrygold seemed like the way to go in that regard. Maybe it was something subliminal about the Celtic connection.
There was a lot of fun measuring in this recipe. It was awesome. It was all about the grams. I love me some metric system for measuring. It made everything so much easier.
So, the saga begins: I started about 4:40pm.
A little flour fell in the yeast while I was measuring it. (Oops!) Thankfully, it didn’t seem to make a difference. The yeast didn’t exactly foam up like they said. Maybe the bowl was too big? Maybe I don’t know what they mean by foam. I let it sit a few more minutes than they said. When it came to kneading the dough, It wasn’t quite five minutes that I kneaded it before I thought it was ready. It took about 45 minutes for this first part (up until the proofing in Step 4). Then I cleaned up the mess I had made so far.

The dough about half way through proofing.
I let it proof for about 1 hour until Step 5. Then it was just a couple of minutes for that step. Then I let it sit for 45 minutes in the fridge.
It wasn’t a lot of work up until this point. But there was a lot of waiting around. I did other work in the meantime, including writing up other recipes. (In retrospect, maybe I should have done more writing then on this one, as this one is quite a lengthy one.)

After Step 5.
Step 6 took just a few minutes.
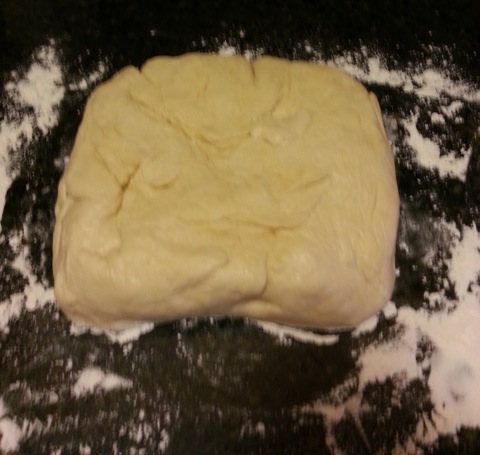
6×6″ square.
Then I let it chill for 30 minutes. I worked on the butter block (Step 8) while it was chilling.
The butter block took forever! (Okay, about 40 minutes. But it seemed like forever.) The dough had finished chilling. I had to take it out of the freezer and put it into the fridge, so it wouldn’t get too hard. Then I had to put it back in the freezer once the butter went in the fridge.
Here’s what happened with the butter block: I cut up the butter. Maybe it wasn’t small enough, but it was tough to blend. It got stuck. I had to turn the mixer up to high-speed to flick it off. Then I went back to mixing it. I had to do that a few times. Eventually, I got it all mixed. Maybe I mixed it too much. It was closer to whipped than waxy. It wasn’t quite 3 minutes mixing.
I wasn’t sure how big a piece of parchment paper to use for the butter block, but it ended up being too small, or else I didn’t place it right. It took a long time to mush the butter into place, and by then it was melting. The parchment paper kept rolling up. I tried weighing it down. It didn’t work. I ended up taping it down. Then I ended up taping it down again with bigger pieces of tape just to keep it down. I then tore off the pieces of parchment where the tape was so the parchment I ended up with would still be clean.
At this point there was lots of measuring. And then mushing. And then measuring again. And mushing again. (I had misread it as 12×16 instead of 12×6 in Step 9.)

Butter block.
Because the parchment paper was too small, I had to use more when I folded it over. But then when I was rolling it out, it got kinda messy getting out the air bubbles, because it wasn’t one solid piece. It leaked out a little. I eventually got it into decent shape. But I had trouble closing it up, because of it being multiple pieces. I used some butter to try to keep it together. (Tape didn’t work on the outside.) I didn’t measure it, so I didn’t know if it was 1/4 inch like it was supposed to be. I just had to assume. I chilled it for 25 minutes.

Step 11.

Step 12.

Starting Step 13.

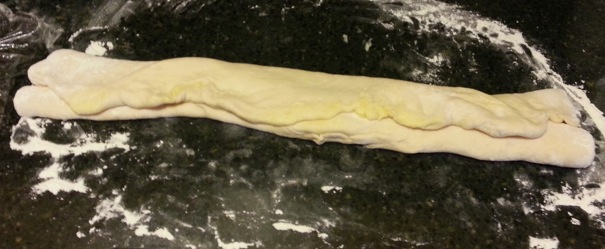
Finishing Step 13. Butter burrito, anyone?

Step 14. (I’m sorry it’s a little blurry. I must have been either tired or excited.)

Step 15 done.
Step 16. In retrospect, I don’t think that looks right. Oh well, too late now. 🙂
Moving on a bit: I wasn’t quite sure what they meant by flap. Maybe I had accidentally folded it over. I didn’t turn it (Step 19). It was hard to maneuver. It was very sticky at Step 21. When rolling it out in Step 22, I had to fold it over to get the right size. I ended up with layers. I’m assuming that was intentional.
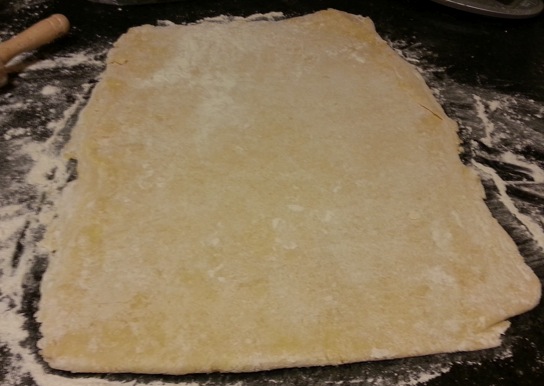
Step 22. Rectangle, slightly larger than 16×12.
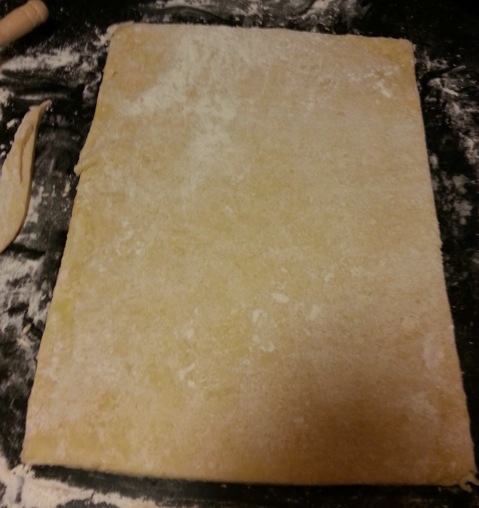
Step 22. Trimmed to 16×12.
In Step 23 it was hard to get the excess flour off of the dough, but I did my best. I didn’t bother so much with removing the flour from the surface.
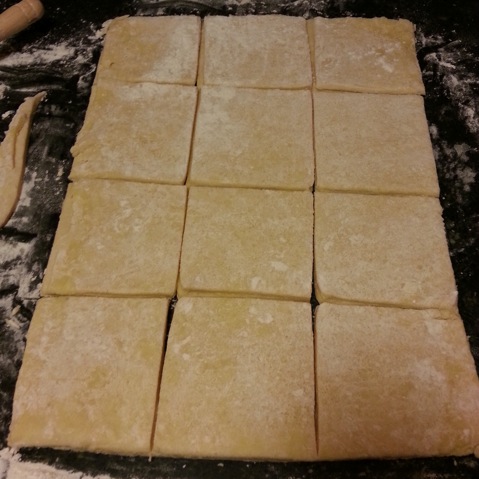
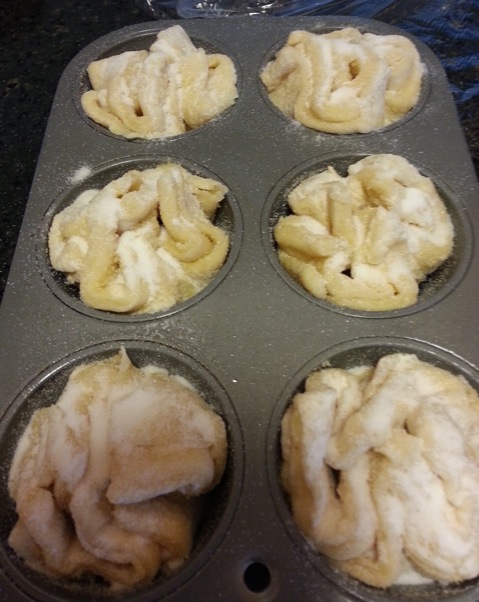
Step 23. Squares!
In Step 25, I was 10 grams of sugar short. I didn’t feel like opening up another bag of sugar just for a few grams. I figured it was okay, as lots of it fell off anyway.
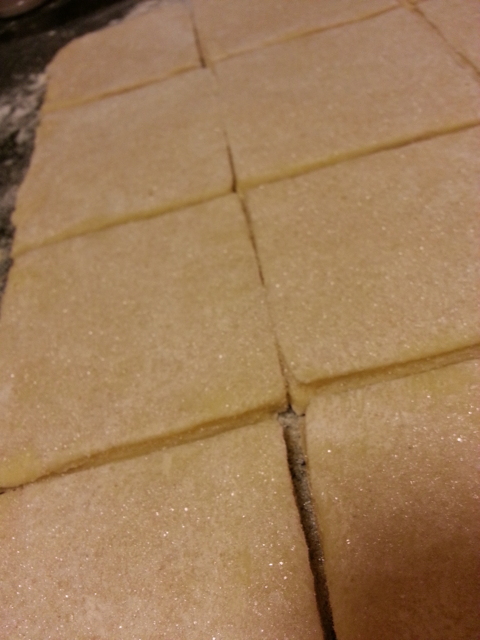
Squares. Extreme sugar close-up.

Before their good night’s sleep.
For Step 26, I let it sit for 10 and a half hours, starting at 11:50pm. My wife helped clean up from this round. (Thank you!) We were done with cleaning up around 1:20am. We had also managed to have dinner and watch a movie during the time while it was chilling. (We didn’t finish cleaning up until after the movie which is why we finished so late.)
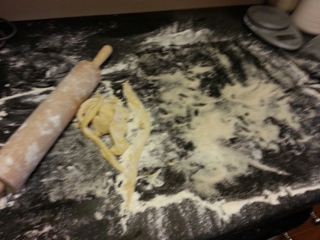
This is what my work surface looked like at the end of the night. Before cleaning, obviously. 🙂
The next morning, I continued. For Step 27, I used just 23g of sugar. (I know! The sorrow. The deep, deep sorrow.) I didn’t want to open up a new package of sugar for such a little amount, so I used some sugar packets that we had.
More sugar.
While the oven was preheating, I put the pastries back in the fridge. That’s because Step 28 said to bake them while they were still cold.
They smelled awesome while baking. (Otherwise the kitchen smelled a little yeasty, if that’s even a word.) I baked them for 28 minutes. After 25 they looked brown, but the sugar didn’t quite look caramelized enough. After 28 minutes, they still didn’t look super caramelized, but I think they were caramelized enough. I didn’t want them to burn.
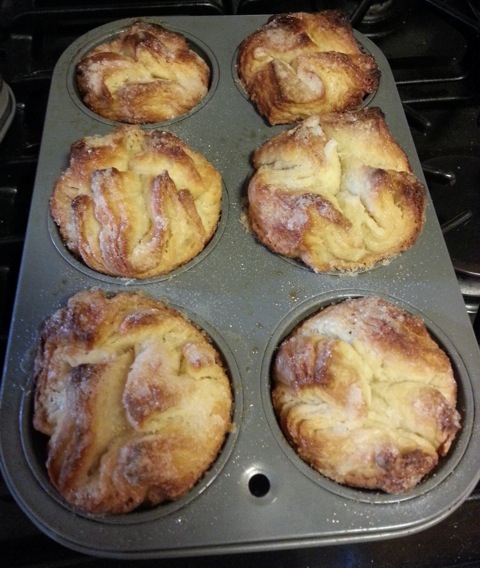
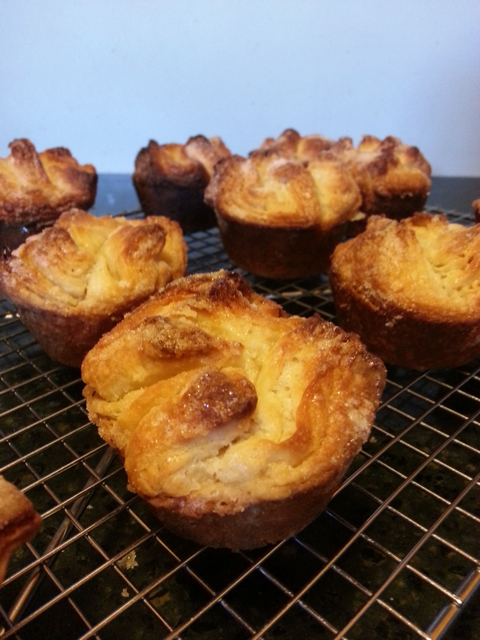
Fresh from the oven!

Tray 2, fresh from the oven!
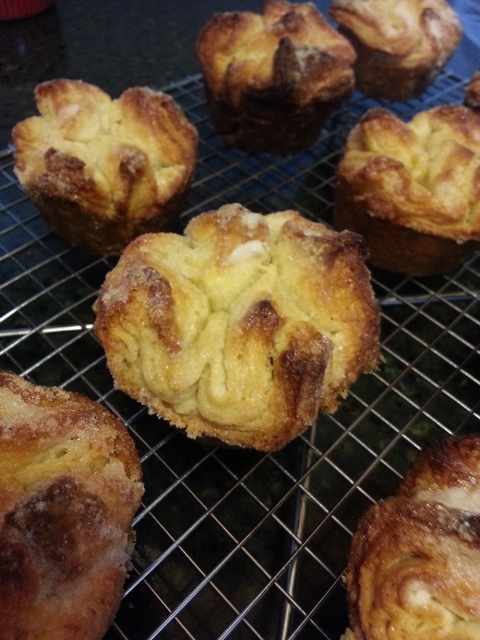
I pulled them out with two forks. (Thank you to this other kouign-amann recipe for the hint.) I let them cool. They smelled kinda like croissants.

Just hanging out. (And cooling.)
I tasted the remains in the muffin tins. You know, the little bits that don’t come out when you pull the baked goods out. Some of the sugar was definitely caramelized, some of it was definitely not.
My wife came home and almost lost it. (In a good way.) She was like, “Oh my god, it smells amazing.” To which I replied, “You live in a French pastry shop now.”
Once they cooled, we tried them. Much happiness commenced. Some reactions to eating them from those who tried them:
- Wow.
- Phenomenal.
- These are 7 dollar pastries.
- This was definitely worth skipping lunch for.
- They’re crunchy on the outside, soft on the inside.
- They are delicious.
- Great texture. Great taste.
- Kinda like croissants, but a little sweeter and more substantial.
I recommend that you eat these quickly. (I don’t imagine you’ll have much trouble.) After about two and a half days, the flavor was still very good, but the texture changed. They started to dry out a little.
So how about my friend who suggested them in the first place? What did she think? Unfortunately, she wasn’t able to have any. There was a scheduling conflict, so I couldn’t get them to her in time. I will have to coordinate better for next time.

Speaking of next time: one of the other versions of the recipe I had found was a much easier recipe. I will have to try that one next time and see if it tastes as good. I knew this one would be much more work, but I wanted to try it first, so I could see how it’s “supposed to” be done.
I had thought the apple pie recipe was a lot, but this takes the cake. The pie? The pastry? Well, you know what I mean. It was a lot. And it was spread out over more time.
I hope I haven’t scared you off of making them, though. They’re a lot of work, but they’re definitely worth it. Please give them a try, and let me know how they turn out. I’d also love to know if you’ve ever done any other recipes that were equally ambitious.
Recipe courtesy of Bon Appétit. (Step by step instructions here.)