Category Archives: Pastries

Sour Cream Apple Strudel

Who doesn’t love strudel? Well, the results of my highly (un)scientific poll prove without a shadow of a doubt that nobody doesn’t love strudel. I mean, it is a classic, delicious pastry, but I had no idea just how much people love it until I made it.

DSC01672

Why strudel in the first place? Well, if it’s deliciousness alone wasn’t a good enough reason. The other reason was this role-playing game that I play. In the game our characters are currently traveling around the world a bit. The guy who runs the game, last time he made dinner from Romania, where our characters were. That inspired me. I found out that this time our characters were going to Vienna, so I thought I would make something Austrian.

Working the dough.

Working the dough.

I have some history with Austrian foods. I studied German and in high school, I was on an exchange program with an Austrian high school (Gymnasium). It was with a school in Graz. Graz is the second largest city in Austria, but it doesn’t get lots of tourists because it’s in the southeast corner of the country away from the more famous touristy stuff. For me at least, that was a good thing. Away from the huge crowds, I really got immersed in the culture, language, food, and all the rest. It was lots of fun being there, and it was also fun showing them around when they visited us in the US. The program was only for a couple of weeks each way, but it had a big impact.

DSC01676

So, I tried to figure out what kind of Austrian food to make. There are a lot of choices! After finding a few that looked doable, I decided on one that would be easily recognizable, and easily transportable: apple strudel. Also, I settled on this particular version of the recipe because it was easier. Traditionally, you roll the dough paper-thin (so thin that you can see through it). This one didn’t call for that, which was good, because I didn’t really have a space to roll out the dough that thin, and I was concerned about breaking it, honestly.

Apples!

Apples!

The recipe itself is pretty simple. Classic, in fact, and awesome. It has very few ingredients, and very little sugar. Let’s just say that sometimes, simpler is better. For the apples, I chose Gala apples. The recipe just called for baking apples and of the available choices, the Gala apples looked the best at the grocery store.

Filling!

Filling!

Also, eagle-eyed readers might notice an issue with the picture of the ingredients. You’ll see that the little spice bottle is not cinnamon, as you might expect, but rather cumin. Let me assure you that there is cinnamon and not cumin in this. The cumin was next to the cinnamon and I grabbed it by accident. Thankfully I noticed it before I used it.

The first one.

The first one.

It was a very easy recipe to put together. It started with a simple dough. I used a pastry blender to help put it together. I still needed to put some muscle into it, but it wasn’t bad. It was kinda like pie dough.

All rolled up.

All rolled up.

Besides paying attention to the ingredients (see cumin above), it also helps to pay careful attention to the instructions. I didn’t, and so I didn’t realize that the dough needed to be refrigerated overnight. Unfortunately, I didn’t have that kind of time. So I put it in the fridge and turned it to the coolest setting possible. Then I had dinner and hung out a bit. Then I made the filling and did the rest of the prep work that was necessary before taking it out of the fridge. So it didn’t chill as long as it was supposed to, but I think it was okay.

The second one.

The second one.

As for making the filling, the Gala apples were a good choice. They were very easy to cut, and they were nice and sweet. (I tried some of the filling after I made it.) The recipe didn’t say how to cut them, so I cut them pretty small, basically dicing them. I melted the butter, mixed in the breadcrumbs, added the sugar and cinnamon, and then dumped it all into the apple bowl and mixed it all up. Easy peasy.

Ready to bake.

Ready to bake.

I used my new assistant, the handy-dandy pastry mat, with measurements right on it. That made it very easy to measure. I pulled out the dough and guessed at splitting it into thirds. (I did an okay job, but one ended up a little smaller.) I rolled it out to the right size-ish. I had to guess at splitting the filling too. Mostly fine, but the last one had way too much filling. (Which is why I tasted the filling. I had put it all in at first, but it was too much, and I had to take some out.)

Fresh from the oven.

Fresh from the oven.

After rolling out each piece of dough, I spread out the filling, then rolled up the dough. Fun! I tried pinching the dough closed at the edges and at the seam. Not perfect, but good enough. Some of the dough was thin, allowing apples to poke through, so I patched the dough as needed.

DSC01689

Originally I was going to use a baking dish, but then I thought I wanted to give the strudel more room. So I used a baking sheet. I had to carefully move them onto the baking sheet. It made 3. I baked them for 55 minutes. Wow, they smelled really good. They were nice and brown when they came out of the oven. I let them cool a couple of minutes. Then I cut off a couple of pieces to try.

DSC01691

Really, really yummy. Not too sweet. Only a cup of sugar total for the whole recipe, which was a ton of strudel. Nice flaky crust. Good filling. It was almost hearty, but not in a savory way. Just yummy apple-y, pastry goodness.

DSC01694

I kinda feel like I cheated. The other recipes where you roll the dough super thin are a little more involved, and I think they make a more delicate dough, but this was pretty good. (Thanks hon for helping with the cleanup as usual.)

DSC01695

The game was the next day. Everyone loved it. They kept thanking me and saying how great it was. I was asked how I made the crust so flaky. (Butter, I replied.) I brought one of the three. It was gone fairly quickly. There were lots of strudel jokes. (None of which are funny unless you were there, unfortunately.) That night, my wife and I had a little bit more. We warmed it up a little before eating it, which was a good call. As I said, not a lot of sugar, but the apples made up for that. It was just really good. Simple, not flashy, but delicious. I also brought some to work. People loved it there as well. Comments ranged from “it was excellent” to “you could sell this”.

DSC01700

All in all, I would say it was a great choice of recipes. People really went gaga for it. Who knew a little strudel could do that to people? Have you had a big reaction from making strudel? Do you have a favorite strudel recipe? Do you have a favorite strudel besides apple strudel? I’d love to hear all about your strudel experiences. Feel free to share!

DSC01704

Recipe courtesy of Recipes Wikia.

Kouign-Amann Postscript

Greetings! Happy April to everyone. For many of us this is now springtime, a time when the weather is warm, and the world around us buzzes with life and new beginnings. It’s a great time for baking, what with all the inspiration around us.

Unfortunately, here at Needs Baked HQ, it’s a slightly different story. I’ve spent the last week under the weather. 😦 Thankfully, I’m on the mend. While I’ve got lots of recipes in the pipeline, I haven’t had the time or energy to really write anything up. I didn’t want to leave you empty-handed though, so I do have something short to share today.

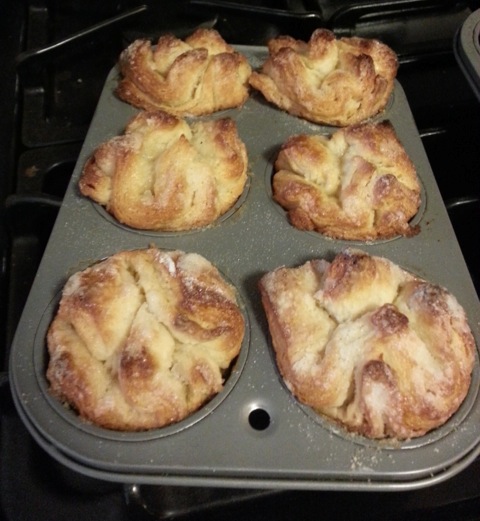
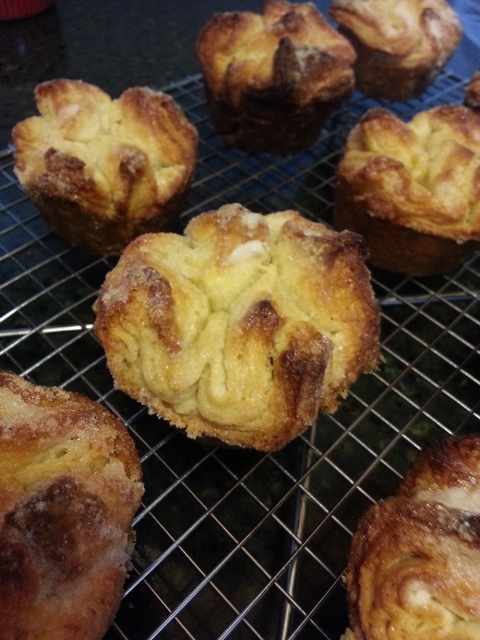
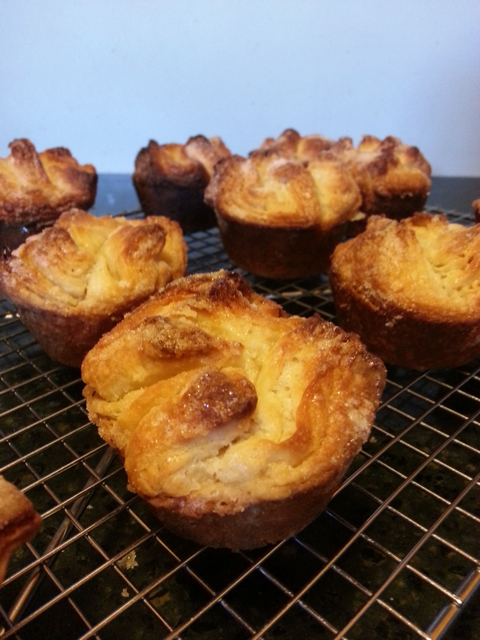
You might remember I made these delicious kouign-amann a while back. They’re a delicious, buttery, flaky, French pastry that take a long time to make, but are totally worth it. When I made them, I made a whole bunch, and they were so rich, we couldn’t eat them all. Apparently I had saved one, but I had totally forgotten about it.

The other week (way before I had been knocked down by the spring sickness), I was cleaning out the freezer, when I came across a muffin shaped parcel of aluminum foil. I figured it was a muffin or a cupcake from an adventure long past, but when I opened it up I found a kouign-amann. I have no memory of having saved one, but I was very excited that I had. It looked just the same as the day I had baked it, still glistening with caramelized sugar.

I wasn’t going to waste it, so I put it in the fridge to defrost over night. I checked StillTasty (my go to site for checking the safety of “mature” foods). They suggested it would still be okay, so I figured I would give it a shot. The next day after it had defrosted, I put it in the toaster oven for a little while, and waited (what seemed like a long time) for it to warm up.

How did it turn out? Oh. My. Goodness. It was still delicious. Buttery, flaky, sweet, and delicious. (The very center of it hadn’t gotten warmed up enough, as I had only lightly toasted it. So that part wasn’t as delicious, but if I had cut it open first or waited long enough to warm it more, it would have been. The rest of it: still amazing.) All the memories of making it came floating back. It was still a triumphant pastry all these months later. Wow. I really have to hand it to the French.

Now I want to make these again. Since I’m now an expert ;), maybe I could make them much quicker this time. Or, as I’m remembering, I have another version of the recipe which is supposed to be much quicker and easier. Maybe I’ll try that.

In any case, if you have a spare afternoon (or so) and love buttery, flaky, sweet, and delicious pastry, you should definitely make these. And if you want to surprise yourself, put a couple in the freezer and forget about them. You’ll be glad you did.

Recipe courtesy of Bon Appétit.

* PS – The image I used for this post was not a new image, just a recycled one from when I first posted this recipe. But since it looked exactly the same, and I didn’t remember to take any pictures this time, it will have to do.

Sufganiyot

You’ll forgive me if I stray again this week from the world of baked goods. This week I highlight a lovely dessert that is not baked, but fried. It’s a traditional Hanukkah dessert called sufganiyot. (That’s the plural. Sufganiyah is the singular.) They’re delicious jelly filled donuts, and I think you’ll appreciate them.

If you ever pay attention to Jewish holidays, you’ll know that relative to the secular calendar Hanukkah moves around a little bit. Of course it never moves so much as to happen in the middle of May. I actually made this recipe during Hanukkah, but I’m just now getting the chance to write about it. (BTW, want to hear one of my favorite jokes about Hanukkah? Q: What day is Hanukkah this year? A: Same day it is every year. 25th of Kislev. Okay, so it’s not that funny. But I think you have to give me bonus points because I made it up myself.)

The holiday of Hanukkah commemorates a miracle with oil. To recognize that, different foods cooked in oil are traditional on Hanukkah. Sufganiyot are one of those foods. Another popular one you may be familiar with is latkes. Latkes are potato pancakes and are also delicious.

To digress for a moment about latkes: every year my wife and I have a tradition which she has lovingly called Latkepalooza. It is not a music festival headlined by potato pancakes, although that would be awesome. Latkepalooza involves us making and eating tons and tons of latkes. Sometimes there are other foods involved. Sometimes there are other activities. But latkes are the main attraction. When I say tons and tons of latkes, it’s actually a single recipe. We use my family latke recipe, which comes from my maternal grandmother (and probably her mother before that). One recipe’s worth of the latkes makes enough to feed a small army. So for the two of us, it’s quite a lot.

The first time we decided to make the latkes together after moving in together, I printed a copy of the recipe out and taped it up in the kitchen for easy reference while we were cooking. Eight years later, it’s still hanging up there. Year round. We only use it once a year, but somehow, we’ve never taken it down. I think it’s a good reminder.

But back to the sufganiyot. They’re donuts. Now, one might ask, what is a donut really? Is it a pastry, as I’ve labeled it here? Is it a cake? I’ve done some research, and those in the know seem to refer to it as a cake. But to the general populace, I think people consider them to be pastries. Maybe they’re culinary pastries? By that I mean, they’re like tomatoes. Tomatoes are biologically fruits. However, people often think of them and use them like vegetables. Hence they are considered culinary vegetables. Maybe donuts are the same way.

20141226_143904

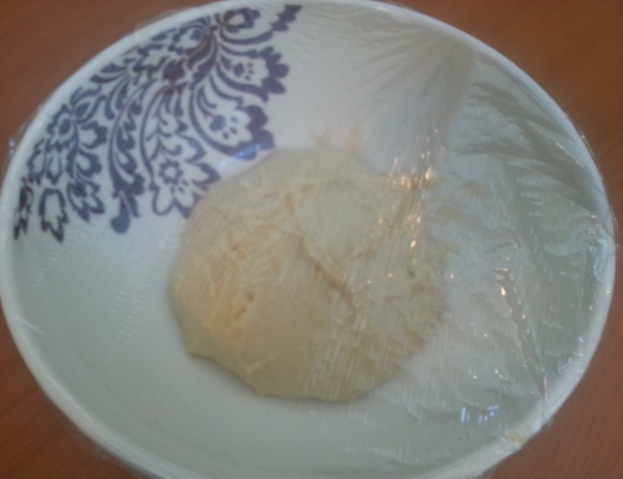
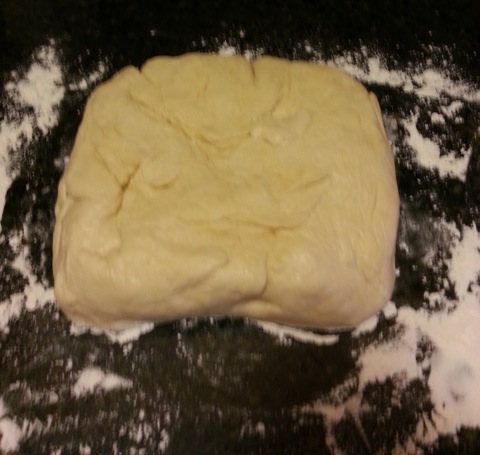
The dough before rising.

When I started putting them together, I originally mixed them by hand, but it was really tough. I brought out the hand mixer, which unfortunately did not have a dough hook. The dough eventually climbed up and covered the beaters, but it got done much quicker. I let the dough rise two hours. I put plastic wrap on the bottom of a baking sheet which I then floured.

20141226_163046

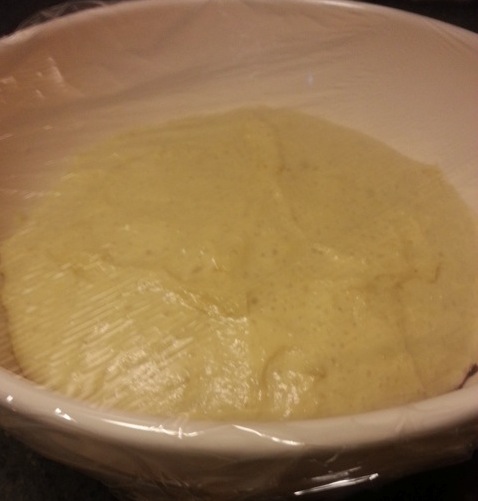
The dough after rising.

I rolled out the dough. I measured it. It was kind of 1/4 inch, but it wasn’t even all around. The recipe is supposed to make 30, but I got 41. Maybe they were too thin? I measured with a 2″ cup and used that to cut them out, so they should have been the right diameter, if not the right thickness.

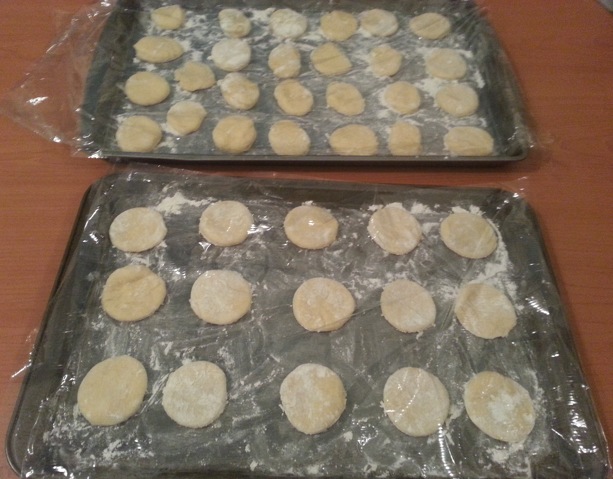
The sufganiyot before rising.

The sufganiyot before rising.

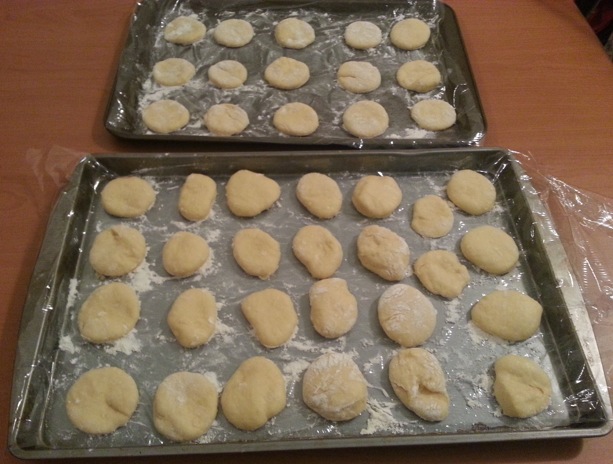
I covered them with plastic wrap. It ended up taking two baking sheets to fit them all. I let them rise 30 minutes. Toward the end of it, I started heating up the oil. I could have started earlier. It took a while to heat up. More than 30 minutes. I took the plastic off at 30 minutes, and it was still a bit longer. (Later events will explain why it took so long to heat up. Read on.) 

The sufganiyot after rising.

The sufganiyot after rising.

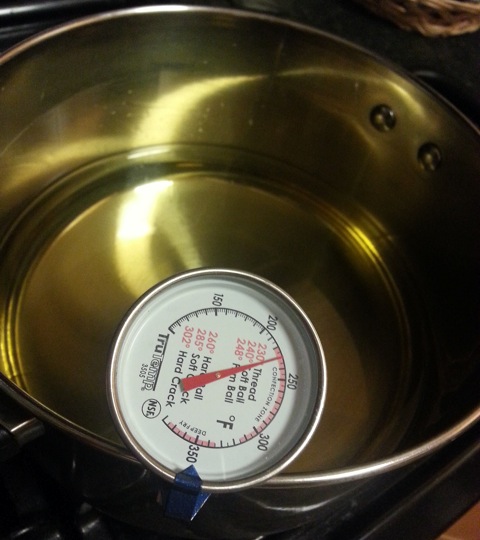
I used a candy thermometer for the first time for measuring the oil temperature. I had resisted getting one for a long time, because who needs another kitchen gadget sitting around? But I was coming across enough recipes that needed one, so I figured it was worth getting one.

Heating up the oil.

Heating up the oil.

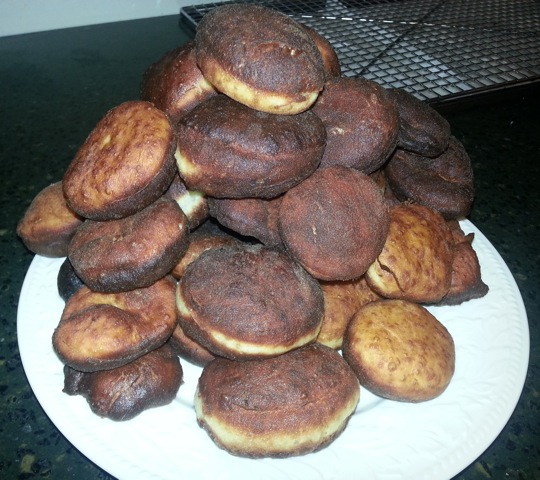
When I started cooking the sufganiyot, they cooked super fast. I tried the recommended 90 seconds per side, but after no more than a few seconds in they started getting really brown. The first batch or so was blackened. I noticed that the temperature had shot up. The thermometer was in the middle of a few donuts. I moved it to get a better reading, and I lowered the heat. The temperature shot back down again. I tried again, but they still got black pretty quick.

After that, I put in a few more and once I was done putting them in, I started flipping the first ones over already. That seemed to work better. Maybe only 20 seconds or so a side. Some were definitely smaller, but even the bigger ones cooked really quickly. Maybe the thermometer was off? Maybe I wasn’t using it right? Maybe they were all too small?

Freshly fried!

Freshly fried!

In any case, I eventually got the hang of it. Most of them turned out okay. I tried one of the blackened ones, and it was still yummy!

A mountain of sufganiyot.

A mountain of sufganiyot.

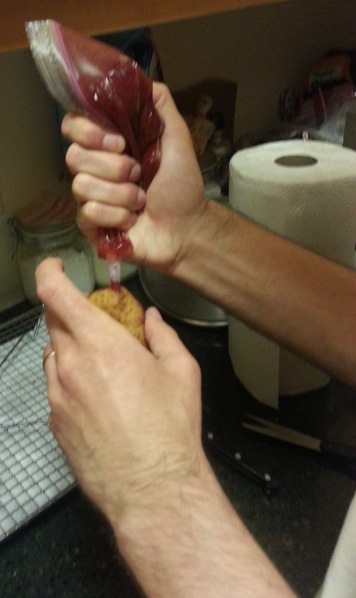
I punctured them all. The crispier ones were a little harder to do. I set about to fill them all with jam. (For a funny look at removing the jelly from a donut, check this out.) I didn’t have a proper pastry bag and tips. I used the plastic bag trick, but since I had to stick it inside the donuts a bit, I attached a straw at the end. (I actually cut down a full size straw and used pieces of it.) It kinda worked, but it was messy. Several times I had to reattach the straw or get a new one, and eventually I needed a whole new bag. It took a lot longer than it should have, but it worked.

Filling the sufganiyot. Action shot! (My wife took this picture, in case you're wondering where the extra set of hands came from.)

Filling the sufganiyot. Action shot! (My wife took this picture, in case you’re wondering where the extra set of hands came from.)

As I was filling them, I realized that they are really just big air pockets surround by a bit of dough. And it’s hard to know how much jam to put in. You can’t really tell how much is going in, because you can’t see the inside. I had to guess based on guessing the rate of filling and the size of the donut.

I used a bit more jam than they said to. There were many reasons for this. Some spilled out the back of a bag when it burst. Some got left in a bag once the bag was unusable. Also I made a few more sufganiyot than the recipe called for. There was also the aforementioned not knowing how much was going in. After filing them, I let them sit. I decided to put the powdered sugar on them later.

All filled with jam.

All filled with jam.

In retrospect, I probably could have used less oil. There was so much left over. I get that they needed to cook in it, but there could have been much less oil and it still would have worked out fine. (It’s possible that they would have soaked more up had they cooked longer, as originally designed.)

Like I said, a lot of oil left over.

Like I said, a lot of oil left over.

I put powdered sugar on them later. I started using a spoon, but it didn’t give me enough control. So I ended up using my fingers. It probably would have been better to sift the sugar right onto them. Then it would have been finer, and I could have spread it more easily.

Powdered sugar!

Powdered sugar!

I can’t remember making sufganiyot before, so I have to say I’m impressed at how they turned out. They tasted great. There was fried doughy goodness, sweet raspberry filling, and the little sprinkling of sugar on top. Admittedly, the ones that got a little overcooked were less yummy, but still not bad. Also, a helpful tip: if you’re not going to eat them right away, don’t cover them in powdered sugar right away. Wait until right before you’re going to eat them. The powdered sugar will be in better shape that way.

20141226_213054

One other note I should mention is that between making the sufganiyot and writing this post, I found out what the issue was. My thermometer is off. Far off. After some other temperature sensitive recipes seemed to have issues, I began to suspect the thermometer was the culprit. I wasn’t sure what to do, but I came across an easy test.

Fill a pot with water and put the thermometer in. Heat it till boiling and read what the temperature on the thermometer is. We know what temperature water boils at, so if your thermometer doesn’t read that temperature in boiling water, adjust accordingly. I can’t remember at this point how far off it was, but it was definitely running hot. In boiling water, it said it was like 240°F. Since water boils at 212°F, it was running about 30° too hot. No wonder they cooked so fast! I have to see if there’s a way to adjust the thermometer, otherwise I’ll just have to keep this in mind when I use it going forward.

Now that you’ve heard my story, I’d love to hear from you. Do you have any thermometer tips or tricks? Do you have a favorite Hanukkah recipe (dessert or otherwise)? Any holiday recipes that you like to make, even when it’s not the holidays? Let me know!

Recipe courtesy of Chow.

20141226_213226

Kouign-Amann

20141019_153738

To paraphrase, these aren’t the pastries you’re looking for. I mean, they are. They are buttery, flaky goodness. But they’re not some fly-by-night pastry you can have a passing fancy with. If you want these, you need to make a commitment to them. You don’t have to move in with them or marry them. But you have to be committed to going the distance. They’re a lot of work. I’m sure it gets easier as you make them more often, but there’s no getting around it being a lot of work. So why would I spend many hours slaving over this delicate pastry?

One reason is that I like a challenge. Another reason is that I enjoy learning how to do new things, like adding new recipes to my repertoire. But primarily, this is something I made “because you asked”. Well not “you” the reader, but “you” my friend who asked. It started with an innocent enough post on Facebook a little while back which said, “I am not a baker. Will someone who is PLEASE make this for me?”. To which I responded, “Oooh! That looks fun and yummy. I will totally make those.” And so a few months later, when I had time to, I did.

Actually, there’s one more reason. As some of you know, linguistics is one of my other interests. And a French pastry with a name that most English speakers would find unpronounceable piqued my interest. For those of you wondering how it’s pronounced, it’s roughly “queen a-mahn”. Why the interesting spelling and pronunciation? Well it’s a specialty of the Bretons, a Celtic people who live in northwestern France. Say what? That’s right, Celtic. If you’re interested (as I am), you should definitely research the history of these fascinating people and their language. (I did.)

It’s also worth seriously researching (by which I mean trying) their food. It’s delicious, as I can attest to from the kouign-amann. So on to the pastries! Which reminds me. I guess I should mention that this post inaugurates a new category on the site: pastries. Yum!

My friend had originally posted a particular recipe for kouign-amann. I looked at that one, but then I also looked at some other recipes to see if there was one I liked more than the others. I stumbled across one that looked good from Bon Appétit. But what really made it stand out was this cool feature they have which has step by step instructions. Instead of having to go back and forth between the ingredient list and the directions, they have a step by step guide which walks you through it, listing the ingredients with the exact amounts right in the directions. It’s kind of awesome.

I’ve linked both the main recipe and the step by step guide below. I’ll also link the step by step guide here, in case you want to follow along. Just click on “Step-By-Step” at the bottom of the page. Where I mention particular steps below, I’m referring to the steps in this guide. Because this recipe has a lot of steps, a lot of this post will be about the details of making it. I also took lots of pictures, so you have fun stuff to look at as well as read.

Thankfully, I had most of the ingredients on hand. Despite its richness and complexities, it uses very few, simple ingredients. That’s a testament to those who created this pastry, as they managed to turn the mundane into the amazing. I did have to get yeast and Kerrygold butter. Well, I didn’t have to get Kerrygold per se, but I needed to get high-fat butter. And Kerrygold seemed like the way to go in that regard. Maybe it was something subliminal about the Celtic connection.

There was a lot of fun measuring in this recipe. It was awesome. It was all about the grams. I love me some metric system for measuring. It made everything so much easier.

So, the saga begins: I started about 4:40pm.

A little flour fell in the yeast while I was measuring it. (Oops!) Thankfully, it didn’t seem to make a difference. The yeast didn’t exactly foam up like they said. Maybe the bowl was too big? Maybe I don’t know what they mean by foam. I let it sit a few more minutes than they said. When it came to kneading the dough, It wasn’t quite five minutes that I kneaded it before I thought it was ready. It took about 45 minutes for this first part (up until the proofing in Step 4). Then I cleaned up the mess I had made so far.

20141018_180516

The dough about half way through proofing.

I let it proof for about 1 hour until Step 5. Then it was just a couple of minutes for that step. Then I let it sit for 45 minutes in the fridge.

It wasn’t a lot of work up until this point. But there was a lot of waiting around. I did other work in the meantime, including writing up other recipes. (In retrospect, maybe I should have done more writing then on this one, as this one is quite a lengthy one.)

After Step 5.

After Step 5.

Step 6 took just a few minutes.

6x6" square.

6×6″ square.

Then I let it chill for 30 minutes. I worked on the butter block (Step 8) while it was chilling.

The butter block took forever! (Okay, about 40 minutes. But it seemed like forever.) The dough had finished chilling. I had to take it out of the freezer and put it into the fridge, so it wouldn’t get too hard. Then I had to put it back in the freezer once the butter went in the fridge.

Here’s what happened with the butter block: I cut up the butter. Maybe it wasn’t small enough, but it was tough to blend. It got stuck. I had to turn the mixer up to high-speed to flick it off. Then I went back to mixing it. I had to do that a few times. Eventually, I got it all mixed. Maybe I mixed it too much. It was closer to whipped than waxy. It wasn’t quite 3 minutes mixing.

I wasn’t sure how big a piece of parchment paper to use for the butter block, but it ended up being too small, or else I didn’t place it right. It took a long time to mush the butter into place, and by then it was melting. The parchment paper kept rolling up. I tried weighing it down. It didn’t work. I ended up taping it down. Then I ended up taping it down again with bigger pieces of tape just to keep it down. I then tore off the pieces of parchment where the tape was so the parchment I ended up with would still be clean.

At this point there was lots of measuring. And then mushing. And then measuring again. And mushing again. (I had misread it as 12×16 instead of 12×6 in Step 9.)

Butter block.

Butter block.

Because the parchment paper was too small, I had to use more when I folded it over. But then when I was rolling it out, it got kinda messy getting out the air bubbles, because it wasn’t one solid piece. It leaked out a little. I eventually got it into decent shape. But I had trouble closing it up, because of it being multiple pieces. I used some butter to try to keep it together. (Tape didn’t work on the outside.) I didn’t measure it, so I didn’t know if it was 1/4 inch like it was supposed to be. I just had to assume. I chilled it for 25 minutes.

20141018_205638

Step 11.

Step 12.

Step 12.

Starting Step 13.

Starting Step 13.

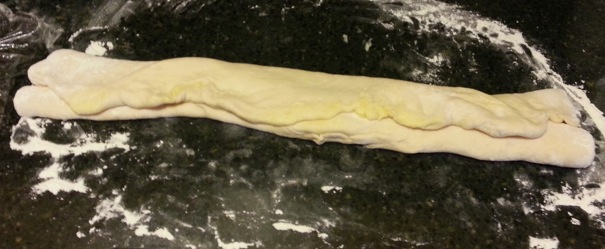
Finishing Step 13. Butter burrito, anyone?

Finishing Step 13. Butter burrito, anyone?

Step 14. (Sorry it's a little blurry, I must have been either tired or excited.)

Step 14. (I’m sorry it’s a little blurry. I must have been either tired or excited.)

Step 15 done.

Step 15 done.

Step 16. In retrospect, I don't think that looks right. Oh well, too late now. :)

Step 16. In retrospect, I don’t think that looks right. Oh well, too late now. 🙂

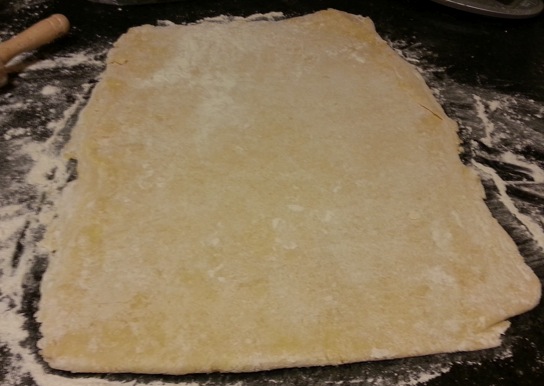
Moving on a bit: I wasn’t quite sure what they meant by flap. Maybe I had accidentally folded it over. I didn’t turn it (Step 19). It was hard to maneuver. It was very sticky at Step 21. When rolling it out in Step 22, I had to fold it over to get the right size. I ended up with layers. I’m assuming that was intentional.

Step 22. Rectangle, slightly larger than 16x12.

Step 22. Rectangle, slightly larger than 16×12.

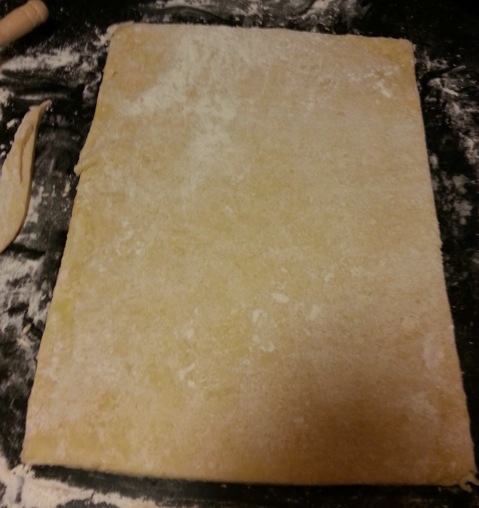
Step 22. Trimmed to 16x12.

Step 22. Trimmed to 16×12.

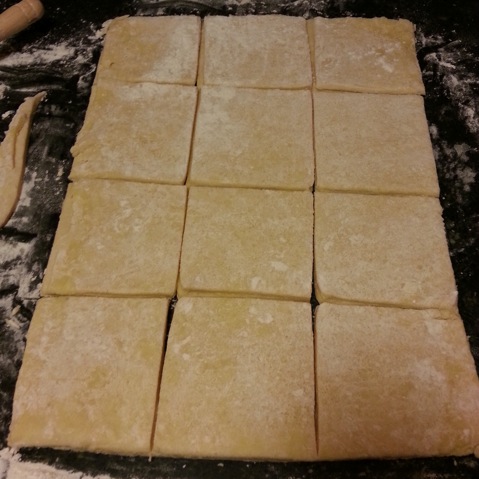
In Step 23 it was hard to get the excess flour off of the dough, but I did my best. I didn’t bother so much with removing the flour from the surface.

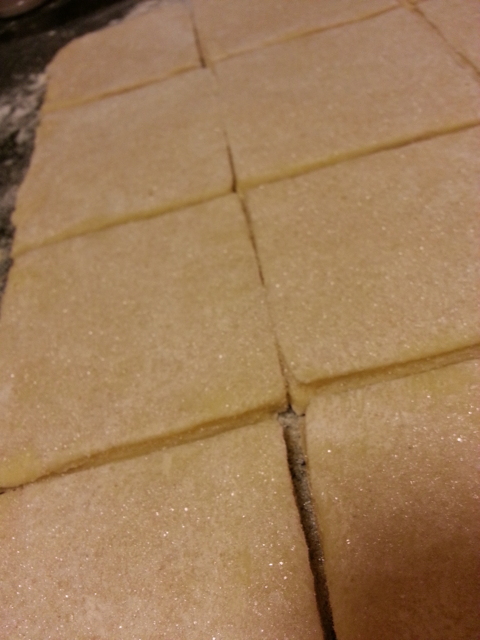
Step 23. Squares!

Step 23. Squares!

In Step 25, I was 10 grams of sugar short. I didn’t feel like opening up another bag of sugar just for a few grams. I figured it was okay, as lots of it fell off anyway.

Squares. Extreme sugar close-up.

Squares. Extreme sugar close-up.

Before their good night's sleep.

Before their good night’s sleep.

For Step 26, I let it sit for 10 and a half hours, starting at 11:50pm. My wife helped clean up from this round. (Thank you!) We were done with cleaning up around 1:20am. We had also managed to have dinner and watch a movie during the time while it was chilling. (We didn’t finish cleaning up until after the movie which is why we finished so late.)

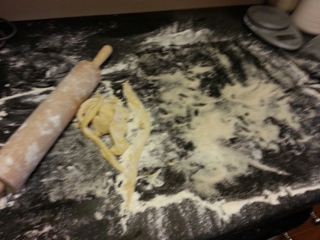
This is what my work surface looked like at the end of the night. Before cleaning, obviously. :)

This is what my work surface looked like at the end of the night. Before cleaning, obviously. 🙂

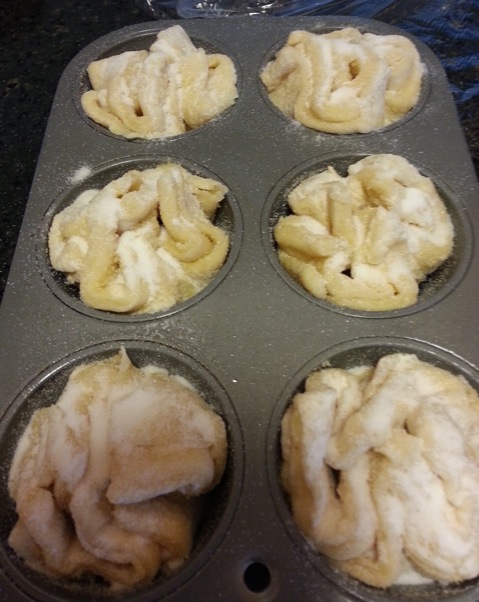
The next morning, I continued. For Step 27, I used just 23g of sugar. (I know! The sorrow. The deep, deep sorrow.) I didn’t want to open up a new package of sugar for such a little amount, so I used some sugar packets that we had.

More sugar.

More sugar.

While the oven was preheating, I put the pastries back in the fridge. That’s because Step 28 said to bake them while they were still cold.

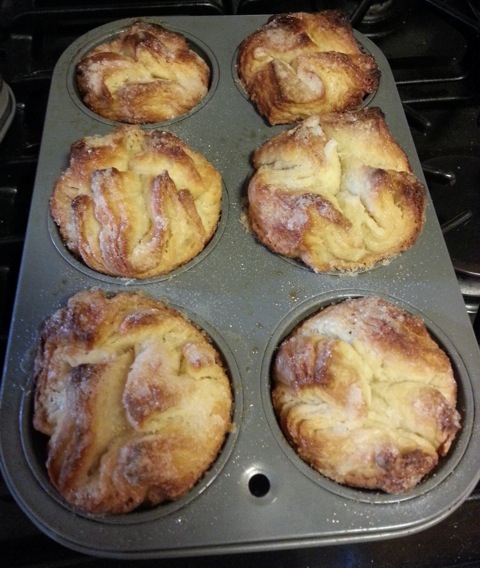
They smelled awesome while baking. (Otherwise the kitchen smelled a little yeasty, if that’s even a word.) I baked them for 28 minutes. After 25 they looked brown, but the sugar didn’t quite look caramelized enough. After 28 minutes, they still didn’t look super caramelized, but I think they were caramelized enough. I didn’t want them to burn.

Fresh from the oven!

Fresh from the oven!

20141019_123909

Tray 2, fresh from the oven!

I pulled them out with two forks. (Thank you to this other kouign-amann recipe for the hint.) I let them cool. They smelled kinda like croissants.

Just hanging out. (And cooling.)

Just hanging out. (And cooling.)

I tasted the remains in the muffin tins. You know, the little bits that don’t come out when you pull the baked goods out. Some of the sugar was definitely caramelized, some of it was definitely not.

My wife came home and almost lost it. (In a good way.) She was like, “Oh my god, it smells amazing.” To which I replied, “You live in a French pastry shop now.”

Once they cooled, we tried them. Much happiness commenced. Some reactions to eating them from those who tried them:

  • Wow.
  • Phenomenal.
  • These are 7 dollar pastries.
  • This was definitely worth skipping lunch for.
  • They’re crunchy on the outside, soft on the inside.
  • They are delicious.
  • Great texture. Great taste.
  • Kinda like croissants, but a little sweeter and more substantial.

20141019_124200

I recommend that you eat these quickly. (I don’t imagine you’ll have much trouble.) After about two and a half days, the flavor was still very good, but the texture changed. They started to dry out a little.

So how about my friend who suggested them in the first place? What did she think? Unfortunately, she wasn’t able to have any. There was a scheduling conflict, so I couldn’t get them to her in time. I will have to coordinate better for next time.

20141019_124145

Speaking of next time: one of the other versions of the recipe I had found was a much easier recipe. I will have to try that one next time and see if it tastes as good. I knew this one would be much more work, but I wanted to try it first, so I could see how it’s “supposed to” be done.

I had thought the apple pie recipe was a lot, but this takes the cake. The pie? The pastry? Well, you know what I mean. It was a lot. And it was spread out over more time.

I hope I haven’t scared you off of making them, though. They’re a lot of work, but they’re definitely worth it. Please give them a try, and let me know how they turn out. I’d also love to know if you’ve ever done any other recipes that were equally ambitious.

Recipe courtesy of Bon Appétit. (Step by step instructions here.)

20141019_124240