Category Archives: Pies

Chess Pie

I normally don’t talk about world events on this blog, not because I don’t care, but because this isn’t the forum for it. But I wanted to say a few words about recent events, because they can’t be ignored, and because my dear friend for whom this recipe was made is a tireless advocate for racial justice and equality, and I think she would want it this way.

My heart goes out to the families, friends, loved ones, and communities of those who were killed. These tragedies are heartbreaking. I want a world where everyone is treated fairly and equally, where everyone is safe, and everyone can live in peace. I am committed to working towards that world.


Hey everyone! How are you? I’m fine, thanks for asking. I know you missed all the recipes, so I wanted to let you know I’m back. With more recipes! More yummy things that I’ve baked! More delicious descriptions and pictures! More exclamation points! So sit back and enjoy.

DSC01765

So what in the world is a chess pie? And where are the checkers pies, dominoes pies, and backgammon pies, too? Chess pie is a classic southern (US) pie. I had never had it before, but I had come across it a bunch when looking up pies. It’s got an interesting name and stories about its name. Is it named after playing chess? A pie chest? From the Rick Springfield song? I don’t know what’s actually true, but the pie piqued my interest.

One dough recipe. Which makes...

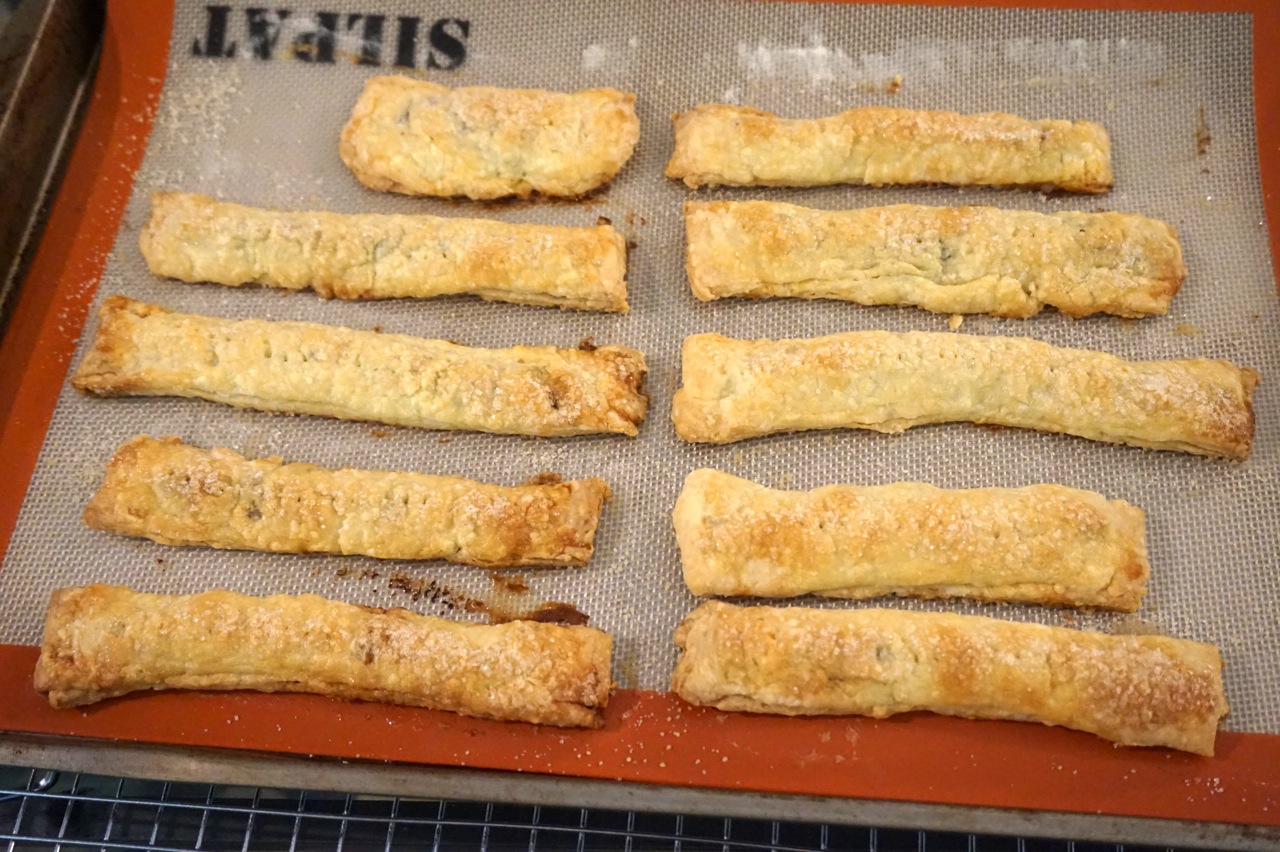
One dough recipe. Which makes…

I was looking for something to make for my friend’s birthday/graduation. I asked her what she wanted, and she said she would be happy with anything. Since she’s southern, I thought it would be fun to make a southern dessert in her honor. Intrigued by this funny-named but tasty-looking pie, I decided to make it. I didn’t know if it would be something she would like or not or if it was even part of her southern experience, but I thought I would give it a shot.

...enough for two crusts.

…enough for two crusts.

As I do with most pies now, I started with my go-to pie dough from smitten kitchen. The recipe makes two pie crusts, so I was able to save one for later. (Future yums!) After I made the crust, I didn’t have time to let it sit in the fridge for an hour. So I put it in the freezer, and I let it sit for about 30 minutes, which turned out to be okay. I put it in the fridge for a little bit before taking it out, so it could get to a better temperature.

DSC01770

Notice the handy circles on the pastry mat. Makes measuring a breeze.

I rolled it out using my handy pastry mat. What makes it particularly handy is that it has the pie crust sizes right on it. No more rolling, guessing, measuring, re-rolling, etc. My first attempt at rolling it out was okay, but it got a little too stretched out while I was putting it in the pie pan. I had to re-roll it, but the second time was the charm. I followed the instructions to pre-bake the crust.

DSC01771

While it was cooling I mixed up the filling. There’s a lot of sugar in this. It’s a custard pie, so eggs and sugar are to be expected. But the odd ingredients in this one are cornmeal and vinegar. It smelled a lot like vinegar as I was mixing it up, but once I put the eggs in, the vinegar smell kinda went away. It was simple to put together. I mixed it up a fair amount to make sure everything was mixed in.

Pre-baking the crust

Pre-baking the crust

I then filled the pie crust. There was a lot of filling. It ended up being filled pretty close to the top. I carefully put it in the oven and baked it for 10 minutes.

DSC01774

Then I took it out to put the aluminum foil on the crust. This was difficult. I should have pre-planned it. Trying to get the foil into the right shape and to cover just the crust and not fall off, all on a hot dish, was challenging. I’m afraid this took too long as it seemed the consistency of the filling changed. I will have to practice more if I do something that requires it again. Actually, I guess I should prepare it ahead of time so it’s all ready to go. (I’m interested to hear any tips or tricks you have for this part.)

Filling.

Filling.

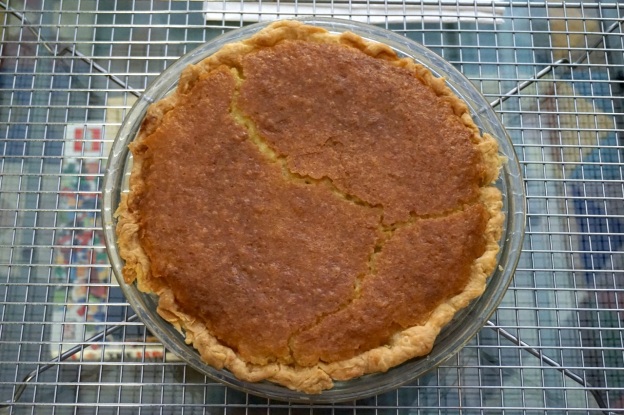
I put it back in for 40 minutes. It got really poofy, then it cracked. The “jiggle test” also seemed to indicate it was done. It eventually deflated. It looked and smelled awesome. I didn’t end up doing the optional powdered sugar, although that might have covered up the cracks. I was excited to see how it tasted and what the birthday girl/graduate thought of it.

All ready to bake!

All ready to bake!

At the party the next day, it went over well! When I mentioned to the birthday girl/graduate that I had made chess pie, she immediately asked which kind. So I knew I was on the right track. She really enjoyed it. Everyone really enjoyed it, even if no one else knew what chess pie was. They did learn, however, that it was delicious. It was full of eggy, sugary goodness, surrounded by crust. And you can’t really go wrong with that.

That filling is living on the edge.

That filling is living on the edge.

I’m not the world’s biggest connoisseur of custard pies, so I didn’t have a lot to compare it to. Of anything, it reminded me a little bit of Swedish pancake. Swedish pancake is an old recipe which is a specialty of my mom’s, which isn’t really a pancake the way most of us think of a pancake, and I don’t think is actually Swedish. (As far as my research has gone, it seems similar to a Dutch baby.) I think the similarity is due to the deliciousness of baked eggs in both.

Beautiful, if slightly cracked.

Beautiful, if slightly cracked.

In any case, it was a wonderful party. My friend had drawn together an amazing assemblage of fantastic people. She is an amazing and fantastic person herself, so I’m not surprised. I had interesting, heartfelt talks with people from all over the world. And it was a great chance to celebrate her.

DSC01782

I was also not the only one to bring dessert, as she and others had baked and brought a wide array of delicious dishes. So while the chess pie went over well, it was definitely in good company.

DSC01784

If you’ve never made chess pie before, I would easily recommend it. It’s simple, it’s delicious, and it’s a great conversation starter. If you have a favorite pie crust, you’re already half-way done. And if you have made it before, I’ve heard that there are lots of different variations on what you put into chess pie. So I’d love to hear, what’s the secret ingredient in your chess pie? How do you deal with covering up the crust while baking? Do you have any other favorite southern desserts? Let me know in the comments below!

Crust recipe courtesy of smitten kitchen.

Pie recipe courtesy of Southern Living.

Chocolate Pie Sticks

Who likes pie? I’ll just assume all your hands went up. Who thinks tiny versions of bigger things are fun and adorable? I’ll just assume the same thing again. One more question: who likes chocolate? I know, three for three, right? Well, have I got a treat for you. This week’s post is about an adorable recipe called chocolate pie sticks. In case you’re wondering what it is, it’s probably exactly what you think it is.

DSC01515

I wish I could take credit for coming up with such an incredibly simple and awesome idea, but alas, I cannot. I will take credit for being inspired to make them, however. The impetus for making these was a visit from a co-worker. I work in the NYC office of a company, and the company’s other big office is in Los Angeles. My boss and his counterpart in the LA office came up with the idea of an exchange program so that everyone could learn how the other office works. This visit was part of that plan.

DSC01517

Since he was coming all that way, I thought it would be nice to make something in his honor. You know, welcome him to the other side of the country. Also, we have these weekly conference calls with both offices, and the NYC team is always boasting about my baked goods. So I thought it would be nice to let him share in that.

DSC01518

DSC01520

The recipe was originally designed to use up scraps of dough leftover from making a pie. However, I didn’t have any pie scraps sitting around, so I made a batch of pie dough from scratch. This recipe came with its own pie dough recipe, in case you needed it, but I decided to go with my standby pie dough recipe from smitten kitchen.

DSC01523

The dough was quick and easy to make, as usual. I followed the recipe as is, except I used half butter and half shortening in order to use up some shortening I had left. Also, I only let it sit in the fridge for about 15 minutes to chill, instead of the hour recommended. (I was making these at night, and I didn’t want it to be too late of a night.)

With the cream wash and sprinkled with sugar.

With the cream wash and sprinkled with sugar.

I rolled out the dough. I kinda measured it. (In retrospect, I could’ve just used the ruler on the pastry mat as a guide.) I cut the dough and lined up the resulting dough strips. It was fun to put together. To make assembly easier, I got little ramekins to hold the different ingredients in: water, chocolate chips, sugar, cream. Once I had the chocolate chips all lined up in a row, the adorable factor was off the charts.

The first batch, fresh from the oven.

The first batch, fresh from the oven.

I had a little problem with sealing the chocolate inside the two layers of dough to make the pie sticks. I’m not sure what the issue was. Possible reasons I could think of were: not chilling the dough long enough, the composition of the dough (that is, using shortening), and not working quickly enough. The second round was easier than the first, because I went back and re-applied water to the top layer in order to stick the layers together better.

The second batch, fresh from the oven.

The second batch, fresh from the oven.

Then I pierced them with a fork. I applied a wash on top, but I used a cream wash instead of the egg wash called for in the original recipe. (The car wash was not available.) Then I sprinkled sugar on top. (A spoonful of sugar helps the chocolate go down?) The pie sticks were hard to move. So after the first couple were a little bit of a mess, I waited to move the rest until after sealing them.

DSC01535

Again, I’m not sure which reason (see above, or maybe that they were too big), but it took forever to bake them. The original recipe called for 12-15 minutes. I kept doing it in 2 minute increments after that, so as not to overcook them. I lost track on the first batch, but I think it was 23 minutes. The second batch I baked a little longer, maybe 25 minutes. The second batch seemed like it was cooked better.

DSC01537

I got 18 individual strips which made 9 pie sticks from the first batch, and 18 strips from the second batch, so 9 more. Plus 2 extra not well-formed pieces which made one more, for a total of 19 pie sticks.

DSC01549

They looked nice. They weren’t as pretty as the pictures from the original recipe, but they were pretty good. The second batch was better looking than the first, I think from having let them bake longer to get that nice golden brown color. I let them cool. I tried one, the “extra” one from the second batch. It was very good. It was like a portable chocolate pie you could eat with your hands. They were simple to make, but tasty.

DSC01562

I brought them into work. Everyone loved them. The coworker I specifically made them for really enjoyed them. So much so, that he came back for seconds. A couple of people asked for the recipe. One person even commented that they were like something you would get in a bakery. I work with such nice people. 🙂

DSC01564

So if you’re looking for a way to use up leftover pie dough, this is a great recipe to have in your toolkit. And even if you’re not, it’s worth making some pie dough just for the occasion. But what about you? Do you have any great recipes for using up pie dough? Any creative ideas for miniaturized versions of bigger desserts? The world wants to know!

DSC01566

Recipe courtesy of Domestic Fits.

Pie dough recipe courtesy of smitten kitchen.

Apple Pie – Goodbye Edition

Hey guess what? It’s another apple pie! As you might know, I’ve made a few before. In case you’re wondering, I didn’t make this because I forgot I made it before, quite the contrary. I made it for a friend. We worked together, and he was leaving to go to our company’s LA office. When I found out he was leaving I told him I would make something for him for his goodbye party. I said I could make him any dessert he wanted. He asked for apple pie.

Now if you recall, one of those previous apple pies I made (well two actually) were ones I made for work. So he’s had my apple pie before. I told him I could totally make that for him, but it didn’t have to be that. I said that I make other stuff, and he could have whatever he wanted: cookies, cake, pie, whatever. He said apple pie was his favorite dessert, and he really wanted me to make that for him. I understood. Sure, I said, apple pie it is.

We were having the goodbye party on a Tuesday. Sunday night I made the crust. Last time I made this recipe, it filled two of the aluminum pie dishes I had. Since I only needed one pie, I made half a recipe. It looked so small. A normal recipe isn’t too bad, the slab pie was one and a half times the recipe, but this half a recipe seemed like almost nothing. As usual, it was very easy to put the crust together. There was just a few ingredients and one bowl. Minimal time and cleanup. When I was done, I split it into two and stuck it in the fridge to chill.

Monday night, the night before the festivities, I made the pie. I stopped at the corner store to get some apples. After dinner I set about making it. Since I was already comfortable with the recipe, I played a little fast and loose with the directions. To fit the pie dish, I only made a half recipe of the filling as well.

I started on the apples first, as that usually takes a long time. I washed them, but I forgot to peel them before coring them. Then instead of cutting them, I used our food processor with a 6mm blade. (6mm is about 1/4 inch, which is the size called for in the recipe.) This is how I’m going to make all future apple pies. Normally making an apple pie is so labor intensive, what with peeling, coring, and chopping all the apples. This was so much easier.

DSC00456

I used about a pound of Granny Smith apples and a little over 3/4 pound of McIntosh apples. When I bought the apples, I had just guessed at the amounts. I had another McIntosh, but rather than cut up half an apple, I decided to go with the amount of full apples that was closest.

Covered and fluted.

This wasn’t too long after my last baking extravaganza, so I had some lemon juice leftover from making the glaze for the cherry slab pie. I used that and zested a lemon which I still had. After mixing those into the apples, I rolled out the dough.

DSC00467

I wasn’t exact, but rather I just guessed at the dough size, and I was pretty close. Since this was a smaller pie plate, I knew the dough didn’t have to be quite as big. After mixing the spices into the apples, it smelled like apple pie. I poured the apple mixture into the pie plate with the dough. It looked like a little too much, but I piled it up in the middle like they suggested. And it worked out okay.

DSC00466

I rolled out the second piece of dough. Again I wasn’t being too exact. I guessed, and it was a pretty good guess. I used scraps from the first piece to fill in a couple of spots on the crust which needed it. (Some of the apples were kinda poking through on the top.) I folded up the dough and fluted it. I was very happy with the fluting. I impressed myself a bit. I guess I’m getting better, what with the rolling and guessing the right size and the fluting and such.

DSC00468

I cut slits in the top. I used heavy cream as a wash (leftover from the cherry slab pie and teddy bear hot tub s’mores) instead of an egg wash. I didn’t have any eggs handy and I didn’t want to get any just for this. (Thank you internet for the tip.) I didn’t measure how much, I just guessed. I sprinkled it with sugar, again using half. I figured that since it was a smaller and shallower pie, it would still make sense to use half, even though the surface area of the pie wasn’t half.

DSC00473

I followed the instructions for baking temperature, although I didn’t put the sheet in the oven ahead of time. I just put it in when I put in the pie. I covered the baking sheet with foil, too, just to be safe. Since the pie was a little bit smaller, I cooked it on the shorter side. The first round was about 22 minutes. I rotated the pan 180 degrees and cooked it for the second round, about 28 minutes.

DSC00476

I could smell it all along the way. It smelled awesome. And after it was all said and done, it looked fantastic. I could see the juices bubbling, although not bubbling over this time. The crust was a nice color. I could see steam rising up. Wow, it was a nice looking pie. I put it on a cooling rack to cool. It was done around midnight. 

DSC00478

At this point, I’d like to say a big thank you to my wife who again did the cleanup both along the way and at the end. Thanks, hon! It saved me a lot of work.

I took the pie in to work the next day. We actually didn’t get to it until the day after. (Turns out crowded bars aren’t always the best places for pie.) When we did get to it, people ate it up. They ate it up so quickly, I didn’t really have a chance to take pictures of how it looked on the inside. In any case, it was delicious and thoroughly enjoyed by all. It was on par with any of my previous apple pies. And my friend was happy with the send off.

How happy? Well, we have regular conference calls with our LA office. Word has now travelled there about my apple pie. The LA office is all abuzz, and they keep asking about making a pie for them. Will I bring them one? Will I send them one? The pie has now taken on mythic proportions.

Do you have a recipe that people like so much they ask you to make it again and again? Do you have a favorite dessert you make over and over? What’s your signature dish?

Pie recipe courtesy of smitten kitchenCrust recipe courtesy of smitten kitchen.

Cherry Slab Pie

What’s summer without a summer BBQ? (For those who don’t like the rhetorical question game the actual answer is it’s still summer.) I live in NYC where having any outdoor space is a luxury. We are lucky enough to have a tiny little outdoor space, and we decided to have a BBQ a few weeks ago. When I say tiny, I mean it’s big enough for a small charcoal grill and about five people to stand around. (That’s not tiny by NYC standards, just tiny in actuality.) We invited what we thought was just a few friends over. However, once all the dust had cleared from the RSVPs, we realized it was going to be like 25 people or so. I had already decided I was going to make dessert, but I soon realized I needed to make two or three.

Since we were going to have a crowd, I wanted to make something big that would serve a lot of people. I remember reading on smitten kitchen about slab pie and thought that would be a great idea. Apple was the one I had seen, but that seemed a little too fall. I wanted something more summer and found this recipe for sour cherry slab pie. Perfect. It’s big (feeds 20 or so people) and it’s summery. It uses her regular pie crust but about 1 1/2 times the amount. I’ve made that pie crust a bunch of times now. It’s pretty easy, and I know it’s good. I thought, this should be a piece of cake. Er, pie.

Good pie dough requires some diced butter.

Good pie dough requires some diced butter.

Using a pastry blender you turn it into this.

Using a pastry blender you turn it into this.

Add some cold water and you eventually turn it into this lovely looking dough.

Add some cold water and you eventually turn it into this lovely looking dough.

I started prepping the pie on the Tuesday night before the Saturday party. I gathered the ingredients and went at it. As usual, there wasn’t much to it. Although since it was 1 1/2 times the amount of dough, it did take a little while to blend all the butter in with the pastry blender. And it did take a little while mixing in the water, incorporating all the ingredients, and getting it dough like. It wasn’t hard. It was just a little bit of work. My arms got a little tired. Which makes me wonder if everyone who made food before we had modern kitchen appliances was as strong as an ox.

Which you then split in two and smoosh into shape.

Which you then split in two and smoosh into shape.

Once it was all done I laid out some plastic wrap, split the dough in two, smooshed it roughly into rectangles (as requested by the recipe), and put it in the fridge. Making the rest of the pie would have to wait for another night. I aimed for Thursday.

The secret ingredients in cherry pie filling. Yes, those are cherries on the right.

The secret ingredients in cherry pie filling. Yes, those are cherries on the right.

Thursday night, the making of the pie continued. I started late in the evening. (There’s something fun about night baking.) I cleared off the counter and pulled out the ingredients. Since I used frozen cherries (I know what you’re thinking, but it was easier than pitting them, sorry!), I remembered to defrost them the night before. I then had to drain them before using. I measured them out. The recipe called for 6 cups pitted, but these were already pitted, and once I drained them it ended up being less than 6 cups. I think it was okay because my pie looked about as filled as hers did.

Mix them together and voila! Cherry pie filling.

Mix them together and voilà! Cherry pie filling.

There was a range of sugar in the recipe. I used one cup. (These cherries weren’t sour, so maybe not as much sugar would be needed, but also her pie was very lightly sweetened, and I wanted it to be a little sweeter than that.) I mixed up the filling and set it aside.

The first piece of dough rolled out.

The first piece of dough rolled out…

... and put into place.

… and put into place.

I rolled out the first piece of dough. It was not an inconsequential task. I’ve learned a little how to roll out dough. (Thank you smitten kitchen!) I remembered to use a lot of flour. I’m not so sure it was even. It was decent, but it was a little thin in places and I had to patch it a bit once I put it on the parchment lined baking sheet. I actually had to purchase a new baking sheet for this recipe. I needed a new one anyway, as one had recently gone to that great kitchen cabinet in the sky, and since I didn’t have one this size (15x10x1), I got one.

With filling!

Once more, with filling!

That's a lot of filling, no?

That’s a lot of filling, no?

I poured in the mixture and spread it around a bit to make it even. Then I rolled out the second piece of dough. It wasn’t big enough at first, so I rolled it out more, but then it was too big. So I smooshed it back into a ball and rolled it out again. This time was easier. I think it was still a little bit too big, but it was okay.

The second piece of dough rolled out...

The second piece of dough rolled out…

I placed it on top. Moving the dough both times was a challenge because they were very big pieces of dough. Both times they stretched and ripped a little. Also finding a spot to move the baking sheet to while I was working on the dough took some finagling. (We were kinda out of space, especially with all the party goods lined up.)

... and put into place. Also notice the holes pricked in the top as well as the cream brushed over top.

… and put into place. Also notice the holes pricked in the top as well as the cream brushed over it.

I folded the crust over and sealed it up. At this point I saw some of the filling was leaking out a little bit. The bottom piece of dough was maybe a little too thin in spots. I pinched it closed. I pulled off a little of the extra dough from the top to help seal it. As instructed, I poked holes in the top with a fork. I brushed it with cream. It didn’t call for much, but I didn’t waste the rest. I needed it for another recipe. (You’ll hear about that next week.) I put it in the oven for 40 minutes to see if that was long enough.

It's a pie!

It’s a pie!

Notice the poofy bits sticking out.

Notice the poofy bits sticking out.

After 40 minutes it was done. When I had checked on it about half way through, I noticed it was a little poofy in one spot. When it was done, it was all kinds of poofy. (Poofy is an industry term.) It was definitely brown and the juices were bubbling. So much so that some of them had spilled out into the oven. I think maybe the crust on the top was too thick or the one on the bottom was too thin. But it looked really nice. And it smelled good too. Not overly like cherries, mostly just crust which smelled and looked delicious. I put it on a wire rack to cool.

Look at that crust!

Look at that crust!

Mmmmm.

Mmmmm.

I decided to do the glaze closer to the time. The morning of the BBQ to be exact. There were some options for how to make it. For mine I mixed 1 tbsp water and 1 tbsp lemon juice with the powdered sugar. It looked nice with the glaze on.

A little glaze, if you please.

A little glaze, if you please.

From this angle it kinda looks like a mountainous landscape.

From this angle it kinda looks like a mountainous landscape.

And now for the question on everyone’s mind: how was it? It was dee-licious. (So delicious, it required an extra “e” and a hyphen in the word.) It had a good flavor. And the glaze was a nice complement. There was lots of dough, which was to be expected because the recipe describes it as having 150% of the dough with 100% of the filling. My wife said the slices of pie were like open-ended pop tarts, which is an excellent description.

As the pie was being eaten.

As the pie was being eaten.

As it turned out, there were many yummy desserts at the BBQ. Other people brought some great dishes. And the other recipe I made kinda stole the show. (You’ll hear about that next week.) So with a pie this big, there was definitely some left over. There were no complaints here! We were happy to have more of the pie around to savor.

DSC00442

I have to say, in prepping for the BBQ we learned a lot about food planning and scaling. I have much appreciation for those who do this on a regular basis. And I got some more practice in making large amounts of dessert. But I’m sure I’m not the only one. I’m sure many of you have made large amounts of dessert? How do you do it? One large dessert? One small dessert scaled up? Multiple desserts? I’d love to hear your large party dessert secrets, if you’re willing to share.

Recipe courtesy of smitten kitchen.

DSC00445

DSC00449

Apple Pie – Work Edition – Part 2

So as you may recall from last week, I made a yummy apple pie to bring into work. The story did not end there, though. As I mentioned, there was a second pie involved. I know you were waiting on the edge of your plate to find out what happened. This is that story.

I had made the first pie (on a Sunday), and since I brought it in to work, I had used an aluminum pie pan which was smaller than the size the recipe required. That means I had a bunch of dough and filling left, and I was determined to use it. Also, my friends had seen the first pie before I brought it into work, and they were salivating over it, so I promised that I would make another one so they could have some.

As I mentioned last week, there was a delay in getting to the pie at work. So instead letting that one go bad, I brought it home to eat. (Yum!) That means I had to make the second pie to bring into work.

So late Tuesday night, just after midnight (technically Wednesday morning), I started on the second pie. I don’t know about you, but there’s something fun and perhaps revolutionary about baking late at night. Perhaps it has something to do with breaking conventions and rules?

I was pretty sure there was enough dough and filling left for another whole pie. I hadn’t been sure how soon I would get to it so I had put the remaining dough in the freezer after making the first pie. I had taken it out around 10:30pm. I was worried that it wouldn’t defrost in time but it did.

I followed the directions from memory. Although since I had done all the hard work the first time, I didn’t have to do that much. I just assembled it. I referenced the recipe just to check on the time & temperature at the end.

I preheated the oven. I floured a surface and the dough and rolled out the bottom crust. It wasn’t exactly right, but it was close enough. I put it in a pie pan which was the same size as the one from the previous day. I let it sit and chill while I rolled out the top. It didn’t get to chill as long as it should have, but I left it in as long as possible, and I think it was okay.

I rolled out the top. It also was not exactly right, but close enough. Once I knew I had it decent, I took the bottom out of the fridge, brought out the leftover filling, and filled it up. I didn’t use all the liquid, cause it seemed like too much. The pie wasn’t filled up as much as the first one, but it was pretty much filled.

I topped it with the top crust and curled it under. I had to patch in some of the dough where the bottom wasn’t wide enough in a few places. (I used dough that I ripped off from the overhang to patch it.) When I was done there were a couple of tiny scraps. As my mother’s son, I wanted to hold onto them, but I knew there was nothing I was actually going to do with them and got rid of them. Then I fluted the crust. (“Fluted” is such a great word.)

Almost ready to bake!

Almost ready to bake!

I cut the slits in the top of the crust and did the egg wash. (Like last time, there was too much flour on the crust, which made it hard to do the egg wash.) Then I sprinkled it with sugar. I tried to do it a little more evenly than last time. When all that was done, I turned down the oven and put the pie in around 1am.

Ready to bake!

Ready to bake!

After the first part, I rotated it and turned down the temperature. I only put it back in for 27 minutes. Last time it was maybe a teensy bit too brown, and this one seemed a little smaller. It still smelled great and warm and yummy.

After the first round of baking.

After the first round of baking.

I took it out after the 27 minutes in the second round. The filling was a little bubbly, and the crust was definitely done. (Maybe too done.) A little bit of the filling oozed out this time, but not nearly as much as last time. I put the pie on some paper towels, to deal with the oozing, and then set it on top of a rack to cool.

Voila!

Voila!

It smelled like apple pie should. I could see the steam coming off of it. The texture was lovely. I took some close-up pictures. I finished up a little before 2am.

After making arrangements at work, we agreed that Thursday would be pie day. And so it was. We had pie. With ice cream. We meaning me and some of my co-workers. In the middle of the day. For no other reason than we had just decided to. It wasn’t someone’s birthday. No one had gotten a promotion. It was just because.

20150327_013729

One guy had a very specific plan for the pie, and since the whole thing was kinda his idea, we followed it: we microwaved the pie for 20 seconds and topped it with Haagen-Dazs vanilla bean ice cream. The ice cream was good. It went well with the pie. We got a lot of interested looks from passersby. I’m not surprised, as it was kind of a spectacle.

Look at that crust!

Look at that crust!

I thought the pie was equally as good as the first. But don’t take my word for it. Here are some quotes from others about the pie:

“This is really great.”

“This apple pie is bangin’.”

“Amazing crust.”

“I don’t really like apple pie, but this has changed my mind.”

“This is the best apple pie I’ve ever tasted.”

Check out that filling!

Check out that filling!

So there you have it. An unexpected second round of apple pie awesomeness from a single recipe. Have you ever gotten an unexpected or bonus round out of a dessert? Have you ever brought desserts into work? Fill us in!


Close-up!


Pie recipe courtesy of smitten kitchenCrust recipe courtesy of smitten kitchen.

Apple Pie – Work Edition

Some desserts are born of planning. Some are born of desperation. This particular dessert was born of casual conversation.

One day, I was talking with some colleagues at work. One mentioned a particular dessert that he enjoyed: apple pie with a particular ice cream. Nonchalantly, I said I could make the apple pie. We set a date for a little over a week later so I would have time to make it, and he would still be in town.

I wasn’t bluffing. I knew I could make apple pie. But in actuality, I had only made one before. This salted caramel apple pie. But I needed a regular pie, so I poked around at some apple pie recipes a little bit. I decided to go with this one from smitten kitchen as her stuff always rocks. I didn’t want to at first because the crust she mentioned in the apple pie recipe had shortening. But I decided to go with her later crust info, the one I use for many of my pies, and use it with this apple pie recipe.

Hey look, I made some pie crust!

Hey look, I made some pie crust!

I made the crust in the late afternoon. It was easy. I’ve made it a few times before. I love having a pastry blender, as it makes short work of these types of things. (I’ll admit that at first I didn’t want to get one, because I didn’t know how often I would use it, and who needs more useless stuff around. But it has come in handy on so many occasions.) After making the crust, I took a little break. I probably started too late though because…

20150322_175903

Okay, actually two pie crusts. One for the bottom and one for the top. All wrapped up and ready to chill.

The apples took forever. (But thankfully not forever and a day, because then I would have been a day late and a dollar short.) Because they were bigger than called for in the recipe, I had slightly too much Granny Smith apple, so I used fewer of the McIntosh (not to be confused with Macintosh) apples. They were smaller than the size mentioned, so I just went with weight. I washed, peeled, cored, sliced, sliced, sliced, and sliced. And then I sliced some more. I used two bowls, which made it much easier. But since my McIntosh apples were a little smaller than what they were expecting, I should have modified how I sliced them. They got too small to work with. I took a break for dinner in the middle of working on the apples, that’s how long they took.

20150322_215421

So. Many. Apples.

Also at some earlier point while working on the apples, I took a different break because the dough had chilled enough (almost 2 hours). So I rolled out the first half. I put it in a pie plate and refrigerated it as suggested.

I listened to some fun stuff on NPR while working on it. This led to a great discussion with my wife during the dinner break. We talked about education, poverty, low self-esteem, college, mentors, etc. It was really great.

After dinner I continued. Then came the lemon. Oh the lemon! I zested and squeezed the whole thing even though it was a little bit too much. And the spices, yum! They smelled like apple pie. (Different than the salted caramel apple pie, but still yum!)

With spices.

With spices.

I realized that I had way too much filling because the pie plate I was using was smaller than 9 1/2 inches. I put in as much filling as I could, and I refrigerated the rest of it to use for a later recipe. I kinda knew it was too small going in (the pie plate was an aluminum one so I could bring it in to work and not worry about it), but I figured it couldn’t hurt to have some leftover filling, and that way I wouldn’t have to worry about futzing with the recipe. (Futzing, it’s an industry term.)

So full of apples.

So full of apples.

I then rolled out the second piece of dough. (I did a regular pie top, not a lattice top.) I tucked it and the bottom one under and fluted it. I had accidentally tucked the bottom crust under first, as I was following the pie crust recipe and not the pie recipe, forgetting that I had the other crust to go on top. When it was all done up right, with the double crust tucked under, it was thick, which is how you want that part of the crust to be.

I cut slits on top. Fun! I brushed it with egg white. It was like I was painting. (You can call me the Matisse of apple pies.) I had a lot of flour on the dough, as suggested, but I probably should have brushed some off, as it was hard to brush on the egg white. I sprinkled sugar on top. More fun!

All ready to bake.

All ready to bake.

I didn’t preheat the oven as early as suggested. I waited till much later in the recipe. It was still ready a few minutes before I needed it. It was interesting that they ask you to make it too hot at first and then turn it down. I guess that makes it a little bit hotter for the beginning.

It smelled amazing while it was baking. When the first part of baking was done, the crust looked kinda awesome. It was nice and golden brown like they said. I wanted to take a picture, but I didn’t because I didn’t want to interfere with the baking process.

It smelled exactly like you would imagine apple pie should smell. I finished baking it for 30 minutes in the second half. It didn’t need more. It was very brown, but not too brown. I peeked by turning the oven light on with a few minutes left just to see how it was going. I was worried it might be a little bit too brown, but it came out looking good. The crust was a different recipe (from her other page), so in the back of my mind I was concerned that it might cook differently. It turned out looking okay.

Fresh from the oven.

Fresh from the oven.

It was supposed to bake until “juices bubble”, but in this case the juices oozed a bit. You could see them a little bit under the edge of the crust, and when I went to lift up the pie, you could see they had oozed out a bit underneath it. It was a gooey mess. Not horrible, but enough that I had to put paper towels down underneath it before putting it on a wire rack to cool. It reminded me a little bit of how the salted caramel apple hand pies had oozed out.

Note the oozing filling.

Note the oozing filling.

I’m wondering why the pie oozed out a bit. Maybe I filled it too full? I knew it wouldn’t all fit in, but I wanted to use up a bunch. Maybe I cut the crust too short? I didn’t measure the 1/2 inch overlay exactly, I just guessed. Maybe I didn’t close it up enough? It seemed some of the apples were almost kinda poking out a bit. Maybe apple pie always oozes a bit. I don’t know. Do you?

Still looks kinda awesome though, right?

Still looks kinda awesome though, right?

I left it to rest. It said it needed to rest for four hours. It was almost midnight when it was done. I left it till the next morning. I was bringing it to work anyway. A while ago, I mentioned writing up some “rules” for baking. If I do, one rule will likely be: never start apple pies after 3pm.

So I brought the pie to work. There was a lot going on at work. The people I was going to eat it with at work were busy, so we had to delay. I left it in the fridge at work. One day. Then another. At that point, I didn’t know how long it would last. Since I had so much filling left over, I ended up making another pie. I brought this one home, and I brought the 2nd pie into work. I’ll fill you in (no pun intended) on the details of the second pie soon.

Yum!

Yum!

Not wanting it to go to waste, we ate this pie at home. It was at room temperature. It looked and smelled how apple pie should. And it tasted that way too. Delicious. It had a good flavor, like you imagine it should. (Well, like I imagine it should. I don’t want to presume what you might or might not imagine.) It was not some pale comparison, it was the real thing. I remember growing up that recipes often didn’t turn out looking like the pictures, but this one did. It had a good crust. It cut very easily. It was a really truly amazing apple pie. Smitten kitchen does not mess around. If you want a good apple pie recipe, this is it. You will not be disappointed. That is, unless amazing apple pies disappoint you.

One other note: while it was waiting around before I brought it into work, a friend had been by and seen it sitting on the counter. I was out, but my wife explained that this pie was not for general consumption because I was bringing it in to work. It almost didn’t make it in though. Our friend said, “It’s one of Carl’s magic pies. I can’t resist.” We had to fight him off to save the pie. And thankfully we did.

Pie!

Pie!

It was not a difficult recipe in terms of complexity. It was just time-consuming because of the apples. Next time, I think I might try a food processor to cut down on how long it takes to make. Do you have any time-saving tips for making apple pie? Any idea on how to get it to not ooze? A favorite apple pie recipe of your own? Share the wealth! Let me (and the rest of us) know. And stay tuned to find out what happened with the second pie!

Pie recipe courtesy of smitten kitchenCrust recipe courtesy of smitten kitchen.

Mini Mint Chocolate Pies

This recipe is a case of “What do I do with an extra pie crust?” Let me let you in on my thought process. You see, I had a pie crust leftover from making the crust for the last pie. I wanted to make something with it, and I wanted to make something fun. I also remembered that I had all that peppermint extract left from making these, so why don’t I do something with that?

So then I was thinking. What does mint go with? Chocolate. Mint chocolate sounded good. And while pies are always fun, smaller is probably more fun. The hand pies I made were great. So I thought I would try something like that again.

So with that in mind, I tried to figure out how to make this thing I had just imagined. I had to find a chocolate pie recipe that involved baking the chocolate filling, as opposed to just baking the crust and letting the filling chill, because I was aiming to do hand pies, and the filling would have to bake inside. I figured that I would find a pie recipe, and then modify it to do hand pies.

Ingredients for the mint chocolate filling.

Ingredients for the mint chocolate filling.

I found one, and put it together. I measured out the ingredients before hand. I used semi sweet chocolate chunks instead of chips or a bar, as they had called for. I didn’t do a double boiler, I just melted them on very low heat, watching and stirring constantly. I took that off the heat. I put together the eggs and such and mixed for 5 minutes. Then I poured the chocolate in and stirred by hand (instead of the other way around like they mentioned, because the bowl that the eggs and such were in was bigger).

I added a teaspoon of peppermint extract. I came up with that amount through careful research: comparing recipes with similar volumes of ingredients, reading comments of people talking about using peppermint extract, etc. A teaspoon seemed reasonable. I tasted before and after adding, and it seemed right. It was not super peppermint-y, but I wanted to err on the side of caution.

Filling!

Filling!

Then I had to take care of the dough. I took the dough out of the fridge, cleaned off a space on the counter, and floured the heck out of it. I rolled out the dough, flouring, turning, flipping, flouring all the way. After learning from smitten kitchen, I basically knew how to do it.

So you might realize from the title of the post that I didn’t end up doing hand pies. I was originally going to, but the filling wasn’t super solid, and I was worried about it not holding together right. I decided at the last-minute to do mini pies in muffin tins instead. Now I had to find out how big to make them. The research I did pointed me to 4 inch circles.

My makeshift dough cutter.

My makeshift dough cutter.

I didn’t (and still don’t) have the proper tools to cut a 4 inch circle. So I did some digging around in the kitchen, and after some trial and error, I found something suitable to substitute. The top of a jar used for storing dry goods was a little over 3 1/2 inches so I figured it was close enough. It worked well enough to cut out circles, and I cut out a bunch. I got 22 circles out of the dough. Since they were supposed to be a little bigger, I re-rolled them a bit to stretch them.

Mini pie crusts.

Circles of dough, soon to become mini pie crusts.

I roughly followed some instructions I found for making mini pies. I put muffin cups into the muffin tins and sprayed them with cooking spray. I pressed the circles of dough into them, trying to have a little bit sticking over the top as suggested. They were a little uneven, because I didn’t really roll them evenly. It was a little hard to stick them in and press them in, but I did.

Mini pie crusts, the first batch.

Mini pie crusts, the first batch.

Then I grabbed the filling and started filling them. I wasn’t sure how much to fill them. I figured 2/3 of the way or so, 1 or 2 tablespoons, depending on how heaping they were, and how big the piece of dough was. I had to tilt the muffin tin, scoop up the filling, wait for a bunch to drip off and then quickly pour it in. Until I figured that out, I had a lot of filling that was dripping over the side.

The first batch at the beginning. (Apologies for the blurry picture.)

The first batch at the beginning. (Apologies for the blurry picture.)

I wasn’t sure of the timing, so I split the difference between the two recipes (the one for the pie and the one for the mini pies) and put them in the oven for 20 minutes at 325°F. A few minutes later I realized that I missed getting a picture of them filled, so I pulled them out, took a quick pic, and then put them back in. After 20 minutes, they didn’t seem quite done. They were supposed to be cracked, and they weren’t, but they had really poofed up. I realized at that point that I could have filled them much less.

The first batch!

The first batch, fresh from the oven!

I cooked them for another 5 minutes and they seemed like they had started to crack. I took them out and set them to cool on a wire rack. When trying to get them out of the muffin tins, having the “dough handles” helped on those that had them and a little fork helped with the rest. I waited a few minutes before putting the next batch in so that the muffin tins could cool a little. I let the pies cool in the dining room, because I had run out of space in the kitchen, as I hadn’t cleaned up yet.

The humble beginnings of the second batch. Note the amount of filling.

The humble beginnings of the second batch. Note the amount of filling.

Before I put together the second batch, I also cleaned out the tins of the flour, dough, chocolate, and grease left from the first batch. I didn’t have quite enough filling, so I really scraped as much out of the bowl as I could. (My mom would be proud.) So the second batch was a little skimpy on the filling, but not too bad. I ended up cooking them 22 minutes for this batch. They puffed up nicely, so while they ended up a little less filled, in the end the filling was not much lower than the top of the crust. (The filling in the first batch went way over.)

The second batch, fresh from the oven.

The second batch, fresh from the oven!

My wife cleaned up all the mess I had made before I got to. (Thanks, hon!) I set the second batch out to cool with the first. Because I ran out of filling, I ended up only using 18 of the 22. (Of course I saved the other 4 for something else. Again, my mom would be proud.)

I left them out to cool for a while. Then I totally forgot about them and the next step which was to put them in the fridge. By that point the poofiness had subsided a little bit. I put them in the fridge for a little while until they chilled.

20150210_202052

And now the important question: how did they taste? I was kinda impressed with myself. They were not the best things I ever created, but they were pretty darn good. I’m happy that I was able to mush a few ideas together and come up with something new.

The mint was just about right. I definitely tasted it, but it wasn’t too much. It went well with the chocolate. And the crust? It was complementary. (Not complimentary, although that would have been awesome, too.) Nice and flaky, but not too rich or overpowering so it let the filling shine. (I guess I shouldn’t have been surprised, it’s a good solid recipe.) All in all it was a good package. Good, good, good.

This one had a little air bubble in the crust. It was still yummy.

This one had a little air bubble in the crust. It was still yummy.

I also have some comments from others on how it was. Those comments included: “delicious”, “amazing”, “crust nice and flaky, not too buttery”, “nice hint of mint”, and “best mint chocolate pie I’ve had”.

So there you have it. That’s the story of the mini mint chocolate pies. Since it’s a bit of a frankenstein recipe, I’ll spell out the details below. But I’d love to hear from you. Do you have any favorite recipes that you’ve made from bits and pieces of other recipes? How did they turn out for you? Do you have a favorite pairing with mint that isn’t chocolate? I’d love to hear any other fun ideas you have.

The final recipe is something I put together, but it was built from pieces of other recipes. Crust recipe courtesy of smitten kitchen. Chocolate filling lightly adapted from scoochmaroo’s recipe on Instructables. Mini pie info and inspiration courtesy of Gimme Some Oven on Tablespoon.

Ingredients:

1 pie crust (any crust will do, but I use this one because it’s easy, amazing, and never fails)

6 ounces semisweet chocolate chunks (any other shape of chocolate will also work)

1/2 cup butter

3 eggs

1/8 tsp salt

1/2 cup sugar

1 tsp peppermint extract (or more)

Instructions:

Make/prepare the crust.

If you don’t have a pie crust already made, now is the time to make it. Follow the instructions here for a great crust, or make your favorite. Roll out the dough and cut it into 4 inch circles. (If you cut them a little smaller, just roll them out a little bit.)

Make the filling.

Melt the chocolate and the butter together. I carefully melted them in a saucepan over low heat, stirring constantly. The chocolate can burn easily, so if you want to be more careful (or less adventurous) you can also use a double-boiler.

In a medium or large-sized bowl, combine eggs, salt, and sugar. (In my experience, your bowl can almost never be too big.) Mix with a mixer for about 5 minutes, until the mixture is nice and fluffy.

Pour the chocolate mixture into the bowl with the egg mixture and stir until combined.

Add the peppermint extract and stir it in. The recipe as is makes it slightly minty. If you want it to be mintier, you can add more. (Peppermint extract is strong, so I would caution against throwing caution to the wind.)

Preheat the oven to 325 °F. Line muffin tins with muffin cups and spray them with cooking spray. Put one circle of dough into each muffin cup. Arrange them so that a little bit of dough hangs over the edge, and press them in.

Fill each mini pie with filling about halfway.

Bake at 325°F until the filling starts to crack, about 20-25 minutes. Remove from tins (using dough handles if necessary) and cool on wire rack. Once cool, chill in fridge. Once chilled, remove and enjoy!

20150210_202243

Caramel Pecan Pie

You know what happens when you start doing a good thing? Sometimes it’s hard to stop. What I mean by that is that this week’s post is another birthday dessert request. Well, birthday request isn’t quite accurate. But it was a request, and it was a birthday dessert.

Here’s the story. Another friend’s birthday was coming up, and I thought it would be fun to make him a dessert. He didn’t ask for one. And I didn’t ask him for his favorite dessert. But he had sent my wife an email a little while before with a link to the recipe and a subject of “Carl. Must. Make.” So I figured it was a good bet. And by not asking him, I figured I could keep the surprise.

Before I started making it, my wife had gotten some of the ingredients because I had had a long day at work. (Thank you, hon!) I thought I might have had some almond flour for the crust, but it had gone bad. So I went with a known entity for the crust. Ye old smitten kitchen favorite (which I used for the pumpkin pie and chocolate pretzel pecan pie). Plus it makes two crusts, so this way I would have an extra one left for something else.

Pie crust dough. (Two, actually.)

Pie crust dough. (Two, actually.)

The crust took about a half hour from start to finish. While making the crust, the recipe asks for ice water. I didn’t have ice handy, but I let the water sit in the fridge so it would be cold. It also asks you to cut the butter into 1/2 inch pieces, which I measured more carefully this time. It was pretty easy to put together, and I let it refrigerate over night, so I could make the pie in the morning.

Boiling the cream.

Boiling the cream.

Fast forward to the next morning when I put the pie together. The caramel was interesting. I have made caramel a lot (particularly for my millionaire’s shortbread), but this time was different. Maybe I used too big of a pan? It said to use “moderate heat”, “stir sparingly”, and add the sugar “slowly”. Needless to say, it took a while to make.

Making the caramel.

Making the caramel.

It also then said to “add the hot heavy cream”. I was a little confused, because it had said earlier to “set aside” the cream after I heated it. To me that meant take it off the heat. I could have left it on the heat, but since the caramel took a while to make, I was concerned that it would get heated too much. 

Still making the caramel.

Still making the caramel.

I cooled it. I thought that maybe the thermometer was incorrect because when it got to the “right” temperature it was as hard as a rock. (I have since learned that my thermometer doesn’t measure accurately, so it was indeed incorrect.) In order to be able to stir in the eggs and butter and vanilla, I had to reheat it. That made it liquid enough. But then the eggs kinda cooked and it was still a little clumpy. I was afraid it would be too hard when it cooled, but it looked to be okay at that point. (By the way, it never mentioned putting the salt in. Oh well, I didn’t use it.)

Done with the caramel. All the other stuff mixed in.

Done with the caramel. All the other stuff mixed in.

I followed the instructions for the pie crust from smitten kitchen. Twice actually. I had to do it twice, because the first time was just a mess. It was uneven and too thin in places. The second time was much better. I had to do a little patching on some parts because I had made a rectangle more than a square, but it was good. And then, per the recipe’s instructions, I did end up refrigerating it for a few minutes. (I figured even the dough was different, it couldn’t hurt for it to cool a little bit.)

Pie crust!

Pie crust!

I put parchment paper on top and then used our new pie weights to weigh it down. We got them at a great Brooklyn kitchen supply store, aptly named the Brooklyn Kitchen. We had registered with them for our wedding and also ended up getting some gift certificates as presents. Many years later, we finally got around to using them. One of the items we got was a set of pie weights. This was the first recipe where I used them.

Pie crust with weights.

Pie crust with weights!

I cooked the crust for 10 minutes. The crust wasn’t really that brown. But again I figured the crust was a little different, and I didn’t want to overcook it. It puffed up a little bit. Maybe I needed more pie weights?

The recipe said to start with “4.5 ounces of the caramel mixture”. Let’s just say that it was fun to measure. It wasn’t that much of the mixture, maybe because it was still clumpy. I put a bit more in to cover the bottom of the pie. They said to use 1/3 of the pecans, and I guessed at how much that was. When I got to the top of the pie, I started by arranging the halves nicely. But then I decided to just throw them on and arrange them because there wouldn’t have been enough to make nice circles like in the picture.

I baked it for 15 minutes at first. I think my oven cooks a little hot, and the crust was different so I wanted to make sure I didn’t overcook it. It wasn’t ready after 15 minutes. I put it in for 5 more minutes. It still didn’t look ready, so I put in for an extra 2 minutes. At that point the caramel kinda looked like it was setting and I figured it would set more as it cooled.

It's pie!

It’s pie!

The crust might not have cooked all the way though. So I guess that’s why it needed to be pre-baked. Also the crust slipped a little bit so some of the filling oozed out, but thankfully not out of the pan. I don’t have a fluted pie plate, and since I was making it as a gift and it needed to travel anyway, I just used a regular 9″ aluminum pie plate.

I told him about it that night. I said I had made a dessert for him. I told him that I wasn’t sure how it turned out, but that if it was bad I could make him another. He said if I made it, he was sure it was good. (He’s had some experience with my baked goods and knows what he’s talking about. In fact, he has jokingly said he wants to bankroll a bakery for me in the future once he’s rich.) I thanked him for his confidence and said that while normally I would agree with him, this time I had a fight with the pie and I wasn’t sure who won.

By the time I got back from the birthday celebrations, the pie had set. Somewhat to my surprise, it actually seemed like a pie. I put it in the fridge, and decided to wait and see what he would say about it. The next day he came over to have some birthday dessert, not knowing what it was. He was very surprised.

I warmed it up a bit because it was cold from sitting in the fridge, but it’s possible I warmed it up a little too much. It ended up being gooey, maybe a little too gooey, but it was really good. The thing is, it wasn’t exactly caramel, it was more like toffee. I had kinda accidentally made toffee. Oops. But as it turned out, the toffee was nice and crunchy and gave it a good texture. Bits of it were like I expected and then bits of it were hard and crunchy. I liked it, the birthday boy liked it, everyone liked it. It wasn’t exactly the pie that it was supposed to be, but it was a new and maybe better pie? Or maybe this was the pie it was secretly, deep down, always supposed to be?

My wife reminded him that I had originally offered to make something else if it wasn’t good. She then jokingly asked what he thought of the pie. “It’s terrible,” he said. (I didn’t make him another pie.)

Yum!

Yum!

So despite the thermometer issues and the instruction issues, it was still yummy. Maybe not how they intended, but good nonetheless. If you try it out, let me know how it goes for you. I’d also love to hear about any other happy mishaps you’ve had with recipes. Ever accidentally make something (possibly) better than the original? Let me know, and happy baking!

Recipe courtesy of Breads Bakery via Gothamist. Pie crust recipe courtesy of smitten kitchen.

Salted Caramel Apple Hand Pie

20141012_002631

As you may remember from last week’s post, I made a delicious Salted Caramel Apple Pie. There were a lot of leftover ingredients. Not leftover pie, rather leftover ingredients. I just couldn’t fit any more into the pie dish. Whenever you make a pie, there’s normally leftover dough, but this time there was leftover apple filling and caramel, too. Rather than let all the leftover ingredients go to waste, I was determined to do something with them.

I think it was my wife who mentioned the idea of hand pies. So I did some research. I found some hand pie recipes, and I read through them so I could get a general idea of how to make them, how long to bake them, etc.

20141010_193113

Seven hand pies waiting to be made.

Eventually I found one that I could use. I followed the instructions for the dough, even though that dough was different than the dough I had leftover. I used a cup to cut out circles. I rolled out the dough over and over, reusing scraps. I ended up with enough to make 14 circles, which meant 7 hand pies.

I followed the instructions for the hand pies. I put my apple filling in the middle, but where they used caramel candies and salt, I used my salted caramel sauce. Some of the early ones had too much liquid, so I tried to be careful when doing later ones. Also, my apples were long and thin, so they were a little harder to fit inside.

Filling!

Filling!

(Baker’s Note: After using up the rest of the apple mixture for this recipe, I still had some caramel sauce leftover, so I feel I might have shortchanged the original pie. (Sorry birthday girl!) There just wasn’t any more room for it in the pie. I also still had a tiny bit of dough left, but not enough to do anything with.)

I continued following their instructions. I put the second piece on top and used a fork to crimp. Some dough circles were different than others, due to how I rolled them, floured them, etc. Some were thinner or thicker, some stiffer or more pliable. Some ended up kinda being in layers from not being rolled well enough. Plus, between the big apple pieces and liquid, and lots of caramel, some of them didn’t close up properly. Which means some had liquid/caramel oozing out, some had apples poking at the edge, some had stiff dough that didn’t crimp well. It wasn’t perfect, but I did my best. (And it’s not entirely unexpected when you frankenstein a couple of recipes together.)

20141010_193904

Topped!

Then I transferred them to a plate. I removed the original wax paper and put down new wax paper, because by this point, the first sheet of wax paper was a mess. (What with all the oozing and such.) They still oozed a bit at the end, but I think this helped some. I used an egg wash. I used a fork to spread it on top, and I wiped down any excess egg or filling that oozed out.

I started with baking them on the shorter side (about 12 minutes), just in case the original recipe worked differently than my version did. I checked them at that point, and it seemed like they should go the whole 15 minutes, so I did that. They came out looking great, smelling great, and oozing a lot. (Yes, there was lots of oozing the whole time through.) It was like a yummy looking, delicious smelling, big ol’ heapin’ mess. I let them cool. The recipe said to wait 10 minutes before eating. These would have to wait a bit longer, until after dinner.

Crimped, with egg wash.

Crimped, with egg wash.

They were very simple and easy to make. It took maybe a little over an hour from start to finish including baking time. (Well I guess they were simple and easy at that point, after all the work I had already put in on making the original pie.)

Some of the filling oozed out (yes, more oozing), and as it cooled, it turned into this caramel-y, slightly apple-y, slightly mushy stuff. So, kinda like a caramel halo or tail coming off the hand pies.

Fresh out of the oven. Note the halos.

Fresh out of the oven. Note the halos.

And lest you think I forgot the most important part: they were delicious. They tasted a lot like the apple pie did. (I know, shocking.) But they were more compact, and had a higher dough to filling ratio. It’s possible I liked them better. Maybe because I like dough a lot? Maybe because they were ones I had more recently? Don’t worry, I wouldn’t turn either of them away.

So go ahead and try these yourselves. I would never suggest making the original pie recipe and then using the leftovers to make these. Or maybe I would? Or maybe you want to try out the recipe as is, and let me know? Or maybe you want to tell me about other interesting recipe mash-ups you’ve done? I’d love to know!

Extreme hand pie close-up.

Extreme hand pie close-up.

Recipe adapted from Just A Taste.*

*When I say adapted, I mean used for inspiration and some of the instructions. Details on original pie recipe which provided the leftovers, can be found here and here. Also, I used this recipe for research.

Salted Caramel Apple Pie – Happy Birthday Edition

20141005_223518

This pie is no ordinary pie. It’s birthday pie. It all started a couple of weeks before my friend’s birthday when I had thanked her for her help with something. We were joking that I could pay her back in dessert. I didn’t actually need to pay her back, but it did get me thinking. Since her birthday was coming up, I thought a homemade birthday dessert could be a good present.

She had mentioned something at the time about her dessert preferences. She said chocolate was not her favorite thing. Which is fine, it actually narrows down the list of dessert options. And there are tons of amazing desserts which don’t have any chocolate at all. For instance, one of the best desserts I ever had was a roasted pear dish at this fancy restaurant in the neighborhood. A.MAY.ZING. But I digress.

While she had mentioned her dislikes, she hadn’t really mentioned what she did like. So I tried to glean from her what that was. Innocently, of course. As nonchalantly as possible. (I wanted it to be a surprise, but I still had to find out. And there’s no way to maintain a surprise chalantly.) She mentioned that she didn’t have a particular favorite dessert, but rather there were a few things she enjoys, among them fruit, caramel, pies, and saltiness. Okay, I thought, not as easy as a particular recipe, but it shouldn’t be too bad.

I did some research on different recipes, trying to find one that fit her criteria. I looked up lots of different apple pies (and other fruit pies). I found one ridiculously awesome looking one that had peanut brittle in the crust (nuts were also on her list). I thought that one might be too much for now, but it got me thinking about making peanut brittle. (Which is why I made it.) I then found this recipe, and I thought it fit the bill. (Although I’m not sure how the duck felt about it. ;)) I actually found a couple of slightly different versions of this recipe online. They were all referring to the recipe in the book, so I think I’ll have to get the book at some point to get the definitive one. They were close enough that I wasn’t too worried, but I had to keep flipping back and forth as they each had different information.

The next thing I had to do was get a pie dish. Since I was gifting it, I had to get one that could be given away. I went in search of an aluminum pie dish. It shouldn’t have been too hard to find, but everywhere I went I found 8″ dishes, while I needed a 9″ dish. I can’t tell you how many stores I went to looking for one. (Seriously, I can’t. I don’t remember at this point. But it was a lot.) Finally I found what I was looking for at Winn Discount, I’m sorry, I mean Winn Home & Beauty. If you’ve never been there, you really don’t know what you’re missing. It’s like an old-school department store, except it’s a little more cramped, and it seems a little more random. They generally have everything you’re looking for (paper goods, dish soap, kitchen gadgets, shampoo, coffee makers, holiday candy, 9″ aluminum pie dishes, and more!), so I don’t know why I didn’t look there first.

Now, about the recipe as I made it. As for ingredients: I only used regular sugar. For apples, I used 5 Granny Smith apples. And I did not use any bitters. (I hope the birthday girl wasn’t bitter about that.) I made the dough by hand, using a pastry blender. I didn’t have a pastry brush or mandoline handy, so I didn’t use them.

20141005_210945

There are a lot of steps in this recipe, so I made it in sections. First I made the dough, then I took a break. Then I made the caramel and peeled the apples, then another break. Then I went from cutting the apples all the way through to the end. My wife cleaned up at that point. (Thanks hon!) And while it was baking, we managed to have dinner.

The caramel seemed a little weird, at least in comparison to other caramel I have made. I had it at a low boil for about 15-20 minutes. It got down to almost a sugar like consistency, but it hadn’t changed to the right color yet. It was still very, very light, but most of the liquid was gone. I figured I shouldn’t cook it anymore. I added the cream at that point, and it jumped back to the right consistency. It didn’t bubble that much at that point. And as weird as it seemed while cooking, it turned out great.

I washed and peeled the apples. I used an apple corer/slicer on them. I cut out the bad bits and the remains of the peel. Then I cut them into thin slices. I went back and forth between bowls at each step. Having an extra bowl made it much easier to deal with than having to pile stuff up on the counter or cutting board.

Once I put it all together, the apple mixture itself smelled like apple pie. Exactly how you imagine apple pie should smell. There was too much of it though, as I didn’t want to stuff the pie crust too much. I saved some of the apple mixture and caramel and dough for something else.

I rolled out the dough at the very end, after everything else was made. I preheated the oven while I did so. For the top crust, I didn’t do strips. I did a whole layer with four cuts in it and crimped it, following the instructions from Smitten Kitchen. Thank you, Smitten Kitchen! (These instructions are linked at the bottom.) Since I didn’t have a pastry brush handy for the egg wash, I used the fork that I had beaten the egg with. I eventually put too much on. I had to wipe it off and soak it up with paper towels.

20141005_213513

The pie with the egg wash, before cooking.


I baked it for the initial 20 minutes that they said to. Then as directed I reduced the temperature. I baked it another 25 minutes, but it wasn’t quite ready. I baked it for another 4 on top of that, and that was about right. I’m glad I put the pie on a baking sheet covered with aluminum foil, because the caramel spilled out everywhere.

Making this pie was a little bit of a challenge. It took longer than I thought. (Pay no attention to the time listed in the first version of the recipe. It’s not accurate. The time listed in the second one is a more reasonable estimate.) But I think it was worth it. I made apple pie, and now I know I can make apple pie. Plus, I like making stuff for people. And as my wife said, it was probably one of the best presents she got for that birthday.

It looked great and smelled great. I remember mentioning at the time that I wish you could record how things smell as easily as you can record how they look and sound. (Someone work on that please. Thanks!) But I didn’t know how it tasted. (Because it was a gift for her.) I assumed it was good, but I didn’t know for sure.

The day I made the pie was quite the busy day. The aforementioned peanut brittle was made in the early afternoon. The pie crust for this pie was made later the same afternoon. And after running some errands, I made the pie that same night. I finished up around 10:30pm.

So with the pie done, I now had to get it to the birthday girl. At this point, I mentioned to her that I had a “time sensitive present” and asked when I could see her to deliver it. She said the next night was good. At that point, I didn’t know if she realized what it was or why I had asked her about dessert.

Now, let’s fast forward to the next day. I wanted to make sure the pie got into her hands (figuratively at least, or literally if it was that good) while it was still fresh. She was having an unofficial birthday get-together before her actual birthday celebration. It was late on a Monday night, but it was either that or wait all week. I would have had no problem waiting, but I don’t think the pie would have been as patient. So I brought her the pie that evening. It was heavier than I had imagined, and I had to be careful carrying it.

20141005_223553

She was very happy to receive the pie. (Surprising, I know.) I asked her if she knew it was coming. And she said she kinda had an idea. She’s a smart cookie. (Ooh! There’s an idea, smart cookies. I wonder what they would do? Bake themselves? Jump into your mouth when they sense you’re hungry?) I had asked her about dessert, and while I wasn’t explicit about it, she kinda knew. She didn’t know exactly what though, because she had given me a long list of options, rather than just one specific choice. So it was at least partially a surprise.

She was nice enough to share the pie. (Birthday girl’s prerogative.) And it was a lot of fun. It ended up being just the two of us hanging out over pie. At a bar on a Monday night. At like 11pm. You know, the regular hanging-out-over-pie situation.

She knew the bartender and asked him for a knife. We didn’t have plates (hello napkins!), so it was a little messy. They also don’t really serve food there, so they didn’t have forks. The bartender did manage to scrounge up one fork for us though, which meant we had to take turns eating. (In retrospect, I could have been better prepared with the whole plates and utensils aspect of the operation.)

She’s someone I know fairly well. (I don’t normally make pie for strangers.) But she’s more of my wife’s friend than mine. However, I feel like we got to know each other better that night. We had a great chat about pie, desserts, her birthday, family, work, relationships, religion, children, bad movie casting, rugby, Scandinavia, bad advertising, and what might happen if our two fathers got in a room together, among other things. I forget sometimes how much we have in common. I totally lost track of time and didn’t leave until about 2:45am. I’m often up late, but even for me that’s a little late to be out on a school night. I guess time flies when you’re having fun and/or eating pie.

And lest you think I forgot, now for the important question. How was the pie? The pie was big and goopy and messy. (Goopy is a technical term.) It was delicious, of course. The caramel wasn’t overpowering, but you could definitely tell it was there. Same with the saltiness. I actually think it could have used more caramel. Since not all of the apples fit into the pie, I didn’t put all of the caramel into the pie either. Maybe I left a little bit too much out? Perhaps I’ll have to try again.

20141005_223621

So to recap: making desserts for people’s birthdays is a good idea. I highly recommend it. Having friends worth making desserts for is also highly recommended. I’m sorry we didn’t get to take her up on her offer to help finish the pie, but I’m sure it didn’t go to waste.

Have you ever made special desserts as birthday presents? Do you have a go-to recipe or do you specialize based on the person’s interests? I’d love to hear your birthday dessert stories in the comments below.

Recipe courtesy of Four and Twenty Blackbirds.

Notes: I mainly used this version of the recipe. I used this version to help fill in some details. (In retrospect, I probably should have just used the second one.) I also got some help from Smitten Kitchen. I used this info for rolling and crimping the pie crust. And I followed instructions here for dealing with a straight top, instead of a lattice top.