Tag Archives: summer

Ice Cream Icebox Cake

So as you know last week, I made a giant icebox cake for my wife’s surprise birthday party. It’s her favorite cake, and since I knew it would get devoured at the party, I wanted to make her another one so she could enjoy it. And, as I mentioned, I wanted to kick it up a notch.

I had recently discovered this no-churn ice cream recipe. So I thought, what about making an ice cream icebox cake? That is, replace the whipped cream with ice cream. Surely, I thought, someone would have done it before. But when I looked, all I found were some vague references along the lines of “wouldn’t that be an interesting idea?”. So I plunged ahead into the unknown. I couldn’t get any clear info on whether or not it would work the same, but I figured it would.

The ice cream ingredients. Magic!

The ice cream ingredients. Magic!

I made a double recipe of the ice cream, as I didn’t know how much I would need. I had made a bunch of cookies for the first icebox cake, and this one. I figured I would use about 3/4 of the cookies for the first cake, and use the rest for this one.

Because the ice cream needed a while to set, I made it the night before. I waited until my wife went to sleep, and then gathered the ingredients I had secretly assembled. In this case, I had just hidden the ingredients in another room.

The ice cream, ready to freeze.

The ice cream, ready to freeze.

The ice cream recipe, as I mentioned when I made it the first time, is pretty straightforward. It was complicated a little bit by wanting to do it secretly, but it was still pretty easy. I used our immersion blender with the whisk attachment as that was easier to clean after the fact. It was also easier to transport into another room. The kitchen is not far from our bedroom, and even with my wife asleep and the door closed, I didn’t want to risk it.

I followed the instructions for making the ice cream. I added a little bit of vanilla, as I thought that vanilla ice cream would be a good choice, and it would mirror the vanilla that gets added to the whipped cream in the regular icebox cake.

Packaged up and going to freeze.

Packaged up and going to freeze.

So I made ice cream, and buried it under some other things in the freezer, betting that she wouldn’t go digging through it in the morning. I also sealed the ice cream in containers with lids, as opposed to using wax paper. (It was the cleanest way to bury them.) I cleaned up and let the ice cream set work its magic overnight.

The next day I made the chocolate wafer cookies, as I described last week. I made the regular icebox cake first, as that was going to be used first, and I wanted to give it the longest time possible to set. Once that was done, I went to work making this.

Fresh from the freezer.

Fresh from the freezer.

First things first, what to put it in? I needed something big enough, and that could go in the freezer. I ended up using a 9″ round cake pan. Since it was going to be a cake anyway, this seemed appropriate. I lined it with foil. I figured that would make cleanup easier. I also thought it might let me pull the cake out of the cake pan.

So then how to make it? I was kinda making it all up here. So I just started building it like I would a regular icebox cake. I grabbed some cookies and started filling in between them with ice cream. I laid down a stack of those and started on another. One thing soon became clear to me. It’s hard to build an icebox cake in a circle. A square or rectangular dish would have probably been better.

Assembly. It was a little messy.

Assembly. It was a little messy.

So I soon had a few stacks filling up part of the space, but because it was a circle, I then had to fill in here and there to get all the in between spaces. Eventually I got it reasonably filled. I then had to make another decision. Should the outer layer be cookies or ice cream? If it were a cookie cake, and maybe for structural reasons, you’d want cookies on the outside. But for an icebox cake you wouldn’t. I ended up going for the full icebox and filled in the outside layer with ice cream. I also filled in the rest of the spaces with ice cream. And covered the top with ice cream.

After that, I covered it in plastic wrap and buried it in the freezer for secrecy purposes. I didn’t end up using as many cookies as I thought I might. Maybe 30 or so? I ended up using about one and a half recipes worth of the ice cream, so I’m very glad I made a double recipe.

Assembled, and going back into the freezer.

Assembled, and going back into the freezer.

With the second cake done, I did all the cleanup, and all the major preparation was now done. I sat down for a couple of minutes to relax before the evening’s festivities.

Last week’s post detailed what happened next. One thing I’ll say is that at the party I let my wife know that there was a second dessert waiting at home. When we got home, there was no way we were going to eat another dessert, but I gave her a sneak peek at what was to come. She was very excited and still kinda flabbergasted from the whole surprise party. I won’t say that this was the icing on the cake, but it was very well received.

Voila!

Voila!

We waited until the next evening to try it. The way it had frozen made it challenging to remove, so I decided to cut it right in the pan. But it’s a non-stick pan, so I had to tread carefully. A large spatula ended up being the tool of choice. And letting it sit on the counter to warm up a little bit didn’t hurt either.

Once a slice was freed from the pan, you could see it was clearly a good-looking cake. It actually looked a bit like icebox cake. A sea of white surrounding some layers of chocolate.

Yum!

Yum!

And how was it? Wow. It was an ice cream cake. And it was an icebox cake. It totally worked! I’m not sure exactly why, but it only partially softened the cookies. (It had over a day by the time we ate it.) But this was actually a good thing. It tasted like a Carvel ice cream cake.

I’m sure not everyone is familiar with Carvel, but it’s a chain of ice cream shops. They have these pretty awesome ice cream cakes. And the way the cookies softened in this cake made them taste just like the chocolate cookie/cookie crumb they used in theirs.

DSC01732

It was a nice soft vanilla ice cream with these great, mostly softened, but slightly crunchy chocolate bits throughout. They went perfectly together and made for a delicious cake. A slight change from the regular icebox cake, but a good change nonetheless.

I would highly recommend trying this out. The ice cream is super easy. The cookies are just mix, slice, and bake. The cake assembly is easy. And all in all, it’s greater than the sum of its parts. And for me, it checked off all the boxes I needed. Second birthday dessert, check. Keeping true to my wife’s favorite dessert, check. Kicking it up a notch, check. Trying something new, check. And “inventing” a new recipe, also check.

Close-up.

Close-up.

So when summer hits, and you’re looking for an easy, yummy, totally homemade and totally knock your socks off dessert, you’ll be glad you remembered this. And when you want to wow them a second or a third time, you’ll also remember that the ice cream is easily modified into many, many, different flavors. So go forth and enjoy. I’d love to know how it all turns out!

Inside the cake pan.

Inside the cake pan.

Ice cream recipe courtesy of The Kitchn. Chocolate wafer recipe courtesy of smitten kitchen. Cake recipe inspired by Nabisco, but imagined and created by me.

Cherry Slab Pie

What’s summer without a summer BBQ? (For those who don’t like the rhetorical question game the actual answer is it’s still summer.) I live in NYC where having any outdoor space is a luxury. We are lucky enough to have a tiny little outdoor space, and we decided to have a BBQ a few weeks ago. When I say tiny, I mean it’s big enough for a small charcoal grill and about five people to stand around. (That’s not tiny by NYC standards, just tiny in actuality.) We invited what we thought was just a few friends over. However, once all the dust had cleared from the RSVPs, we realized it was going to be like 25 people or so. I had already decided I was going to make dessert, but I soon realized I needed to make two or three.

Since we were going to have a crowd, I wanted to make something big that would serve a lot of people. I remember reading on smitten kitchen about slab pie and thought that would be a great idea. Apple was the one I had seen, but that seemed a little too fall. I wanted something more summer and found this recipe for sour cherry slab pie. Perfect. It’s big (feeds 20 or so people) and it’s summery. It uses her regular pie crust but about 1 1/2 times the amount. I’ve made that pie crust a bunch of times now. It’s pretty easy, and I know it’s good. I thought, this should be a piece of cake. Er, pie.

Good pie dough requires some diced butter.

Good pie dough requires some diced butter.

Using a pastry blender you turn it into this.

Using a pastry blender you turn it into this.

Add some cold water and you eventually turn it into this lovely looking dough.

Add some cold water and you eventually turn it into this lovely looking dough.

I started prepping the pie on the Tuesday night before the Saturday party. I gathered the ingredients and went at it. As usual, there wasn’t much to it. Although since it was 1 1/2 times the amount of dough, it did take a little while to blend all the butter in with the pastry blender. And it did take a little while mixing in the water, incorporating all the ingredients, and getting it dough like. It wasn’t hard. It was just a little bit of work. My arms got a little tired. Which makes me wonder if everyone who made food before we had modern kitchen appliances was as strong as an ox.

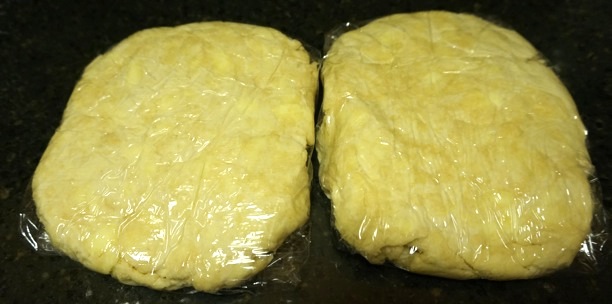
Which you then split in two and smoosh into shape.

Which you then split in two and smoosh into shape.

Once it was all done I laid out some plastic wrap, split the dough in two, smooshed it roughly into rectangles (as requested by the recipe), and put it in the fridge. Making the rest of the pie would have to wait for another night. I aimed for Thursday.

The secret ingredients in cherry pie filling. Yes, those are cherries on the right.

The secret ingredients in cherry pie filling. Yes, those are cherries on the right.

Thursday night, the making of the pie continued. I started late in the evening. (There’s something fun about night baking.) I cleared off the counter and pulled out the ingredients. Since I used frozen cherries (I know what you’re thinking, but it was easier than pitting them, sorry!), I remembered to defrost them the night before. I then had to drain them before using. I measured them out. The recipe called for 6 cups pitted, but these were already pitted, and once I drained them it ended up being less than 6 cups. I think it was okay because my pie looked about as filled as hers did.

Mix them together and voila! Cherry pie filling.

Mix them together and voilà! Cherry pie filling.

There was a range of sugar in the recipe. I used one cup. (These cherries weren’t sour, so maybe not as much sugar would be needed, but also her pie was very lightly sweetened, and I wanted it to be a little sweeter than that.) I mixed up the filling and set it aside.

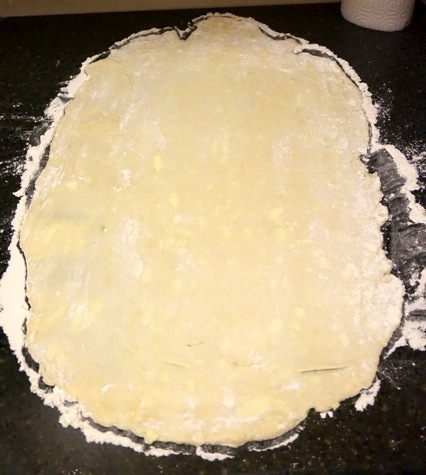
The first piece of dough rolled out.

The first piece of dough rolled out…

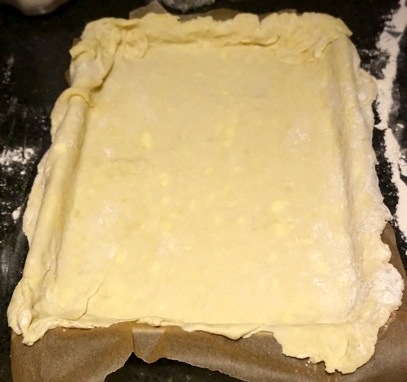
... and put into place.

… and put into place.

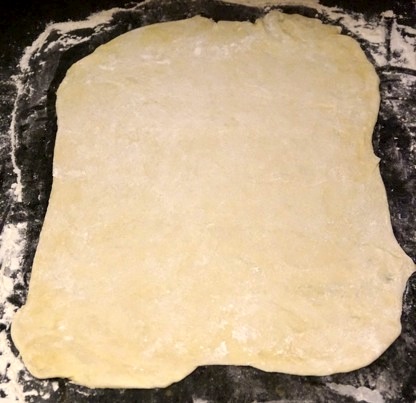
I rolled out the first piece of dough. It was not an inconsequential task. I’ve learned a little how to roll out dough. (Thank you smitten kitchen!) I remembered to use a lot of flour. I’m not so sure it was even. It was decent, but it was a little thin in places and I had to patch it a bit once I put it on the parchment lined baking sheet. I actually had to purchase a new baking sheet for this recipe. I needed a new one anyway, as one had recently gone to that great kitchen cabinet in the sky, and since I didn’t have one this size (15x10x1), I got one.

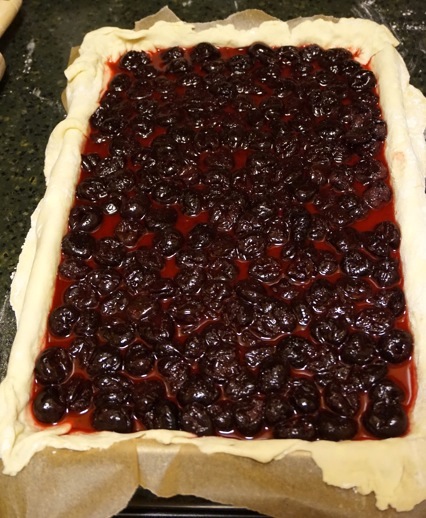
With filling!

Once more, with filling!

That's a lot of filling, no?

That’s a lot of filling, no?

I poured in the mixture and spread it around a bit to make it even. Then I rolled out the second piece of dough. It wasn’t big enough at first, so I rolled it out more, but then it was too big. So I smooshed it back into a ball and rolled it out again. This time was easier. I think it was still a little bit too big, but it was okay.

The second piece of dough rolled out...

The second piece of dough rolled out…

I placed it on top. Moving the dough both times was a challenge because they were very big pieces of dough. Both times they stretched and ripped a little. Also finding a spot to move the baking sheet to while I was working on the dough took some finagling. (We were kinda out of space, especially with all the party goods lined up.)

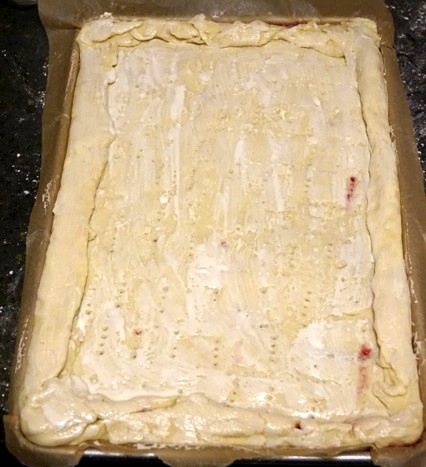
... and put into place. Also notice the holes pricked in the top as well as the cream brushed over top.

… and put into place. Also notice the holes pricked in the top as well as the cream brushed over it.

I folded the crust over and sealed it up. At this point I saw some of the filling was leaking out a little bit. The bottom piece of dough was maybe a little too thin in spots. I pinched it closed. I pulled off a little of the extra dough from the top to help seal it. As instructed, I poked holes in the top with a fork. I brushed it with cream. It didn’t call for much, but I didn’t waste the rest. I needed it for another recipe. (You’ll hear about that next week.) I put it in the oven for 40 minutes to see if that was long enough.

It's a pie!

It’s a pie!

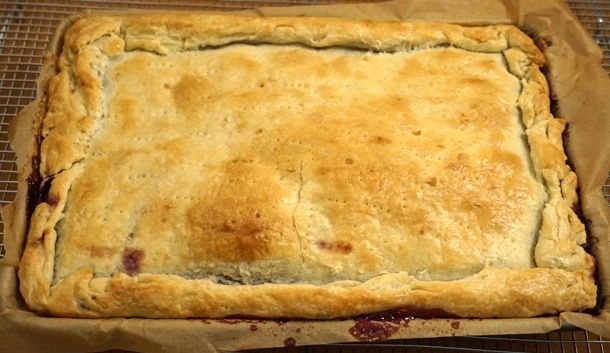
Notice the poofy bits sticking out.

Notice the poofy bits sticking out.

After 40 minutes it was done. When I had checked on it about half way through, I noticed it was a little poofy in one spot. When it was done, it was all kinds of poofy. (Poofy is an industry term.) It was definitely brown and the juices were bubbling. So much so that some of them had spilled out into the oven. I think maybe the crust on the top was too thick or the one on the bottom was too thin. But it looked really nice. And it smelled good too. Not overly like cherries, mostly just crust which smelled and looked delicious. I put it on a wire rack to cool.

Look at that crust!

Look at that crust!

Mmmmm.

Mmmmm.

I decided to do the glaze closer to the time. The morning of the BBQ to be exact. There were some options for how to make it. For mine I mixed 1 tbsp water and 1 tbsp lemon juice with the powdered sugar. It looked nice with the glaze on.

A little glaze, if you please.

A little glaze, if you please.

From this angle it kinda looks like a mountainous landscape.

From this angle it kinda looks like a mountainous landscape.

And now for the question on everyone’s mind: how was it? It was dee-licious. (So delicious, it required an extra “e” and a hyphen in the word.) It had a good flavor. And the glaze was a nice complement. There was lots of dough, which was to be expected because the recipe describes it as having 150% of the dough with 100% of the filling. My wife said the slices of pie were like open-ended pop tarts, which is an excellent description.

As the pie was being eaten.

As the pie was being eaten.

As it turned out, there were many yummy desserts at the BBQ. Other people brought some great dishes. And the other recipe I made kinda stole the show. (You’ll hear about that next week.) So with a pie this big, there was definitely some left over. There were no complaints here! We were happy to have more of the pie around to savor.

DSC00442

I have to say, in prepping for the BBQ we learned a lot about food planning and scaling. I have much appreciation for those who do this on a regular basis. And I got some more practice in making large amounts of dessert. But I’m sure I’m not the only one. I’m sure many of you have made large amounts of dessert? How do you do it? One large dessert? One small dessert scaled up? Multiple desserts? I’d love to hear your large party dessert secrets, if you’re willing to share.

Recipe courtesy of smitten kitchen.

DSC00445

DSC00449