Monthly Archives: August 2015

Apple Pie – Goodbye Edition

Hey guess what? It’s another apple pie! As you might know, I’ve made a few before. In case you’re wondering, I didn’t make this because I forgot I made it before, quite the contrary. I made it for a friend. We worked together, and he was leaving to go to our company’s LA office. When I found out he was leaving I told him I would make something for him for his goodbye party. I said I could make him any dessert he wanted. He asked for apple pie.

Now if you recall, one of those previous apple pies I made (well two actually) were ones I made for work. So he’s had my apple pie before. I told him I could totally make that for him, but it didn’t have to be that. I said that I make other stuff, and he could have whatever he wanted: cookies, cake, pie, whatever. He said apple pie was his favorite dessert, and he really wanted me to make that for him. I understood. Sure, I said, apple pie it is.

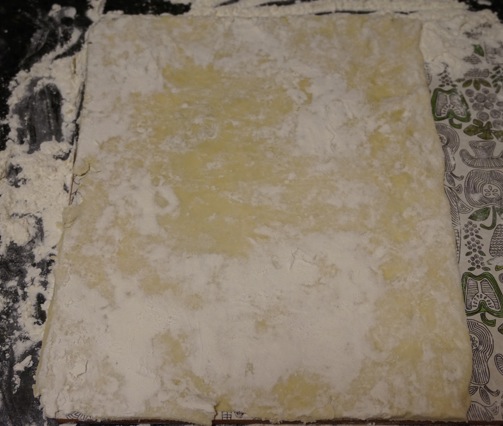
We were having the goodbye party on a Tuesday. Sunday night I made the crust. Last time I made this recipe, it filled two of the aluminum pie dishes I had. Since I only needed one pie, I made half a recipe. It looked so small. A normal recipe isn’t too bad, the slab pie was one and a half times the recipe, but this half a recipe seemed like almost nothing. As usual, it was very easy to put the crust together. There was just a few ingredients and one bowl. Minimal time and cleanup. When I was done, I split it into two and stuck it in the fridge to chill.

Monday night, the night before the festivities, I made the pie. I stopped at the corner store to get some apples. After dinner I set about making it. Since I was already comfortable with the recipe, I played a little fast and loose with the directions. To fit the pie dish, I only made a half recipe of the filling as well.

I started on the apples first, as that usually takes a long time. I washed them, but I forgot to peel them before coring them. Then instead of cutting them, I used our food processor with a 6mm blade. (6mm is about 1/4 inch, which is the size called for in the recipe.) This is how I’m going to make all future apple pies. Normally making an apple pie is so labor intensive, what with peeling, coring, and chopping all the apples. This was so much easier.

DSC00456

I used about a pound of Granny Smith apples and a little over 3/4 pound of McIntosh apples. When I bought the apples, I had just guessed at the amounts. I had another McIntosh, but rather than cut up half an apple, I decided to go with the amount of full apples that was closest.

Covered and fluted.

This wasn’t too long after my last baking extravaganza, so I had some lemon juice leftover from making the glaze for the cherry slab pie. I used that and zested a lemon which I still had. After mixing those into the apples, I rolled out the dough.

DSC00467

I wasn’t exact, but rather I just guessed at the dough size, and I was pretty close. Since this was a smaller pie plate, I knew the dough didn’t have to be quite as big. After mixing the spices into the apples, it smelled like apple pie. I poured the apple mixture into the pie plate with the dough. It looked like a little too much, but I piled it up in the middle like they suggested. And it worked out okay.

DSC00466

I rolled out the second piece of dough. Again I wasn’t being too exact. I guessed, and it was a pretty good guess. I used scraps from the first piece to fill in a couple of spots on the crust which needed it. (Some of the apples were kinda poking through on the top.) I folded up the dough and fluted it. I was very happy with the fluting. I impressed myself a bit. I guess I’m getting better, what with the rolling and guessing the right size and the fluting and such.

DSC00468

I cut slits in the top. I used heavy cream as a wash (leftover from the cherry slab pie and teddy bear hot tub s’mores) instead of an egg wash. I didn’t have any eggs handy and I didn’t want to get any just for this. (Thank you internet for the tip.) I didn’t measure how much, I just guessed. I sprinkled it with sugar, again using half. I figured that since it was a smaller and shallower pie, it would still make sense to use half, even though the surface area of the pie wasn’t half.

DSC00473

I followed the instructions for baking temperature, although I didn’t put the sheet in the oven ahead of time. I just put it in when I put in the pie. I covered the baking sheet with foil, too, just to be safe. Since the pie was a little bit smaller, I cooked it on the shorter side. The first round was about 22 minutes. I rotated the pan 180 degrees and cooked it for the second round, about 28 minutes.

DSC00476

I could smell it all along the way. It smelled awesome. And after it was all said and done, it looked fantastic. I could see the juices bubbling, although not bubbling over this time. The crust was a nice color. I could see steam rising up. Wow, it was a nice looking pie. I put it on a cooling rack to cool. It was done around midnight. 

DSC00478

At this point, I’d like to say a big thank you to my wife who again did the cleanup both along the way and at the end. Thanks, hon! It saved me a lot of work.

I took the pie in to work the next day. We actually didn’t get to it until the day after. (Turns out crowded bars aren’t always the best places for pie.) When we did get to it, people ate it up. They ate it up so quickly, I didn’t really have a chance to take pictures of how it looked on the inside. In any case, it was delicious and thoroughly enjoyed by all. It was on par with any of my previous apple pies. And my friend was happy with the send off.

How happy? Well, we have regular conference calls with our LA office. Word has now travelled there about my apple pie. The LA office is all abuzz, and they keep asking about making a pie for them. Will I bring them one? Will I send them one? The pie has now taken on mythic proportions.

Do you have a recipe that people like so much they ask you to make it again and again? Do you have a favorite dessert you make over and over? What’s your signature dish?

Pie recipe courtesy of smitten kitchenCrust recipe courtesy of smitten kitchen.

Teddy Bear Hot Tub S’Mores

There are lots of kinds of desserts in this world. There are ridiculous desserts. There are cute desserts. There are delicious desserts. This one is all three: ridiculous, cute, and delicious. My wife found this recipe, and I thought they were too cute to pass up. As I alluded to last week, I made these for a BBQ we hosted. I thought they would be fun, a crowd pleaser, a large volume dessert (important for big crowds), and since I was making them for an event at home, I wouldn’t have to worry about transporting them.

DSC00404

They looked pretty straightforward. I started on them late the night before the BBQ. I’ll chalk that one up to equal parts naiveté and being busy. They weren’t difficult to make, but I definitely underestimated how long they would take.

DSC00405

Ganache!

I had recently bought some baking chocolate in bulk chunks. I had miscalculated how much I needed for the recipe at the time, so I ended up with enough to feed a small army. I found a chunk that was enough for this recipe and I cut it in two. I cut the one half into small crumbly bits to use for the ganache. I didn’t heat the cream in a saucepan as suggested. Instead, I used the beverage function on the microwave. (Don’t hate me for cheating.) I almost made a big mess of it because I wasn’t watching closely, and it bubbled up and almost bubbled over. However, it still mixed with the chocolate as expected. (I did not use any of the optional bourbon.)

Roasting the marshmallows.

Roasting the marshmallows.

Roasting the marshmallows took a while. I had the feeling that they would take a while, so I enlisted my wife. (Thanks hon!) We put them on forks and roasted them one by one over the flame of one of the burners in the kitchen. Roasting them over the grill would have been quicker, but that wouldn’t be ready till the next day. Roasting them was harder than you think. We had to get them close enough to brown without them catching on fire. We got the hang of it after a while, but many of them did catch on fire in the process. Even with both of us, it still took over an hour. Most of them turned out okay. Some of them less so. The latter ones had to be manually cut open a bit, which was challenging. (Have you ever tried to carve out the inside of a semi-roasted marshmallow?)

All done roasting!

All done roasting. You can see some turned out better than others.

Marshmallow close up.

Marshmallow close up.

I then moved on to the second batch of chocolate. I melted it in the microwave, and after both it and the marshmallows had cooled, I tried spreading it on the marshmallows with a knife. Unfortunately, that was way too slow. I ended up dipping the marshmallows in the chocolate, then the graham cracker crumbs. Then I flipped them upside down and repeated. It was as messy as all get out – I got almost as much chocolate on me as I did the marshmallows – but it was much, much quicker.

My ingredients for the next steps.

Important ingredients: melted chocolate, graham cracker crumbs, and teddy bears.

All dipped and coated.

All dipped and coated. (The four marshmallows to the left were extra, so they weren’t done till later as explained below.)

Actually, the whole recipe was pretty messy. For instance, during the marshmallow roasting we had to clean off the forks several times because of marshmallow build up. (Great band name, by the way.) And during this part, I had to clean the chocolate off of my hands more times than I could count. There was chocolate to the left of me, chocolate to the right. There I was, stuck in the middle with you a whole bunch of teddy bears in hot tubs. But I digress.

I then moved on to the ganache. I used a plastic bag with the tip cut off for piping the ganache into the marshmallows. I learned my lesson from previous times and cut the hole very small. For the marshmallows that turned out right, the piping was easy. But for those marshmallows that hadn’t really opened up (maybe they have trust issues?), it was difficult to fill them. I had cut them open, but it wasn’t easy to keep them open to get the ganache in. They all got filled, however the difficult ones got less filled.

All the hot tubs are filled and ready, Mr. Teddy Bear, sir.

All the hot tubs are filled and ready, Mr. Teddy Bear, sir!

With the hot tubs ready, I put in the teddy bears. (Why teddy bears have hot tubs in the first place, I don’t know, but I think that’s a story for another time.) There’s no way around it. They were the most adorably cute dessert you’ve ever seen. I’ve seen my share of desserts, and I’m  not exaggerating. They were not quite as pretty as the picture on the recipe, but at the risk of tooting my own horn, I thought they looked pretty darn good.

DSC00427

The recipe was supposed to make 36. However, we had roasted all 40 marshmallows in the bag in case some of them didn’t turn out as well. (For all my fellow linguists out there, I realize that this sentence could be construed to mean we had roasted the marshmallows while they were still in the bag, but given that I already described the roasting process above, I hope you’ll forgive me.) And since I still had graham cracker crumbs, melted chocolate, ganache, and teddy bears left, I decided to use up the remaining 4 marshmallows.

I have much respect for people who work in the candy, chocolate, and confectionary fields. I can see it involves a lot of hard work, and a lot of detail work at that. It’s kinda fun, interesting, and challenging, and it’s a lot of work.

DSC00429

The recipe didn’t look that difficult, and it wasn’t really. However, since some of the marshmallows didn’t get done as well as they should have, their tops didn’t sink, which made filling them difficult. Other than that they worked out okay. It just took a lot of time and patience. A lot more time and patience than I thought.

I think it was all worth it though, as they ended up being the star of the show (as the recipe indicated they might be). As soon as people saw them, they couldn’t stop talking about them, taking pictures of them, Instagramming them, figuring out movie franchises for them, etc. People who left before dessert asked to have some, people took some with them when they left. You get the idea.

DSC00431

Besides being really cute, they also tasted really good. In all the hubbub I didn’t get to have one till the next day. (Although I had sampled the parts while making them.) They’ve got interesting textures. There’s the chewy marshmallow, the smooth chocolate(s), and the crunchy graham crackers. Plus there’s the mix of flavors. You have the roasted, smokey marshmallow, two different chocolates, and two different graham crackers. They are yum and fun and wow all around.

If you’re at all thinking about making them, they are a lot of work, but they’re totally worth it. Taste, texture, presentation, and a very large cute factor make them rank very high. This recipe further encourages me to come up with my own fun ideas. My one question is, I don’t even have my own hot tub, and here we have 40 teddy bears each with their own hot tub. How in the world did that happen?

If you make them, I’d love to hear your experience and everyone’s reactions. But tell me, do you have recipes which are just as cute or even cuter? I’d love to see a cute-off.

Recipe courtesy of foodelicious at Allrecipes.

Cherry Slab Pie

What’s summer without a summer BBQ? (For those who don’t like the rhetorical question game the actual answer is it’s still summer.) I live in NYC where having any outdoor space is a luxury. We are lucky enough to have a tiny little outdoor space, and we decided to have a BBQ a few weeks ago. When I say tiny, I mean it’s big enough for a small charcoal grill and about five people to stand around. (That’s not tiny by NYC standards, just tiny in actuality.) We invited what we thought was just a few friends over. However, once all the dust had cleared from the RSVPs, we realized it was going to be like 25 people or so. I had already decided I was going to make dessert, but I soon realized I needed to make two or three.

Since we were going to have a crowd, I wanted to make something big that would serve a lot of people. I remember reading on smitten kitchen about slab pie and thought that would be a great idea. Apple was the one I had seen, but that seemed a little too fall. I wanted something more summer and found this recipe for sour cherry slab pie. Perfect. It’s big (feeds 20 or so people) and it’s summery. It uses her regular pie crust but about 1 1/2 times the amount. I’ve made that pie crust a bunch of times now. It’s pretty easy, and I know it’s good. I thought, this should be a piece of cake. Er, pie.

Good pie dough requires some diced butter.

Good pie dough requires some diced butter.

Using a pastry blender you turn it into this.

Using a pastry blender you turn it into this.

Add some cold water and you eventually turn it into this lovely looking dough.

Add some cold water and you eventually turn it into this lovely looking dough.

I started prepping the pie on the Tuesday night before the Saturday party. I gathered the ingredients and went at it. As usual, there wasn’t much to it. Although since it was 1 1/2 times the amount of dough, it did take a little while to blend all the butter in with the pastry blender. And it did take a little while mixing in the water, incorporating all the ingredients, and getting it dough like. It wasn’t hard. It was just a little bit of work. My arms got a little tired. Which makes me wonder if everyone who made food before we had modern kitchen appliances was as strong as an ox.

Which you then split in two and smoosh into shape.

Which you then split in two and smoosh into shape.

Once it was all done I laid out some plastic wrap, split the dough in two, smooshed it roughly into rectangles (as requested by the recipe), and put it in the fridge. Making the rest of the pie would have to wait for another night. I aimed for Thursday.

The secret ingredients in cherry pie filling. Yes, those are cherries on the right.

The secret ingredients in cherry pie filling. Yes, those are cherries on the right.

Thursday night, the making of the pie continued. I started late in the evening. (There’s something fun about night baking.) I cleared off the counter and pulled out the ingredients. Since I used frozen cherries (I know what you’re thinking, but it was easier than pitting them, sorry!), I remembered to defrost them the night before. I then had to drain them before using. I measured them out. The recipe called for 6 cups pitted, but these were already pitted, and once I drained them it ended up being less than 6 cups. I think it was okay because my pie looked about as filled as hers did.

Mix them together and voila! Cherry pie filling.

Mix them together and voilà! Cherry pie filling.

There was a range of sugar in the recipe. I used one cup. (These cherries weren’t sour, so maybe not as much sugar would be needed, but also her pie was very lightly sweetened, and I wanted it to be a little sweeter than that.) I mixed up the filling and set it aside.

The first piece of dough rolled out.

The first piece of dough rolled out…

... and put into place.

… and put into place.

I rolled out the first piece of dough. It was not an inconsequential task. I’ve learned a little how to roll out dough. (Thank you smitten kitchen!) I remembered to use a lot of flour. I’m not so sure it was even. It was decent, but it was a little thin in places and I had to patch it a bit once I put it on the parchment lined baking sheet. I actually had to purchase a new baking sheet for this recipe. I needed a new one anyway, as one had recently gone to that great kitchen cabinet in the sky, and since I didn’t have one this size (15x10x1), I got one.

With filling!

Once more, with filling!

That's a lot of filling, no?

That’s a lot of filling, no?

I poured in the mixture and spread it around a bit to make it even. Then I rolled out the second piece of dough. It wasn’t big enough at first, so I rolled it out more, but then it was too big. So I smooshed it back into a ball and rolled it out again. This time was easier. I think it was still a little bit too big, but it was okay.

The second piece of dough rolled out...

The second piece of dough rolled out…

I placed it on top. Moving the dough both times was a challenge because they were very big pieces of dough. Both times they stretched and ripped a little. Also finding a spot to move the baking sheet to while I was working on the dough took some finagling. (We were kinda out of space, especially with all the party goods lined up.)

... and put into place. Also notice the holes pricked in the top as well as the cream brushed over top.

… and put into place. Also notice the holes pricked in the top as well as the cream brushed over it.

I folded the crust over and sealed it up. At this point I saw some of the filling was leaking out a little bit. The bottom piece of dough was maybe a little too thin in spots. I pinched it closed. I pulled off a little of the extra dough from the top to help seal it. As instructed, I poked holes in the top with a fork. I brushed it with cream. It didn’t call for much, but I didn’t waste the rest. I needed it for another recipe. (You’ll hear about that next week.) I put it in the oven for 40 minutes to see if that was long enough.

It's a pie!

It’s a pie!

Notice the poofy bits sticking out.

Notice the poofy bits sticking out.

After 40 minutes it was done. When I had checked on it about half way through, I noticed it was a little poofy in one spot. When it was done, it was all kinds of poofy. (Poofy is an industry term.) It was definitely brown and the juices were bubbling. So much so that some of them had spilled out into the oven. I think maybe the crust on the top was too thick or the one on the bottom was too thin. But it looked really nice. And it smelled good too. Not overly like cherries, mostly just crust which smelled and looked delicious. I put it on a wire rack to cool.

Look at that crust!

Look at that crust!

Mmmmm.

Mmmmm.

I decided to do the glaze closer to the time. The morning of the BBQ to be exact. There were some options for how to make it. For mine I mixed 1 tbsp water and 1 tbsp lemon juice with the powdered sugar. It looked nice with the glaze on.

A little glaze, if you please.

A little glaze, if you please.

From this angle it kinda looks like a mountainous landscape.

From this angle it kinda looks like a mountainous landscape.

And now for the question on everyone’s mind: how was it? It was dee-licious. (So delicious, it required an extra “e” and a hyphen in the word.) It had a good flavor. And the glaze was a nice complement. There was lots of dough, which was to be expected because the recipe describes it as having 150% of the dough with 100% of the filling. My wife said the slices of pie were like open-ended pop tarts, which is an excellent description.

As the pie was being eaten.

As the pie was being eaten.

As it turned out, there were many yummy desserts at the BBQ. Other people brought some great dishes. And the other recipe I made kinda stole the show. (You’ll hear about that next week.) So with a pie this big, there was definitely some left over. There were no complaints here! We were happy to have more of the pie around to savor.

DSC00442

I have to say, in prepping for the BBQ we learned a lot about food planning and scaling. I have much appreciation for those who do this on a regular basis. And I got some more practice in making large amounts of dessert. But I’m sure I’m not the only one. I’m sure many of you have made large amounts of dessert? How do you do it? One large dessert? One small dessert scaled up? Multiple desserts? I’d love to hear your large party dessert secrets, if you’re willing to share.

Recipe courtesy of smitten kitchen.

DSC00445

DSC00449

Brownie Bow Ties

As cute and delicious as I’m sure it would be, this recipe is not about putting adorable little bow ties on brownies. This recipe is about a very tasty mashup between a rugelach dough and a brownie filling. It came from a cookbook I got as a present on my birthday this year. I actually got three awesome cookbooks that day. So I guess word is getting around that I like to bake. 😉

I made these cookies for my family’s annual 4th of July party. (I made these for last year’s party.) They seemed like fun and good for a party. Plus the recipe made a lot, which always helps for crowds. The book was a present from my mom, and I thought she would enjoy that I used it to make something for the party that she was hosting.

Every dough starts somewhere...

Every dough starts somewhere…

The recipe starts with a rugelach dough. For the those of you who aren’t familiar with rugelach, you can read more about them here. So I made the dough first, on a Tuesday night. (The party was on the upcoming Saturday.) It was pretty quick and easy. It only took about half an hour including stopping to take pictures a bunch of times.

This looked like "very coarse bread crumbs" to me.

This looked like “very coarse bread crumbs” to me.

I got to use our KitchenAid again! Woo hoo! (You can read about the first installment of the KitchenAid adventures here.) I started doing stuff with it, and then I was like, “Oh wait, I don’t have to do anything. It’s doing its own thing. I can go off and do other stuff.” I can’t tell you how much I love it. Okay, I guess I can. I love it a lot.

Notice the streaks of cream cheese. The recipe said that's how it should look.

Notice the streaks of cream cheese. The recipe said that’s how it should look.

When measuring out the flour, I used my scale as usual. It called for 11.25 ounces of flour and I guessed it right on the first try. I dumped out a bunch, and voilà! It was 11.25 ounces exactly. I know I really shouldn’t get that excited about it, it’s not like I guessed the right number for the lottery, but sometimes it’s the little things that make one’s day.

Separated.

Split into pieces.

The recipe said to mix it until it looked like “very coarse bread crumbs”. I wasn’t sure how it would look, but it got there quick enough. Mixing the cream cheese was very quick. Maybe I had it on too high of a speed, but it was very quick to mix up. I don’t know if it was even the 30 seconds the recipe called for. Have I told you how much I love our KitchenAid? (I swear I’m not shilling for them. I’m legitimately just enjoying it.)

Dough close-up!

Dough close-up!

I kneaded the dough and split it into pieces. I used a scale to measure the pieces, because otherwise I’m not sure I would have gotten the pieces so even. I measured out the size on the cutting board and used that as a guide for flattening. I wrapped the dough and left it in the fridge. I aimed to make the filling and finish up the cookies the next day.

Flattened and ready to chill.

Flattened and ready to chill.

The next day I started on them late, around 11pm. It was actually pretty quick to make the filling. Instead of doing a double boiler for the chocolate, I microwaved it. This had worked well for me in the past and worked well here, too. I mixed in stuff by hand. I used liquid eggs instead of the regular eggs called for in the recipe. It took a total of 20 – 25 minutes, including getting all the ingredients and washing the necessary dishes and utensils. I put the filling in the fridge to firm up. The bowl was too big, but better safe than sorry.

Every filling starts somewhere, too.

Every filling starts somewhere, too.

Mmm, filling.

Mmm, filling.

A little while after it was done firming up, I started on the dough. It called for rolling out the dough to 9″ x 11″. I measured a cutting board which I used to roll the dough on. It was 9″ one way, and I measured out 11″ the other way to a specific spot on the board. (It has an interesting pattern, so it was easy to remember which part of the pattern on the board was the 11″ mark.) That way I wouldn’t have to measure the dough each time, I could use the board as a reference. I floured the board and the rolling pin, maybe a bit too much, but again better safe than sorry.

The first piece of dough, rolled out.

The first piece of dough, rolled out.

I shoulda let the dough sit out a little bit more, as it was a little bit tough to roll. I more or less used the smitten kitchen method for rolling out the dough. I cut it, but I wasn’t paying attention to the instructions right. I cut rectangles instead of squares. I smooshed it back up and rolled it out again. This time was much easier. I cut along the edges of the cutting board to trim, and along the mental mark I had made on the fourth side.

By mistake, I made rectangles at first.

By mistake, I made rectangles at first.

Once I realized my mistake, I turned them into more square-ish pieces.

Once I realized my mistake, I turned them into more square-ish pieces.

I wasn’t sure exactly how much filling to put in so I estimated. (Later I split up the filling into parts so I could better gauge each round.) Per the instructions I filled the dough, I wet one bit, folded it over, pressed and sealed. It was pretty easy and fun once I got the hang of it. Some were a bit too filled, but oh well. I did one round as I thought that’s all I could fit. (As I found out later, I could fit more on the sheets.) And I also wanted to get them started. I brushed them with milk, and sprinkled them with sugar. I guessed on how much to use of both of those too.

Dough with filling!

Dough, with filling!

Rolled up and ready to bake!

Rolled up and ready to bake!

Close-up!

Close-up!

I used parchment paper on the cookie sheets. I arranged the racks in the “upper and lower thirds of the oven” as directed. The recipe said to bake for 18-20 minutes. I baked them for 18 minutes. As suggested, after 9 minutes I rotated the pans from top to bottom and front to back, followed by the other 9 minutes. It was just right. They were nice and brown.

First batch, fresh from the oven.

First batch, fresh from the oven.

As the first batch was cooking, I started on the second batch. They were almost ready to go in after the first batch came out. While finishing the next batch, it gave enough time for the cookie sheets to cool before I reused them. I repeated this process throughout, reflouring each time, although not nearly as much. Each round was 18 minutes. In later rounds I realized I could do all 12 cookies from each round on one sheet. I still rotated bottom to top and front to back though.

That's a good-looking cookie.

That’s a good-looking cookie.

At the end, I had a bit of extra sugar leftover, so the last batch got extra. I planned it out pretty well with the filling though, so that ended up right. The chocolately filling busted out of some of them, but that’s to be expected. Some had more or less filling, and some of the squares were a little bigger or smaller.

All the cookies!

All the cookies!

As they were cooling I consolidated them. This let me reuse the pieces of parchment paper once or twice until they got too much debris on them. I left them on the remaining parchment paper to cool, but I reused the cookie sheets. I let them cool on the rack. I did not use any of the optional cinnamon or nutmeg on top. They looked amazing. They smelled good, but not overpowering. After they cooled, I put them into plastic containers, which were good for storage, as well as transport to the party.

Yes, these are things that exist. How did I not know about them before?

Yes, these are things that exist. How did I not know about them before?

I made 48, which is exactly what they said you would make. That wasn’t a surprise, as the directions had you dividing the dough very specifically. On the last batch, which had a lot of sugar on it, you could see the sugar all over the chocolate. Fun!

As you can see, some turned out better than others. Aesthetically speaking of course. They were all delicious.

As you can see, some turned out better than others. Aesthetically speaking of course. They were all delicious.

So the million dollar question: how were they? They were kinda greatIt didn’t necessarily seem so up front, but they ended up edging towards the realm of what I call ridiculous desserts. As in, this is so complex and amazing that it’s almost too ridiculous to exist. At some point I realized they’re like dessert versions of pigs in a blanket.

DSC00364

They had a nice taste. Kind of like how they smelled, they were subtle and not overpowering. Sophisticated almost. Someone described them as tasting nostalgic, like an old-fashioned cookie. A nice simple cookie surrounding a yummy chocolate filling. And as a fun side note, they fit together kinda like puzzle pieces. People ate them up.

DSC00369

They turned out to be a little bit more work than I had anticipated, but they were fun to make and totally worth it. Do you have any recipes that are labor intensive but worth the results? Any “ridiculous desserts”? Any party favorites that you like to make over and over? Let me know!

Recipe courtesy of Chewy Gooey Crispy Crunchy Melt In Your Mouth Cookies by Alice Medrich.

Icebox Cake – Homemade Edition – Part 2

In case you think you’re having déjà vu, you’re not. Well you might be, but not because of this week’s recipe. I did just make an icebox cake, wafers and all, but that was two weeks before this one. That one only used about half of the wafers. I had enough left over for a second cake. And who wouldn’t want a second icebox cake?

Our lovely KitchenAid, in action.

Our lovely KitchenAid, in action.

Look at it go!

Look at it go!

I had used 40 wafers in the previous one, and after having tasted a couple on their own, there were 37 wafers left for this cake. It was a couple of weeks later, because I was out-of-town the week in between. (See last week’s post if you want to know the wonderful story why.) The wafers were supposed to last that long, and they did.

Whipped cream anyone?

Whipped cream, anyone?

Seriously. There's plenty of whipped cream here.

Seriously. There’s plenty of whipped cream here.

Since it was no longer her birthday, and there was no reason to keep it a surprise, I asked my wife if she wanted to help make the second cake. She did. And for the first time, we used our KitchenAid stand mixer. It was a wedding gift. After we got it, it sat there for a while. Then eventually, we unboxed it. Then it sat there a while again, as neither of us wanted to use it for the first time without the other. We had gotten married 3 1/2 years earlier. So yes, we were a little bit slow, but finally, we were making something together that we could use it on. It was her idea to add it our wedding registry in the first place, and I’m so glad we did.

Making stacks of cookies.

Making stacks of cookies.

Lots of little stacks of yummy cookies.

Lots of little stacks of yummy cookies.

I have to say, it’s kinda awesome. Making the whipped cream was so easy! It took maybe 5 minutes, and the KitchenAid did all the work. It was so much easier than using a hand mixer. I can easily see how this would make a difference in recipe prep times. It’s quicker and you can do other stuff while it’s going. I’m not saying it changed my life. But just between you and me, I think it did. I know I sound maybe a little bit too excited about it, but I’m telling you it’s as great as you think it is. As a side note, you might recall I used my in-laws’ KitchenAid for the previous recipe, and it was interesting to see how little it had changed since theirs was made.

Frosting the cake.

Frosting the cake.

After making the whipped cream, we started assembling the cookies. My wife and I took turns making stacks of 10 cookies, as I had done last time. Because we didn’t have 40 cookies, the last couple stacks were a little smaller. And once all the stacks were done, we took turns frosting the whole thing. Because a couple of the stacks were shorter, it ended up being short on one end. We used whipped cream to even it out. It was all a lie for appearance’s sake, but it did look nicer that way.

DSC00285

We ended up having a lot of whipped cream left over. We might have been a little too spartan on the whipped cream between the cookies. That was my call as I wanted to make sure we had enough (after a previous experience of not having enough). Also contributing to the leftover whipped cream was the fact that we were a few cookies short. We put a lot of frosting on the top and sides to even it out. But even so, we still had a bunch left over. We made fruit parfaits to use up some more.

DSC00289

Ready for your close-up?

Ready for your close-up?

We waited for it to be ready, and then we tried it. It’s still a great dessert. This time the cookies were not absorbed by the whipped cream as much because we had used too little whipped cream between them. So the texture was different. It was a little bit crunchier, but it was still delicious. The cookies had managed to stay fresh. I would say it was equally as good as the previous cake.

DSC00296

I’m glad I decided to break it up into two cakes, as we got to enjoy it over a much longer period of time. It was a lot of fun to get to use the KitchenAid. (Vroom!) And it was a lot of fun to get to make the cake with my wife. We have fun when we make food together.

DSC00299

Have you ever made such a big batch of something that you had to break it up into two batches? Do you ever make desserts with other people? Also, I hear about a lot of different icebox cake recipes out there. Do you have a favorite one? Let me know!

DSC00302

Chocolate wafer recipe courtesy of smitten kitchen. Icebox cake recipe courtesy of Nabisco.