Tag Archives: chocolate

Chocolate Dipped BBQ Potato Chip Cookies – Gluten-Free

I’m excited to bring to you another gluten-free recipe this week. As you may know, I started doing gluten-free baking a while back because my wife does better when she eats less wheat. She can have some wheat without any ill effects, and so we sometimes don’t think about it. However, issues seem to accumulate over time, and that reminds us. Today while we were out grocery shopping, we did get some fun gluten-free foods, and having them around will definitely help.

But I don’t want her to miss out on my desserts, so I want to bake more gluten-free recipes again. I had that on my mind this week when putting this recipe together. I found a great recipe on smitten kitchen for potato chip cookies. It looked like a great recipe, and easy to make gluten-free, but it turns out I didn’t have any pecans. But by that point, I was kinda set on doing something to use up the potato chips I had. So I did some digging and found this other potato chip cookie recipe which looked good, so I ended up using that. But, I skipped the powdered sugar dusting from this recipe and went with the chocolate coating from the smitten kitchen recipe I had originally wanted to make.

dsc02440

I tweaked the recipe a bit. One big change is that I went with gluten-free flour instead of regular. I didn’t have any of the Trader Joe’s gluten-free flour I usually use. But I had some Bob’s Red Mill gluten-free flour. I used some xanthan gum with it, as they recommend it in conjunction with the flour when making baked goods.

dsc02442

Another change I made to the recipe was that instead of using plain potato chips, I used barbecue potato chips. They say that what you make can only be as good as the ingredients you use. So I didn’t use just any old barbecue potato chips. I used what I consider to be some of the best barbecue potato chips anywhere. They are Middleswarth kettle cooked barbecue potato chips. As I’ve mentioned before, I’m a bit of a snack food snob (aka gourmet, aka connoisseur). These chips are ones I grew up on, so maybe I’m biased, but I think they’re really good. I used most of one of these 4.5 ounce bags. I crushed them by hand bit by bit inside a sandwich bag. Granted, I was also snacking on them at the time, so let’s say I used about three to three and a half ounces of chips.

dsc02445

For the chocolate, I used what I had on hand. That may seem contradictory to my statement above about using the best, but I don’t think it is. I used half of a dark chocolate bar, the end of a bag of semi-sweet chocolate chunks, and some bulk milk chocolate. It was all good chocolate, so no worries there. And I think one skill that’s useful for a cook or baker to have is being able to make something good out of whatever you have on hand.

The recipe was pretty easy to put together. I mixed everything by hand. I baked the cookies for about 8 1/2 minutes. I ended up with 35 cookies.

dsc02450

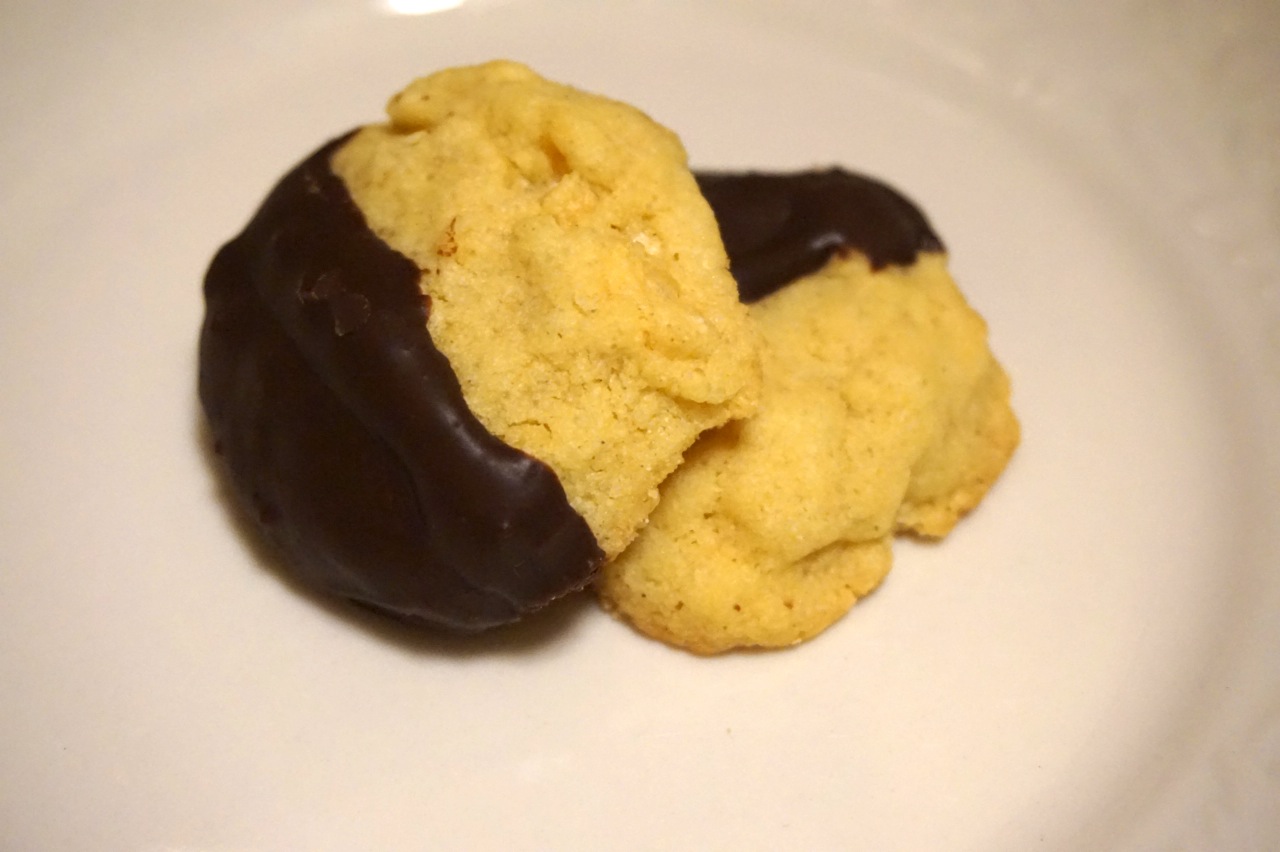
After the cookies cooled, I melted the chocolate and oil in the microwave and stirred it together. I dipped the cookies into the chocolate. Actually, I dunked them a little bit and then splooshed on the chocolate with a spoon. (Yes, “sploosh” is an industry term.) The cookies were a little crumbly and there was some slight breakage during this process. I then let them sit so the chocolate could set.

dsc02452

After the chocolate set, I tried one. First the cookie part without the chocolate. It’s really good! It tastes kinda like shortbread, but I can also taste all the little crunchy potato chip parts. There is just a hint of the barbecue flavor. I then tried the side with the chocolate. It’s also good! There are a lot of flavors going on there, but they all seem to work together. I think this gluten-free flour is pretty good, too. It’s not quite as smooth as Trader Joe’s, but not bad at all.

dsc02453

After I tried one, I cleaned up the cookies. While the chocolate was setting, I let them sit on parchment paper on top of the cooling rack. I figured it would be a lot easier to clean up than having them directly on the rack. It was, but some of the cookies got stuck to the parchment paper, and as I pulled them up, some of the chocolate got left behind.

dsc02454

I brought some into work the next day. After I offered them and explained what they are, a couple of my co-workers took two each before even trying them. I guess they just knew the cookies would be good. 🙂 One of my other coworkers gave me a very funny compliment. She liked the cookie, and gave me a thumbs up. Then she said, “I would give you two thumbs up, but one of them is holding my cookie.”

dsc02456

As I was going on my dessert rounds, one person was in a meeting, so I was going to come back, but he waved me in anyway, seeing that I had cookies with me. He referred to me as one of the best bakers to his meeting mate. After trying one he said, “I would’ve thought you bought this in a store.” In short, everyone loved them. I didn’t mention to most people that they were gluten-free. No one seemed to notice.

dsc02458

There’s one other thing I should mention. As it turns out, the particular potato chips that I used are not gluten-free. I didn’t realize it at the time, but I double-checked the ingredients, and the barbecue seasoning in these chips contains wheat flour. However, you could easily make these with another kind of chips. For instance, Middleswarth makes lovely plain potato chips as well, or if you prefer barbecue chips, Martin’s makes some that are gluten-free. Either one would be a lovely choice.

dsc02459

Do you have a favorite potato chip? I’m biased towards the ones I know, and while I’ve tried many others, I haven’t tried them all. If you know of a particular chip I should try, let me know. I’m always interested to try new ones out. And if you try making these cookies, I’d love to hear how they turn out with your favorite chip in them. So, happy baking and happy crunching!

dsc02460

If you want to make them how I did, here’s my version of the recipe, adapted and combined from the following:

Potato Chip Cookies recipe courtesy of The Washington Post.

Chocolate dip courtesy of smitten kitchen.
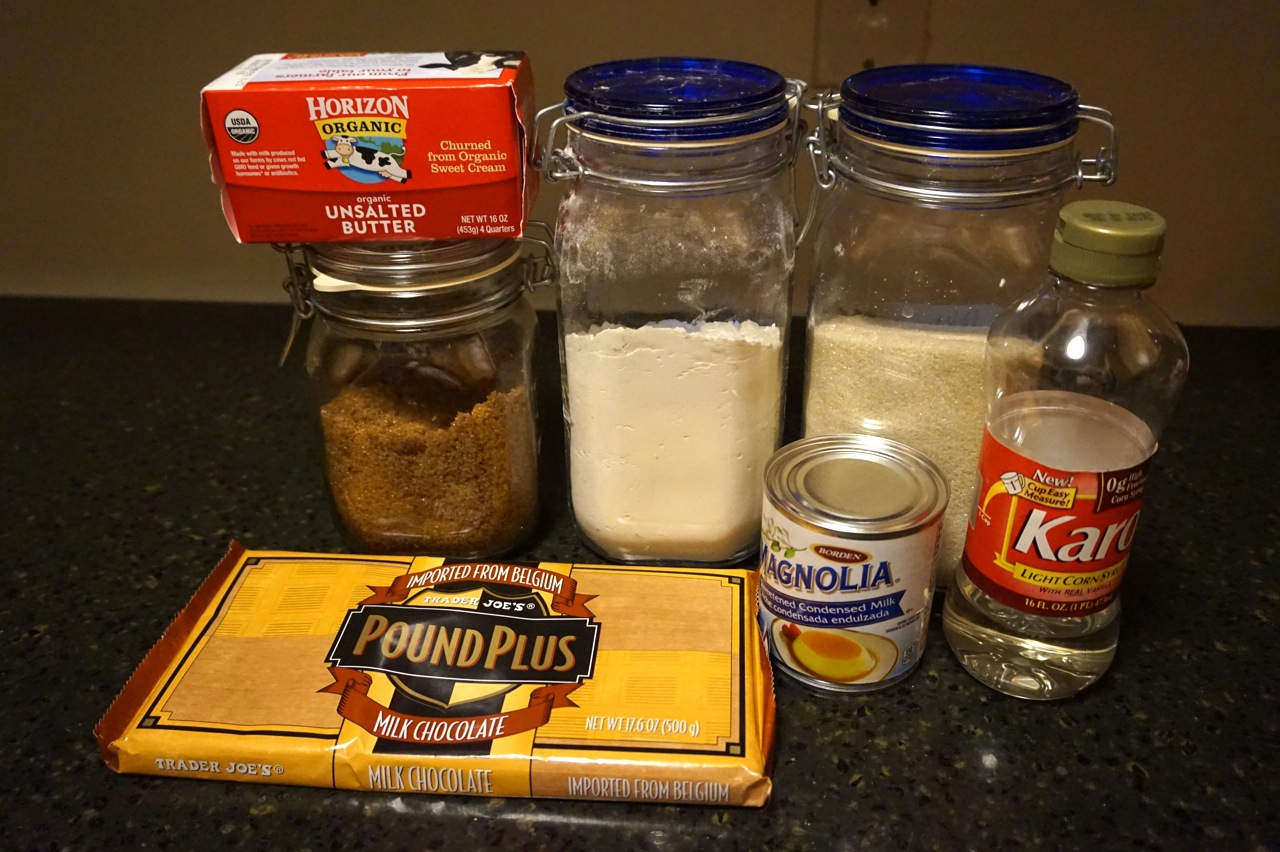
Ingredients:

For the cookies:

2 sticks unsalted butter

1/2 cup sugar

1 3/4 cups gluten-free flour

7/16 tsp xanthan gum (if your gluten-free flour calls for it, as mine does)

3/4 cup crushed barbecue potato chips

1 teaspoon vanilla

For the dip:

4 ounces of chocolate

1 teaspoon grapeseed oil

I didn’t change the directions significantly, so you can follow along from the original recipes for those. Enjoy!

Gluten-Free Banana Chocolate Muffins

Happy October everyone! Now that fall is in full swing here, it’s clear that pumpkin overload is in full effect. (Not to be confused with Full Force.) I’m sure you see it too, with the overflow of pumpkin-y things in every shop. We often shop at Trader Joe’s, and it’s clearly the case there. They have more pumpkin products than you ever thought could exist. (Or should exist, really.)

You can almost plot out the seasons by what food is prevalent at Trader Joe’s. The season before pumpkin season at Trader Joe’s seems to be mango season. It’s the same as with pumpkin, just with mangoes. I knew the seasons had started to change when the mango and pumpkin products overlapped briefly. But the mangoes have been fully replaced by pumpkins now.

Alas, seasons change. Time marches on. Sometimes things slip through the cracks. Most recipes I write about soon after I make them, but some sneak past (they’re sneaky like that), and I don’t get to write about them till much later. So I’m writing to you this week about another one of those. I bring you another entry from my (soon-to-be-picked-up-and-become-a-major-tv) series, recipes of future past.

I haven’t been baking as much gluten-free these days. Which means I have a lot of gluten-free flour stocked up, so I really need to do so again. But this was a good gluten-free muffin recipe from the New York Times. You might remember the gluten-free whole grain cheese and mustard muffins I had written about previously. These banana chocolate muffins are their siblings. That is to say, they came from the same article.

These days I generally use regular recipes and just substitute in gluten-free flour. But back in the day when I made this, I wasn’t as confident that I could do that, and so I sought out recipes that were specifically gluten-free. In this case, I followed the ingredients listed in the recipe and I used the different gluten-free flours they listed.

Bananas seem to go well in muffins. They’re in this recipe. They’re in the gluten-free peanut butter banana chocolate chip muffins I made. And they’re in one of my favorite muffin recipes ever from Moosewood Cookbook.

It’s been a while, but as I remember these, they were good muffins. Banana-y and cocoa-y, with bits of chocolate inside. As with some other gluten-free baked goods, they were best fresh or warmed up. After a while though, the texture is different, and they end up being more grainy.

They look pretty decadent, but they’re not as ridiculous as they might seem. Check out the ingredient list.

As they’re way in the past at this point, and I didn’t have much in the way of notes, I don’t have much more to say on them. But let me know if you try them out. I’d love to hear your take on them. Or if you have any favorite muffin recipes, gluten-free or otherwise, feel free to share those as well. Or favorite banana recipes. Or, you know, the location of the fountain of youth. I’m not picky.

Recipe courtesy of The New York Times.

Tate’s Bake Shop Chocolate Chip Cookies

On this blog, I’ve written about a lot of the unusual recipes that I’ve made. There was the maple syrup taffy. The mini sweet potato cheesecakes. The lime cornmeal cookies. The different cookies with potato chips in them. Adorable little teddy bears in marshmallow hot tubs. And while I’ve definitely made some more traditional recipes, I haven’t actually written about good ol’ regular chocolate chip cookies. One time I made salted chocolate chip cookies, but that was really the closest I’ve done.

dsc02405

So, I thought I would do something unusual and make something regular. 🙂 I decided to make chocolate chip cookies. Since everybody and their grandmother has a chocolate chip cookie recipe, which recipe to use could have been a difficult decision. Luckily for me, I had an easy answer. Since I was making them for my friend’s birthday, I thought I would make something he would particularly enjoy.

dsc02406

He’s a big fan of Tate’s cookies. Now, generally I’m a big advocate of homemade cookies. (Wonder what would have given you that idea?) But if you’re looking to buy cookies that someone else made, you can’t go wrong with Tate’s. For example, in a previous incarnation of one of my gaming groups, we consumed an exceptional amount of them. They’re a NY State specialty, but you can get them all over the place. And since the birthday boy really enjoys them, I thought it would be cool to make some for him, as I have the cookbook from Tate’s. Well, as it turns out, I have a cookbook of theirs, but not the cookbook with this recipe. So I had to find it elsewhere. (Thank you, internet!)

dsc02407

They were pretty easy to put together. I mean, they’re chocolate chip cookies after all. A few recipe notes: I didn’t have salted butter, just unsalted, so I added extra salt to compensate. I didn’t use eggs. I used aquafaba instead. And it turns out that the 2 cups of chocolate chips was a whole bag.

dsc02412

I baked them on baking sheets covered in parchment paper. I used three sheets and rotated them in and out of the oven through the process, using one or two sheets per batch. I used my handy-dandy cookie scoop to make the cookies, but that made the cookies too big. So I split the scoops of dough roughly in half, which was about right. I ended up with 46 cookies. (The recipe is supposed to make 54, so I guess mine were a little bigger.)

dsc02414

I baked the first batch for 12 minutes, which wasn’t quite enough. I baked the second batch for 14 minutes which seemed just right. For the next batch, I also baked them for 14 minutes, but that was too much for these. Some might have been a little smaller. It’s also possible that opening and closing the oven to check a couple of times during the previous batch might have cooled it down a little, which made for the longer time. The last batch was in for 13 minutes which was just right.

dsc02418

They smelled delicious while baking. That is, for a while they smelled really good, but as with any smell, after a while you get used to it. At one point I went into another room and came back and I could notice the difference. It was like walking into a giant cookie. And while they were cooling, I stepped outside for a couple of minutes. When I came back into the apartment, the scent hit me like a ton of bricks. Err, cookies. It was fantastic.

dsc02419

dsc02421

Tate’s cookies are known for being big, flat, and crispy. And delicious. Some of these turned out more like Tate’s cookies and some less. I tried one that was closer to the Tate’s ideal and one that was further from that. The further one was good, but had just a hint of Tate’s-ness. (Yes, that’s a word now.) The closer one was also good. It was not exactly like a Tate’s cookie, but it was close. It was buttery, crispy, thin, and delicious.

dsc02424

I brought some into work for the birthday boy, who happens to be not just a friend but also a coworker. But due to both of us being out of the office for one thing or another for a few days, it wasn’t until several days after his birthday that the cookies made it in. By that point it was also another coworker’s birthday. So, the cookies ended up being for two birthdays. Huzzah! More merriment! More celebration! More omnomnomnomnom.

dsc02431

They both appreciated the gesture, and really loved the cookies. In fact they loved them so much they, and everyone really, came back for more and more. I mentioned to the Tate’s fan about using their recipe. He said mine were even better. (As he pointed out, one advantage mine had is that they were fresh.) Everyone else loved them as well. I brought in about a dozen and a half, and they were gone very quickly. So quickly in fact that I didn’t really get to make my dessert rounds. So I brought in a bunch more the next day. Those also disappeared quickly. People kept telling me over and over again how good they were. I would have to put these pretty high up on the list of recipes enjoyed by my coworkers.

dsc02433

They were good, simple, buttery, crispy cookies. I didn’t happen to mention that they were egg-free, and I don’t think anyone had any idea. Aquafaba is generally such a good substitute that no one can tell the difference. Plus, they were just really good cookies. I’m glad I made them. It makes me want to try some more simple recipes.

dsc02435

Do you have any favorite recipes that wow the crowds but are super simple to make? Do you have a favorite chocolate chip cookie recipe? A favorite style of chocolate chip cookie? Have you been experimenting with aquafaba or other egg substitutes? I’d love to hear your thoughts in the comments below!

dsc02437

Recipe courtesy of Tate’s Bake Shop Cookbook via Bon Appétit.

Oatmeal Chocolate Chunk Cookie Peanut Butter Swirled Brownies

Sometimes combining two things makes them better. Sometimes, it makes them more than the sum of their parts. Sometimes, not so much.

Brownie batter.

Brownie batter.

This recipe was on my to do list. And it looked just ridiculous enough to try. I mean a brownie, swirled with peanut butter, and mixed with a chocolate chunk oatmeal cookie. Ridiculous and awesome sounding, right?

Oatmeal cookie batter.

Oatmeal cookie batter.

Another thing this recipe had going for it was that I had all the ingredients on hand. And not having to run out and buy ingredients means it moved up a bit on my list. That, and it called for a bunch of oats, which I was trying to finish up the last of. (In my pantry not, you know, in the entire world.)

Assembly part 1.

Assembly part 1.

There is a lot going on in this recipe, including three different chocolates. For the first chocolate, in the brownie batter, I used bulk milk chocolate that I happened to have. For the second chocolate, mixed into the brownies, I used semi-sweet chocolate chunks. For the third chocolate, split between the oatmeal cookie dough and the top of the brownies, I kinda cheated. I used more of the semi-sweet chunks for that. (I learned a lot about chocolate from this David Lebovitz post.)

Assembly part 2.

Assembly part 2.

Everything went swimmingly, but I did forget to chop the first bit of chocolate before melting it. I mixed everything by hand, one bowl for each part of the recipe. It was pretty straightforward to put together. Each part smelled pretty good: peanut buttery brownies and oatmealy cookies.

Assembly complete.

Assembly complete.

Once both parts were done, I moved on to putting it all together. I dropped the first brownie bits by large drops, maybe only 5 or 6 for the whole dish. Then I spooned the oatmeal cookie bits all around. I did slightly smaller dollops for the rest of the brownie bits.

Fresh from the oven.

Fresh from the oven.

Then I swirled the peanut butter around the brownie bits and then swirled some of that in with the other layers, as it wasn’t quite spread out evenly across the dish. Then I spread the rest of the chocolate chunks over the top.

dsc02320

I baked it for 30 minutes, but it didn’t seem quite done. I baked it for the other 5 minutes, and it seemed done at that point. I let the dish cool on a cooling rack until after dinner. It smelled lovely.

dsc02321

How did it taste? It was… okay. Not bad at all, just not as exciting as I was expecting. The peanut butter was inconsistently mixed, which is totally on me, so it was hit or miss on tasting that. The oatmeal bits were fine, but not amazing. The brownie bits were also fine, but nothing special. It was a little bit dry, so I might have been better off baking it a little bit less. (I understand there are a lot of “b” words in that sentence, so I apologize if you’re allergic to “b’s”.)

dsc02326

My wife said the two different parts were both good in their own right, but they have such different textures that she didn’t think they fit well together. Kinda like two people who are really good people on their own but who shouldn’t date each other. All in all it was perfectly fine, but I wasn’t wowed by it. I don’t think it’s a bad recipe, it’s just not what I was looking for.

dsc02327

If you try it out, let me know how it goes. If you happen to have any good combinations of brownie and oats, I’d love to hear about it. This is my second attempt. (You can read about the granola brownies here.) Neither of them have been show stoppers, so if you have one, I’m all ears.

Recipe courtesy of Half Baked Harvest.

Chocolate Peanut Butter Shortbread

Have you ever had a brilliant idea? Like something just pops into your head, and you go, “Wow! Why didn’t I ever think of that before?” That happened to me the other day. It wasn’t of the  “end world hunger” or “create world peace” type of brilliant ideas, but I thought it was pretty good. I had the idea to make chocolate peanut butter shortbread by using my millionaire’s shortbread recipe and substituting peanut butter for the caramel.

DSC02276

Great idea, right? I thought so, too. (Although if I could figure out how to end world hunger or create world peace I’d be really happy.) The next step was finding a suitable recipe to borrow the peanut butter filling from. At first I thought I might use the filling from the buckeye brownies that I had made. But I started looking through my to do list, you know, that list of recipes you accumulate when browsing the internet that you want to make one day. You have one too, right? Well, in that list I found a better candidate. The ingredients were easier, and it had a great tip about making sure the peanut butter layer stuck to the other layers, something the buckeye brownies had a problem with. The recipe was similar to millionaire’s shortbread anyway, so I figured it would be a good fit.

DSC02277

So I started off making the shortbread. I’ve done it like a million times ( 😉 ), so easy peasy. While that was baking I made the peanut butter layer. I decided not to use a mixer for it, but rather to do it the old-fashioned way and mix it by hand. (I know, roughing it.) It was pretty straightforward. To make the mixing easier, I mostly melted the butter instead of just softening it. Then I just mixed all the ingredients together and put it in the fridge to chill.

DSC02279

Back to the shortbread recipe, I needed to melt some chocolate. The recipe I use calls for 190 grams of chocolate. But the secret from the other recipe for gluing down the peanut butter layer was to use more melted chocolate.

Chocolate glue layer.

Chocolate glue layer.

I went with 240 grams. Why 240? I used a very complex scientific principle called… eyeballing it. (Super extra bonus points if you get the reference.) That recipe needed 1/4 cup of chocolate for gluing it down, so I figured I needed 1/4 cup extra. I looked at how much chocolate might fit into 1/4 cup and I weighed it.

Peanut butter layer with the start of the top chocolate layer

Peanut butter layer with the start of the top chocolate layer.

Then I melted the chocolate as per usual. I ended up spreading about 2-3 tbsps of the melted chocolate on top of the shortbread as the glue. Then I spread the peanut butter on top, partially using utensils, partially using my hands. The other recipe called for refrigerating it after adding the chocolate glue layer, but before adding the peanut butter layer. I didn’t do that. I just added the peanut butter right away. So some of the chocolate oozed up a bit from underneath. I wouldn’t know till later if it stuck properly.

Top chocolate layer.

Top chocolate layer.

After I put the peanut butter layer on, I spread the rest of the chocolate on top. I forgot to take a picture after the peanut butter layer, so I took one as I was just starting to put the top chocolate layer on. Then I put it in the fridge overnight, as it was already late.

Totally chilled.

Totally chilled.

Overall, it was fairly easy to make. Two thirds of it were the same as the millionaire’s shortbread. And doing the peanut butter instead of the caramel didn’t make it any more challenging.

You can see how the bottom chocolate layer oozed up around the side.

You can see how the bottom chocolate layer oozed up around the side.

So the next night we tried it. I took it out of the fridge to let it get to room temperature before cutting it. I love the shapes in the corners caused by the bunching up of the parchment paper. When I started cutting it up, I realized that it looks kinda like a candy bar with a big fluffy center. I also noticed that there was a lot of peanut butter filling in comparison to everything else.

One of the cool corner shapes.

One of the cool corner shapes.

And how was it? Well, first of all, it was delicious. And second of all, the peanut butter is the star of the show. In the millionaire’s shortbread it’s complementary, with all three layers working together. But in this one, it’s all about the peanut butter. It overpowered the other layers, to the point where I didn’t taste much of the shortbread or chocolate. It was delicious, but it was basically a vehicle for the peanut butter. And the chocolate seemed to work well as glue, as the whole thing stuck together well.

Another one.

Another one.

My wife described it as either a “Reese’s Peanut Butter Cup on steroids” cookie, or as a softer and creamier quadruple decker Reese’s Peanut Butter Cup on top of shortbread.

DSC02299

If I made it again, I would put in less of the peanut butter layer (probably half as much). I would also probably add a little bit more chocolate. I think if it was more evened out, the three layers would work better together. As it is, the other two layers are kinda jealous of the peanut butter, and that’s not good for anyone.

DSC02301

So, I encourage you to try this recipe. The first reason is that it’s delicious, and I’m sure you’ll enjoy it. The second reason is a little more selfish, in that I hope you’ll iron out the kinks. In any case, let me know how it goes. I’d love to hear your results. And if you have frankenstein creations of your own that you want to share, feel free to let me know that, too.

DSC02302

Original millionaire’s shortbread recipe courtesy of Allrecipes.com. My slightly modified version here. Peanut butter filling (and chocolate glue idea) courtesy of Once Upon a Chef.

World Peace Cookies

Given all that’s happening in the world today, I truly wish that these cookies could bring about world peace. If that were the case, I would happily make them non-stop until that happened. Now to be sure, bringing about world peace is kinda part of their pedigree. They’re named world peace cookies because one time they were made, the person having them thought that if everyone ate these cookies it would bring about world peace. I would be very happy if that’s all it took. I guess we’ll never know unless we try, right? 😉

DSC02128

I made these for my family’s 4th of July party. (You can read some of the history of this party in this earlier post.) I wanted something big enough for a crowd, easy to transport, and that would last a few days because I was making the recipe ahead of time. I found lots of fun recipes, but I settled on this one because it checked all the boxes.

Chopped up chocolate. Yum!

Chopped up chocolate. Yum!

For the chocolate, I used Trader Joe’s Super Dark 73%. I was trying to figure out the difference between bittersweet and semisweet. According to this article at least, there seems to not be a difference. So I went for the one that seemed darkest. I chopped it all up by hand into little chunks.

DSC02131

It was a pretty easy recipe. Thank you KitchenAid for helping to make it easy. I love setting it to mix things and going off to do something else. It’s like an extra set of hands. (Hey look ma, more hands!) I didn’t use a towel over the bowl like suggested, rather I used the KitchenAid pouring shield (and my hand a little bit). It worked out well.

Dough logs.

Dough logs.

I mixed in the chocolate by hand. In the dough it looked like chocolate looks in ice cream. (Now I know what to do next time I make ice cream. 🙂 )

First batch, ready to bake.

First batch, ready to bake.

Following smitten kitchen’s own comment in the comments section below the recipe (and matching my own lack of time to wait around), I ended up sticking the dough in the freezer. It ended up hanging out there for about an hour. That might have been too long, as it was a little hard to cut the dough until it warmed up a bit.

First batch, fresh from the oven. The perspective is very close to the before picture, so you can compare.

First batch, fresh from the oven. The perspective is very close to the before picture, so you can compare.

I had measured out the inch and a half diameter for the dough logs initially. And I measured out the half-inch for the first cookie, but the rest I just guessed on, using that first one as a guide. They were mostly close to that size, although mileage varied a little bit. Some of them did break apart as the recipe warned was possible, but I just smooshed them back together.

DSC02146

So I chopped off slices to make the cookies and then I baked them. I used Silpats for the first two batches, and then since they were still cooling, I used parchment paper for the third batch. (3 batches x 12 cookies per batch, for a total of 36 cookies.) Some of the cookies got a little warm while they were sitting out as I was cutting cookies for the sheet. The last sheet I stuck back in the fridge for a bit before baking to help counter that.

Second batch.

Second batch.

I did one sheet at a time as instructed and set them to cool still on the sheet, on a cooling rack. I put the cooling rack in the living room, as who has that kind of room in the kitchen. 😉 They looked really nice. They didn’t smell overly chocolately or sweet. They were more subtle. I let them cool and put them away.

Third batch.

Third batch.

I tried one the next night. They were really good! A good, solid chocolate cookie. As much as I would like to think it’s possible, I don’t know that they will bring about world peace, but I think they’re good cookies. My wife liked them as well, probably more than me.

DSC02155

I brought them to the party. After I made them, I had left them in the freezer as the party was a few days away. I took them out of the freezer to travel, and I put them back in the freezer once I got to my destination. They traveled really well. I took them out the day of the party.

DSC02150

There was a whole lot of dessert competition at the party. I’m not saying that there was an official competition with prizes and everything. (Although, idea! 😉 ) However, lots of people brought dessert. But even in the face of such competition, they went over well. People really enjoyed them. They were amused by the story of the name. I got comments on how good they were. And one person in particular thanked me for catering to the dark chocolate lovers.

DSC02158

The recipe made three dozen cookies. I brought two dozen to the party (and came back with none). That left one dozen at home in the freezer, minus the taste testing we did. My wife doesn’t want to part with them so quickly. So they’re hanging out in the freezer for a while.

DSC02164

These are easy to make and delicious. So, yes please make them if you enjoy chocolate. Or if you want world peace, because hey, you never know. Speaking of which, do you have any recipes that are so good you think they could bring about world peace? I’d love to hear, so let me know in the comments below!

Recipe courtesy of smitten kitchen.

Millionaire’s Shortbread – Thankful Edition

As you may know, I’ve made millionaire’s shortbread many, many times. It’s fun, it’s easy, it’s delicious, and it’s one of my favorite recipes to make. But, I haven’t made it in a while. Fortunately, there’s a pretty easy solution to that, so I decided to take care of it.

DSC01737

As you may also know, I like playing games. A friend was putting another game together, and I decided to make millionaire’s shortbread for everyone to enjoy while playing. This friend is the one who first suggested I make millionaire’s shortbread, oh so many moons ago. He really enjoys it. I brought it the last time he organized this particular game, and it had gone over really well. I looked for other recipes to make instead, always trying to keep it fresh, but nothing else really struck me, so I went for this again.

A simple dough.

A simple dough.

Since it was going to be a whole gaggle of people, I made a double recipe. I can almost make these in my sleep, but not quite, so I referred to the recipe a little bit as I was making it. The way I cut it, it ended up to be about 60 cookies, although they were not uniform. One of these days I need to make a template or something.

Ready to bake.

Ready to bake.

I brought about 35 cookies to the game. People were very excited to see that I brought them, particularly those who had them last time and knew what they were in for. The friend I made them for was very happy to have them, as was everyone else. They went over very, very well.

Fresh from the oven.

Fresh from the oven.

I have to say the caramel was pretty amazing. Like extra caramely, or something. Really nice. I used different sweetened condensed milk than I normally use, so maybe that was it? Or maybe I’ve just gotten really good at making caramel. 😉

Topped with freshly made caramel.

Topped with freshly made caramel.

There were plenty of cookies left, so I brought some into work. People at work kinda fell in love with them. I’ve brought a bunch of different things into work before, including these several times, but people reacted more strongly to these than probably anything else. How strongly?

And then some chocolate.

And then some chocolate.

I got several comments that I should sell these. One person said it made their eyes flutter, and there was even a proclamation that it was my best item yet. People are generally happy when I bring stuff in, but this was above and beyond. These were a big hit.

After chilling they look like this.

After chilling it looks like this.

I received a lot of thanks for making these, both at the game and at work, but I want to thank my friend as well. So thank you, good sir, for first suggesting them, and thank you for putting together an awesome game. These cookies were made in your honor, and I’m glad you enjoyed them.

And like this from the side.

And like this from the side.

If you’ve made these before, you know how simple they are to make, and how amazing they taste. The recipe has a very good effort to result ratio. If you haven’t made these before, I’m not quite sure what you’re waiting for. They are definitely worth it.

Cutting into small pieces. They're very rich, so this is a very important step.

Cutting into small pieces. They’re very rich, so this is an important step.

I’d love to hear your experiences with making millionaire’s shortbread. Do people love them whenever you make them? Do you have your own special recipe or interesting variation? Let me know!

Voila!

Voila!

Another word for it would be... yum!

Another word for it would be… yum!

See my first millionaire’s shortbread post for recipe & recipe attribution.

Ice Cream Icebox Cake

So as you know last week, I made a giant icebox cake for my wife’s surprise birthday party. It’s her favorite cake, and since I knew it would get devoured at the party, I wanted to make her another one so she could enjoy it. And, as I mentioned, I wanted to kick it up a notch.

I had recently discovered this no-churn ice cream recipe. So I thought, what about making an ice cream icebox cake? That is, replace the whipped cream with ice cream. Surely, I thought, someone would have done it before. But when I looked, all I found were some vague references along the lines of “wouldn’t that be an interesting idea?”. So I plunged ahead into the unknown. I couldn’t get any clear info on whether or not it would work the same, but I figured it would.

The ice cream ingredients. Magic!

The ice cream ingredients. Magic!

I made a double recipe of the ice cream, as I didn’t know how much I would need. I had made a bunch of cookies for the first icebox cake, and this one. I figured I would use about 3/4 of the cookies for the first cake, and use the rest for this one.

Because the ice cream needed a while to set, I made it the night before. I waited until my wife went to sleep, and then gathered the ingredients I had secretly assembled. In this case, I had just hidden the ingredients in another room.

The ice cream, ready to freeze.

The ice cream, ready to freeze.

The ice cream recipe, as I mentioned when I made it the first time, is pretty straightforward. It was complicated a little bit by wanting to do it secretly, but it was still pretty easy. I used our immersion blender with the whisk attachment as that was easier to clean after the fact. It was also easier to transport into another room. The kitchen is not far from our bedroom, and even with my wife asleep and the door closed, I didn’t want to risk it.

I followed the instructions for making the ice cream. I added a little bit of vanilla, as I thought that vanilla ice cream would be a good choice, and it would mirror the vanilla that gets added to the whipped cream in the regular icebox cake.

Packaged up and going to freeze.

Packaged up and going to freeze.

So I made ice cream, and buried it under some other things in the freezer, betting that she wouldn’t go digging through it in the morning. I also sealed the ice cream in containers with lids, as opposed to using wax paper. (It was the cleanest way to bury them.) I cleaned up and let the ice cream set work its magic overnight.

The next day I made the chocolate wafer cookies, as I described last week. I made the regular icebox cake first, as that was going to be used first, and I wanted to give it the longest time possible to set. Once that was done, I went to work making this.

Fresh from the freezer.

Fresh from the freezer.

First things first, what to put it in? I needed something big enough, and that could go in the freezer. I ended up using a 9″ round cake pan. Since it was going to be a cake anyway, this seemed appropriate. I lined it with foil. I figured that would make cleanup easier. I also thought it might let me pull the cake out of the cake pan.

So then how to make it? I was kinda making it all up here. So I just started building it like I would a regular icebox cake. I grabbed some cookies and started filling in between them with ice cream. I laid down a stack of those and started on another. One thing soon became clear to me. It’s hard to build an icebox cake in a circle. A square or rectangular dish would have probably been better.

Assembly. It was a little messy.

Assembly. It was a little messy.

So I soon had a few stacks filling up part of the space, but because it was a circle, I then had to fill in here and there to get all the in between spaces. Eventually I got it reasonably filled. I then had to make another decision. Should the outer layer be cookies or ice cream? If it were a cookie cake, and maybe for structural reasons, you’d want cookies on the outside. But for an icebox cake you wouldn’t. I ended up going for the full icebox and filled in the outside layer with ice cream. I also filled in the rest of the spaces with ice cream. And covered the top with ice cream.

After that, I covered it in plastic wrap and buried it in the freezer for secrecy purposes. I didn’t end up using as many cookies as I thought I might. Maybe 30 or so? I ended up using about one and a half recipes worth of the ice cream, so I’m very glad I made a double recipe.

Assembled, and going back into the freezer.

Assembled, and going back into the freezer.

With the second cake done, I did all the cleanup, and all the major preparation was now done. I sat down for a couple of minutes to relax before the evening’s festivities.

Last week’s post detailed what happened next. One thing I’ll say is that at the party I let my wife know that there was a second dessert waiting at home. When we got home, there was no way we were going to eat another dessert, but I gave her a sneak peek at what was to come. She was very excited and still kinda flabbergasted from the whole surprise party. I won’t say that this was the icing on the cake, but it was very well received.

Voila!

Voila!

We waited until the next evening to try it. The way it had frozen made it challenging to remove, so I decided to cut it right in the pan. But it’s a non-stick pan, so I had to tread carefully. A large spatula ended up being the tool of choice. And letting it sit on the counter to warm up a little bit didn’t hurt either.

Once a slice was freed from the pan, you could see it was clearly a good-looking cake. It actually looked a bit like icebox cake. A sea of white surrounding some layers of chocolate.

Yum!

Yum!

And how was it? Wow. It was an ice cream cake. And it was an icebox cake. It totally worked! I’m not sure exactly why, but it only partially softened the cookies. (It had over a day by the time we ate it.) But this was actually a good thing. It tasted like a Carvel ice cream cake.

I’m sure not everyone is familiar with Carvel, but it’s a chain of ice cream shops. They have these pretty awesome ice cream cakes. And the way the cookies softened in this cake made them taste just like the chocolate cookie/cookie crumb they used in theirs.

DSC01732

It was a nice soft vanilla ice cream with these great, mostly softened, but slightly crunchy chocolate bits throughout. They went perfectly together and made for a delicious cake. A slight change from the regular icebox cake, but a good change nonetheless.

I would highly recommend trying this out. The ice cream is super easy. The cookies are just mix, slice, and bake. The cake assembly is easy. And all in all, it’s greater than the sum of its parts. And for me, it checked off all the boxes I needed. Second birthday dessert, check. Keeping true to my wife’s favorite dessert, check. Kicking it up a notch, check. Trying something new, check. And “inventing” a new recipe, also check.

Close-up.

Close-up.

So when summer hits, and you’re looking for an easy, yummy, totally homemade and totally knock your socks off dessert, you’ll be glad you remembered this. And when you want to wow them a second or a third time, you’ll also remember that the ice cream is easily modified into many, many, different flavors. So go forth and enjoy. I’d love to know how it all turns out!

Inside the cake pan.

Inside the cake pan.

Ice cream recipe courtesy of The Kitchn. Chocolate wafer recipe courtesy of smitten kitchen. Cake recipe inspired by Nabisco, but imagined and created by me.

Icebox Cake Surprise Edition

I’m a firm believer that birthdays should be special. I think we generally fail to appreciate the people around us. So on people’s birthdays I like to take advantage of the opportunity and show people that I’m thinking of them and that I think they’re special. There are lots of ways of doing this. Obviously telling them is the most straightforward way. But I also like to bake for them.

If I know someone well, I often have a good idea of what to make them for their birthday. My wife’s favorite cake is icebox cake. I’ve made it for her birthday a couple of times so far. (You can see previous posts here and here.). Because it’s her favorite cake, she never gets tired of it. But even so, every year, I try to kick it up a notch. The first year, making it was a big deal. The second year, I baked the chocolate wafers that make up the cake, instead of buying them. This year is no different. What I did to kick it up a notch this year was two-fold. First, I made a giant icebox cake. And second, I actually made two cakes. (I’ll tell you about the second one next week.)

DSC01710

What made this year’s cake more complicated was that her whole birthday was a surprise. It started with a surprise party. Well, actually it started with nothing. At first, she wasn’t sure what she wanted to do for her birthday, so we didn’t plan anything. But as it got closer to her birthday it became clear that she wanted to celebrate with her friends. It seemed too late to her to throw something together at the last-minute. But I was undeterred, and I put together a last-minute surprise party. It was a little bit of a challenge – I won’t say how much, but there was a spreadsheet involved – but in the end we got a bunch of people together.

And since the party was a surprise, I decided to make the dessert a surprise too. I bought the ingredients ahead of time, and I hid them. The small container of milk was hidden at the very back of the fridge. I got shelf stable whipping cream and hid it in another room. Everything else was hidden in plain sight. I also had to find time to make the cake while she wasn’t around. That’s difficult when you live with someone. So I took off work on the day of her birthday, which had the added benefit of making sure I got home in time to celebrate. I spent a good chunk of the day baking the cookies and putting the cakes together.

The dough, all mixed up.

The dough, all mixed up.

That’s because I needed to make a lot of cookies. (In case you don’t know what icebox cake is and you’re confused about why I’m referring to cookies in a cake recipe: icebox cake is made of chocolate wafer cookies which are slathered in whipped cream and put in the fridge. After several hours, the whipped cream turns the cookies into a cake-like consistency.) Because I was making two cakes, and one of them needed to be party size, I made a double recipe of the cookies. This is roughly equivalent to 4 boxes of the original wafer cookies.

Making the cookie dough involves mixing it in the food processor. After mixing, I kneaded it all together on freezer paper. Then I rolled the dough into a log and refrigerated it for about 90 minutes wrapped in that same freezer paper. For ease of measuring and mixing, as well as not overloading the food processor, I did it in two batches and repeated these same steps over for the second batch. (The second batch was in the fridge a little over an hour.)

The dough, in log form.

The dough, in log form.

After chilling, I took the logs out of the fridge to cut them into cookies, but in between cutting each batch of cookies, I put the dough back in the fridge. The freezer paper was easier to cut on than the foil I used previously, and refrigerating it in between sheets of cookies helped keep the dough the right consistency. I cut them as thin as I could. Since I was just eyeballing it, the rolls were a little uneven, but I reshaped them as I cut them, and re-rolled any bits I had cut off.

I did one sheet of cookies. Then I did the second and put it in at the half way point when I rotated the first sheet and moved it to the other rack. Then I pulled the Silpat, with the cookies still on it, off the baking sheet and let them cool on a cooling rack. I then used the baking sheet to prepare the next batch.

First sheet, unbaked.

First sheet, unbaked.

I kept them in rotation. I started off with two baking sheets with Silpats on them, but when it became clear I needed a third baking sheet, I started using parchment paper as well. Between cooking, cooling, and prepping, I kept the three baking sheets in constant use. It was a pretty efficient operation.

I baked them for 12 minutes. I wasn’t exact on the sizing, so while they all got cooked, some of them got a little overcooked. I ended up making 138 cookies. I was expecting 160, but I didn’t measure that carefully.

First sheet, baked.

First sheet, baked.

I ended up using around 100 or so cookies for this cake for the party. A regular cake recipe uses 40 cookies, but I needed it to be bigger, as I was expecting between 15-20 people at the surprise party. It took a little longer than I expected to put it together, so it only got to sit in the fridge for about 4 hours before the party.

One reason that it took a little longer was that I had a slight mistake as I was making the whipped cream. I wasn’t paying close enough attention, and I let it go too far. It turned into something closer to buttercream. So, I had to run out and get more cream. Once I got that settled, it was pretty easy to put the cake together. In a moment of inspiration, I spelled out “Happy Bday” in chocolate chunks on the top.

All the cookies!

All the cookies!

As the cake lay secretly resting in the fridge, my wife and I went out to dinner. I had arranged for everyone to meet us at a different bar/restaurant in the neighborhood. I had also arranged with one of our friends to stop by earlier in the day and pick up keys, so that while we were out to dinner she could pick up the cake and bring it to the party.

After dinner, we walked back home from the restaurant, but I told my wife we couldn’t stop at home. I told her there was one more stop we had to make. She was a good sport and joined me on the unknown adventure. The party was only a block away. As we walked in, and walked toward the back, she started to notice a whole gaggle of her friends assembled. She had no idea what was happening, and was pleasantly surprised.

Omnomnomnom!

Omnomnomnom!

After hanging out with everyone for a while, and after she got over some of the shock of it all, we eventually got around to eating the cake. Lots of people had never heard of icebox cake before, but that didn’t stop it from being devoured. Since the cake didn’t get to sit as long as it should have, the cookies were still pretty solid, and not as cake-like as they should have been. It was still quite tasty, but it wasn’t quite icebox cake consistency. However, the birthday girl was very happy with it (and everyone else was, too). That’s what mattered.

What also mattered is that everyone got to celebrate her. As I said, I like to celebrate people on birthdays, but it wasn’t just me. Everyone was truly, honestly, and emphatically excited to be there. People remarked to me over and over how happy they were to be a part of it, how much fun it was, and how great it was to get to appreciate her.

Not pictured here is the extra whipped cream I had to run out and get.

Not pictured here is the extra whipped cream I had to run out and get.

It took her a while to let it all sink in, which was good, because it was a lot to take in. She was happy, I was happy, everyone was happy. And in the end, that was the most important thing.

Normally I would take time here to thank my wife for her help, but this time I want to give a shout out to all of her friends for helping put this together. You know who you are. Thank you.

The cake, almost completely frosted.

The cake, almost completely frosted.

I encourage you all to try icebox cake sometime, whether or not you make your own cookies. It’s easy, it’s fun, and it’s delicious. But what I really encourage, more than anything, is to find out what makes the people around you happy, and, if at no other time, see if you can arrange to make that happen on their birthday. I can assure you they’ll be glad you did.

DSC01723

Chocolate wafer recipe courtesy of smitten kitchen. Icebox cake recipe courtesy of Nabisco.

No-Churn Mint Chocolate Chip Ice Cream

Yes, this is still a baking blog. No, I did not somehow figure out how to bake ice cream. (Not yet, at least. 😉 ) However, for a change of pace, and for something cool now that the weather is starting to get a little warm where I am, I thought I would try making ice cream. I hope you’ll forgive me.

DSC01648

I kept seeing these no-churn recipes around, and I thought it was worth trying. It was. It was super simple and fun to make. The basic recipe has just two ingredients: sweetened condensed milk and cream. I had some cream, but I had to run out and get some more as well as some sweetened condensed milk.

Sweetened condensed milk.

Sweetened condensed milk.

I decided as long as I was going to make it, I would spice it up a little bit. I decided to go for mint chocolate chip. I used 1 tsp of peppermint extract and about half a bag of semi-sweet chocolate chunks. (Okay so not exactly chocolate chip, but it sounds better than chocolate chunk, right?)

Cream.

Cream.

I followed the super simple instructions, which basically involve making whipped cream and then mixing the two ingredients together. I used our immersion blender with the whisk attachment. It was easier to clean up after than my beloved KitchenAid. Besides, it was good to give the immersion blender some use. It had been getting lonely after not being used for a while.

Whipped cream.

Whipped cream.

I mixed it up per the instructions. In addition to the basic recipe, I just added the mint extract to the sweetened condensed milk, and I added the chocolate chunks in near the end.

Mixing.

Mixing.

I put it in a loaf pan, which was just big enough, covered it with freezer paper and put it in the freezer. As I’ve mentioned before, we have the world’s tiniest freezer, so I made sure to make some room before starting the recipe.

Mixed.

Mixed.

All in all it took 20 minutes to make. Plus a few minutes preparation and a few minutes cleaning up. I left it to sit overnight, as it was late enough already.

Add in the chocolate.

Add in the chocolate.

For a brief moment I thought about adding in green food coloring to make it “authentic”, but I figured it would stand okay on its own. (Not literally stand. I don’t know of any ice cream with feet.)

Pour in the pan.

Pour in the pan.

We tried it the following evening. I wasn’t sure what to expect, but as it turns out, it was super yummy! It was just the right amount of mint. It was not super sweet. It was light, kinda like whipped cream, kinda like custard. My wife was utterly blown away by it. It was really good. It was hard to believe that I could make ice cream so easily. But it was definitely ice cream, and it was definitely good.

Cover before freezing.

Cover before freezing.

There was one tiny issue. Most of the chocolate chunks had sunk to the bottom. I should have followed the instructions for heavier mix-ins, but I thought I could get away without doing it. It wasn’t a serious problem. It just meant that I had to make sure to intentionally distribute the chocolate chunks when serving it.

Fresh from the freezer.

Fresh from the freezer.

This ice cream was easy to make, fun to make, and tasty to eat. Yes, you can go out and buy it, but then you wouldn’t have made it. Plus, this way you can make it however you like.

Yum!

Yum!

If you’re looking for an easy, no fuss no muss ice cream recipe, I can’t recommend it enough. But now that I’ve got the hang of this one, I’d love to see what else is out there. If you have any favorite ice cream recipes, or even flavor ideas for this one, let me know! I’d love to hear.

Chocolate on the bottom.

Chocolate on the bottom.

Recipe courtesy of The Kitchn.