Category Archives: Cake

Ice Cream Icebox Cake

So as you know last week, I made a giant icebox cake for my wife’s surprise birthday party. It’s her favorite cake, and since I knew it would get devoured at the party, I wanted to make her another one so she could enjoy it. And, as I mentioned, I wanted to kick it up a notch.

I had recently discovered this no-churn ice cream recipe. So I thought, what about making an ice cream icebox cake? That is, replace the whipped cream with ice cream. Surely, I thought, someone would have done it before. But when I looked, all I found were some vague references along the lines of “wouldn’t that be an interesting idea?”. So I plunged ahead into the unknown. I couldn’t get any clear info on whether or not it would work the same, but I figured it would.

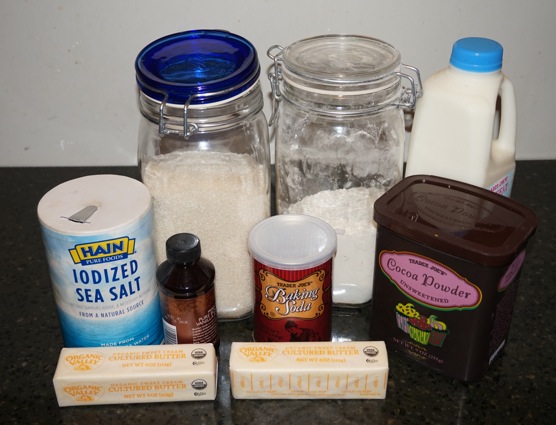
The ice cream ingredients. Magic!

The ice cream ingredients. Magic!

I made a double recipe of the ice cream, as I didn’t know how much I would need. I had made a bunch of cookies for the first icebox cake, and this one. I figured I would use about 3/4 of the cookies for the first cake, and use the rest for this one.

Because the ice cream needed a while to set, I made it the night before. I waited until my wife went to sleep, and then gathered the ingredients I had secretly assembled. In this case, I had just hidden the ingredients in another room.

The ice cream, ready to freeze.

The ice cream, ready to freeze.

The ice cream recipe, as I mentioned when I made it the first time, is pretty straightforward. It was complicated a little bit by wanting to do it secretly, but it was still pretty easy. I used our immersion blender with the whisk attachment as that was easier to clean after the fact. It was also easier to transport into another room. The kitchen is not far from our bedroom, and even with my wife asleep and the door closed, I didn’t want to risk it.

I followed the instructions for making the ice cream. I added a little bit of vanilla, as I thought that vanilla ice cream would be a good choice, and it would mirror the vanilla that gets added to the whipped cream in the regular icebox cake.

Packaged up and going to freeze.

Packaged up and going to freeze.

So I made ice cream, and buried it under some other things in the freezer, betting that she wouldn’t go digging through it in the morning. I also sealed the ice cream in containers with lids, as opposed to using wax paper. (It was the cleanest way to bury them.) I cleaned up and let the ice cream set work its magic overnight.

The next day I made the chocolate wafer cookies, as I described last week. I made the regular icebox cake first, as that was going to be used first, and I wanted to give it the longest time possible to set. Once that was done, I went to work making this.

Fresh from the freezer.

Fresh from the freezer.

First things first, what to put it in? I needed something big enough, and that could go in the freezer. I ended up using a 9″ round cake pan. Since it was going to be a cake anyway, this seemed appropriate. I lined it with foil. I figured that would make cleanup easier. I also thought it might let me pull the cake out of the cake pan.

So then how to make it? I was kinda making it all up here. So I just started building it like I would a regular icebox cake. I grabbed some cookies and started filling in between them with ice cream. I laid down a stack of those and started on another. One thing soon became clear to me. It’s hard to build an icebox cake in a circle. A square or rectangular dish would have probably been better.

Assembly. It was a little messy.

Assembly. It was a little messy.

So I soon had a few stacks filling up part of the space, but because it was a circle, I then had to fill in here and there to get all the in between spaces. Eventually I got it reasonably filled. I then had to make another decision. Should the outer layer be cookies or ice cream? If it were a cookie cake, and maybe for structural reasons, you’d want cookies on the outside. But for an icebox cake you wouldn’t. I ended up going for the full icebox and filled in the outside layer with ice cream. I also filled in the rest of the spaces with ice cream. And covered the top with ice cream.

After that, I covered it in plastic wrap and buried it in the freezer for secrecy purposes. I didn’t end up using as many cookies as I thought I might. Maybe 30 or so? I ended up using about one and a half recipes worth of the ice cream, so I’m very glad I made a double recipe.

Assembled, and going back into the freezer.

Assembled, and going back into the freezer.

With the second cake done, I did all the cleanup, and all the major preparation was now done. I sat down for a couple of minutes to relax before the evening’s festivities.

Last week’s post detailed what happened next. One thing I’ll say is that at the party I let my wife know that there was a second dessert waiting at home. When we got home, there was no way we were going to eat another dessert, but I gave her a sneak peek at what was to come. She was very excited and still kinda flabbergasted from the whole surprise party. I won’t say that this was the icing on the cake, but it was very well received.

Voila!

Voila!

We waited until the next evening to try it. The way it had frozen made it challenging to remove, so I decided to cut it right in the pan. But it’s a non-stick pan, so I had to tread carefully. A large spatula ended up being the tool of choice. And letting it sit on the counter to warm up a little bit didn’t hurt either.

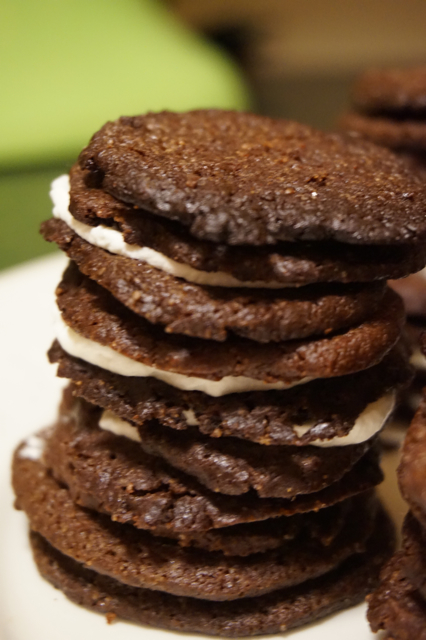
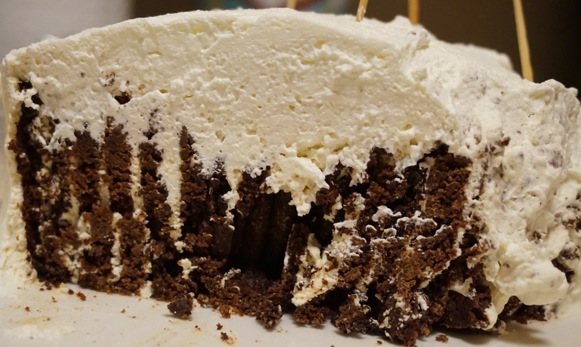
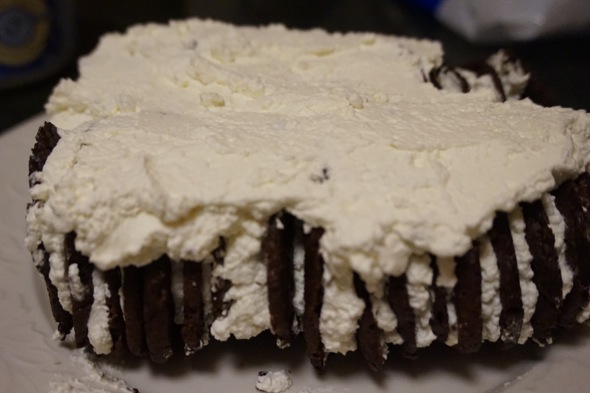
Once a slice was freed from the pan, you could see it was clearly a good-looking cake. It actually looked a bit like icebox cake. A sea of white surrounding some layers of chocolate.

Yum!

Yum!

And how was it? Wow. It was an ice cream cake. And it was an icebox cake. It totally worked! I’m not sure exactly why, but it only partially softened the cookies. (It had over a day by the time we ate it.) But this was actually a good thing. It tasted like a Carvel ice cream cake.

I’m sure not everyone is familiar with Carvel, but it’s a chain of ice cream shops. They have these pretty awesome ice cream cakes. And the way the cookies softened in this cake made them taste just like the chocolate cookie/cookie crumb they used in theirs.

DSC01732

It was a nice soft vanilla ice cream with these great, mostly softened, but slightly crunchy chocolate bits throughout. They went perfectly together and made for a delicious cake. A slight change from the regular icebox cake, but a good change nonetheless.

I would highly recommend trying this out. The ice cream is super easy. The cookies are just mix, slice, and bake. The cake assembly is easy. And all in all, it’s greater than the sum of its parts. And for me, it checked off all the boxes I needed. Second birthday dessert, check. Keeping true to my wife’s favorite dessert, check. Kicking it up a notch, check. Trying something new, check. And “inventing” a new recipe, also check.

Close-up.

Close-up.

So when summer hits, and you’re looking for an easy, yummy, totally homemade and totally knock your socks off dessert, you’ll be glad you remembered this. And when you want to wow them a second or a third time, you’ll also remember that the ice cream is easily modified into many, many, different flavors. So go forth and enjoy. I’d love to know how it all turns out!

Inside the cake pan.

Inside the cake pan.

Ice cream recipe courtesy of The Kitchn. Chocolate wafer recipe courtesy of smitten kitchen. Cake recipe inspired by Nabisco, but imagined and created by me.

Icebox Cake Surprise Edition

I’m a firm believer that birthdays should be special. I think we generally fail to appreciate the people around us. So on people’s birthdays I like to take advantage of the opportunity and show people that I’m thinking of them and that I think they’re special. There are lots of ways of doing this. Obviously telling them is the most straightforward way. But I also like to bake for them.

If I know someone well, I often have a good idea of what to make them for their birthday. My wife’s favorite cake is icebox cake. I’ve made it for her birthday a couple of times so far. (You can see previous posts here and here.). Because it’s her favorite cake, she never gets tired of it. But even so, every year, I try to kick it up a notch. The first year, making it was a big deal. The second year, I baked the chocolate wafers that make up the cake, instead of buying them. This year is no different. What I did to kick it up a notch this year was two-fold. First, I made a giant icebox cake. And second, I actually made two cakes. (I’ll tell you about the second one next week.)

DSC01710

What made this year’s cake more complicated was that her whole birthday was a surprise. It started with a surprise party. Well, actually it started with nothing. At first, she wasn’t sure what she wanted to do for her birthday, so we didn’t plan anything. But as it got closer to her birthday it became clear that she wanted to celebrate with her friends. It seemed too late to her to throw something together at the last-minute. But I was undeterred, and I put together a last-minute surprise party. It was a little bit of a challenge – I won’t say how much, but there was a spreadsheet involved – but in the end we got a bunch of people together.

And since the party was a surprise, I decided to make the dessert a surprise too. I bought the ingredients ahead of time, and I hid them. The small container of milk was hidden at the very back of the fridge. I got shelf stable whipping cream and hid it in another room. Everything else was hidden in plain sight. I also had to find time to make the cake while she wasn’t around. That’s difficult when you live with someone. So I took off work on the day of her birthday, which had the added benefit of making sure I got home in time to celebrate. I spent a good chunk of the day baking the cookies and putting the cakes together.

The dough, all mixed up.

The dough, all mixed up.

That’s because I needed to make a lot of cookies. (In case you don’t know what icebox cake is and you’re confused about why I’m referring to cookies in a cake recipe: icebox cake is made of chocolate wafer cookies which are slathered in whipped cream and put in the fridge. After several hours, the whipped cream turns the cookies into a cake-like consistency.) Because I was making two cakes, and one of them needed to be party size, I made a double recipe of the cookies. This is roughly equivalent to 4 boxes of the original wafer cookies.

Making the cookie dough involves mixing it in the food processor. After mixing, I kneaded it all together on freezer paper. Then I rolled the dough into a log and refrigerated it for about 90 minutes wrapped in that same freezer paper. For ease of measuring and mixing, as well as not overloading the food processor, I did it in two batches and repeated these same steps over for the second batch. (The second batch was in the fridge a little over an hour.)

The dough, in log form.

The dough, in log form.

After chilling, I took the logs out of the fridge to cut them into cookies, but in between cutting each batch of cookies, I put the dough back in the fridge. The freezer paper was easier to cut on than the foil I used previously, and refrigerating it in between sheets of cookies helped keep the dough the right consistency. I cut them as thin as I could. Since I was just eyeballing it, the rolls were a little uneven, but I reshaped them as I cut them, and re-rolled any bits I had cut off.

I did one sheet of cookies. Then I did the second and put it in at the half way point when I rotated the first sheet and moved it to the other rack. Then I pulled the Silpat, with the cookies still on it, off the baking sheet and let them cool on a cooling rack. I then used the baking sheet to prepare the next batch.

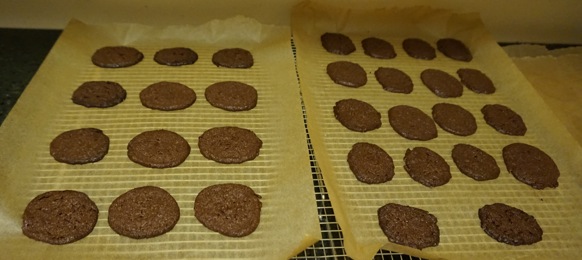
First sheet, unbaked.

First sheet, unbaked.

I kept them in rotation. I started off with two baking sheets with Silpats on them, but when it became clear I needed a third baking sheet, I started using parchment paper as well. Between cooking, cooling, and prepping, I kept the three baking sheets in constant use. It was a pretty efficient operation.

I baked them for 12 minutes. I wasn’t exact on the sizing, so while they all got cooked, some of them got a little overcooked. I ended up making 138 cookies. I was expecting 160, but I didn’t measure that carefully.

First sheet, baked.

First sheet, baked.

I ended up using around 100 or so cookies for this cake for the party. A regular cake recipe uses 40 cookies, but I needed it to be bigger, as I was expecting between 15-20 people at the surprise party. It took a little longer than I expected to put it together, so it only got to sit in the fridge for about 4 hours before the party.

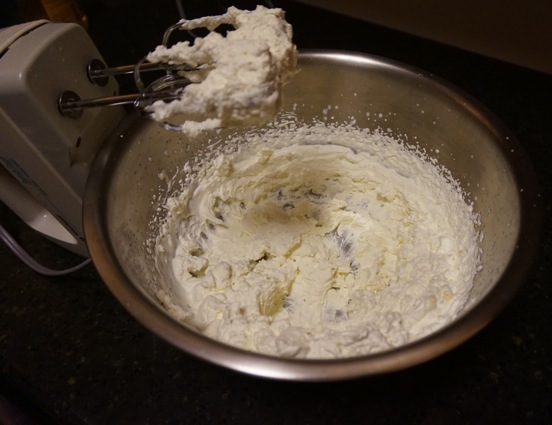
One reason that it took a little longer was that I had a slight mistake as I was making the whipped cream. I wasn’t paying close enough attention, and I let it go too far. It turned into something closer to buttercream. So, I had to run out and get more cream. Once I got that settled, it was pretty easy to put the cake together. In a moment of inspiration, I spelled out “Happy Bday” in chocolate chunks on the top.

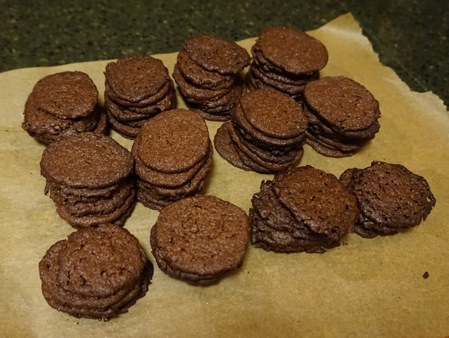
All the cookies!

All the cookies!

As the cake lay secretly resting in the fridge, my wife and I went out to dinner. I had arranged for everyone to meet us at a different bar/restaurant in the neighborhood. I had also arranged with one of our friends to stop by earlier in the day and pick up keys, so that while we were out to dinner she could pick up the cake and bring it to the party.

After dinner, we walked back home from the restaurant, but I told my wife we couldn’t stop at home. I told her there was one more stop we had to make. She was a good sport and joined me on the unknown adventure. The party was only a block away. As we walked in, and walked toward the back, she started to notice a whole gaggle of her friends assembled. She had no idea what was happening, and was pleasantly surprised.

Omnomnomnom!

Omnomnomnom!

After hanging out with everyone for a while, and after she got over some of the shock of it all, we eventually got around to eating the cake. Lots of people had never heard of icebox cake before, but that didn’t stop it from being devoured. Since the cake didn’t get to sit as long as it should have, the cookies were still pretty solid, and not as cake-like as they should have been. It was still quite tasty, but it wasn’t quite icebox cake consistency. However, the birthday girl was very happy with it (and everyone else was, too). That’s what mattered.

What also mattered is that everyone got to celebrate her. As I said, I like to celebrate people on birthdays, but it wasn’t just me. Everyone was truly, honestly, and emphatically excited to be there. People remarked to me over and over how happy they were to be a part of it, how much fun it was, and how great it was to get to appreciate her.

Not pictured here is the extra whipped cream I had to run out and get.

Not pictured here is the extra whipped cream I had to run out and get.

It took her a while to let it all sink in, which was good, because it was a lot to take in. She was happy, I was happy, everyone was happy. And in the end, that was the most important thing.

Normally I would take time here to thank my wife for her help, but this time I want to give a shout out to all of her friends for helping put this together. You know who you are. Thank you.

The cake, almost completely frosted.

The cake, almost completely frosted.

I encourage you all to try icebox cake sometime, whether or not you make your own cookies. It’s easy, it’s fun, and it’s delicious. But what I really encourage, more than anything, is to find out what makes the people around you happy, and, if at no other time, see if you can arrange to make that happen on their birthday. I can assure you they’ll be glad you did.

DSC01723

Chocolate wafer recipe courtesy of smitten kitchen. Icebox cake recipe courtesy of Nabisco.

Coffee Cake

Hey everyone out there in blog land! Happy Passover! For those of you that celebrate, I hope you’re enjoying the holiday with friends and family. In case you’re excited by the title and are thinking that this might be a coffee cake recipe that’s good for Passover, I hate to dash your hopes, but it is not. Alas. I made this a few weeks ago, and I’m just now catching up to it. However, I did make something yummy for Passover this year, and I’ll be writing about that in due course. So stay tuned!

DSC01488

This recipe I made for a friend’s housewarming party. My friend and his fiancée had just gotten a new apartment together. Fun! Exciting! Housewarmings are another occasion where people give different things, and I like to give food. It’s fun, and it’s delicious.

Freshly made crumb.

Freshly made crumb.

When I went looking for good recipes to make for a housewarming party, I kept finding things that would be great to make if you’re hosting a party, not bringing something. At some point I came across something which made think of coffee cake, and while I can’t remember what it was, I’m sure glad I did. I found this recipe, and the rest is history. Delicious, delicious history.

Freshly made batter.

Freshly made batter.

It was pretty straightforward to make. I made the crumb first, then the cake. It used lots of simple ingredients, so I used what was listed in the recipe. One difference is that I used Greek yogurt, vanilla at that, instead of regular plain yogurt, as that’s what I had available.

DSC01494

I had always wondered why coffee cake is yellow, but now I know why. Besides a whole egg, it also uses an egg yolk. Science! I used the KitchenAid to put it together. Vroom, vroom! It made quick work of things.

Ready to bake.

Ready to bake.

There was a brief moment of oopsie. Right after I added them to the dry ingredients, I realized I mixed up the baking powder and baking soda measurements. Fortunately, I realized before I had mixed them in. I removed all of both of them, and a little bit of flour came with them. I replaced the little bit of flour and then re-measured and re-added. Phew! That was close.

Crumb topping close-up.

Crumb topping close-up.

I didn’t have an 8 x 8 dish, so I used an 11 x 7 dish. It’s about the same. I buttered it and lined it with parchment paper. It was a little challenging getting the dough in there. But after some finagling, I managed to spread it all around evenly-ish. Then I put the topping on. Sprinkle, sprinkle, press, press. Fun!

Fresh from the oven.

Fresh from the oven.

After baking, it came out looking amazing. We were running a little late for the party at this point, so I had just enough time to let it cool a bit, before I wrapped it up to take it with us. We were traveling a fair distance (to Queens), so I made sure to wrap it securely. This included a support for the bottom, as it was a big cake.

Baked crumb close-up.

Baked crumb close-up.

I managed to get it to the party in one piece. It went over quite well. Our hosts were pleasantly surprised by it. And everyone’s eyes kind of lit up once it was unwrapped and setup on the table. Everyone thought it was delicious, some people even going back for seconds. I managed to get a piece, and I have to agree. It was a moist and flavorful cake, and the topping added a nice texture and more flavor.

DSC01508

Unfortunately, I don’t have any pictures of the cake sliced up, as I was too busy enjoying the party to take any pictures. But hopefully you can imagine what it looked like. Or perhaps you can’t, and you’ll be forced to make this cake. This yummy, yummy cake. I’m sorry that your lack of imagination would force you to make something so tasty. My apologies. 😉

DSC01510

All in all, I would say that this was a great cake for a housewarming party. It was the right size to feed a party. It was delicious. And something about it just said “housewarming” to me. I had never made one before, but I’m definitely glad I did.

DSC01514

Is coffee cake something in your repertoire? Do you have a favorite recipe to share? Do you have another favorite dish to bring to housewarming parties? Let us know in the comments below!

Recipe courtesy of David Lebovitz.

Swedish Chocolate Cake

Besides just talking about yummy food, I’d also like to talk to you about family. My family, that is. Did I ever tell you the story about my long-lost Swedish cousins? Since this week’s recipe is Swedish, it seems like a good opportunity.

So, back in the day my great-grandmother, Esther Grünberger, lived with her family in a town which was then in the Austro-Hungarian Empire. It was told it was known as Ungvar or Uzgorod. (It’s now in the Ukraine.) Family history tells me that young Esther got on a boat by herself – that is to say without the rest of her family, not completely by herself – and sailed to the United States at the age of 12 or 13. Can you imagine that? That’s a big trip to take at any age let alone at that age, and by yourself.

Earlier, her older brother had worked his way across Europe and ended up in Stockholm. Despite being far apart, Esther and her brother (I don’t remember his name) managed to stay in touch through letters. Until at one point, I believe it was between the two world wars, they lost touch and the family was separated.

Fast forward to a few years ago. My aunt (my mom’s sister) and uncle like to travel a lot. On a trip to Stockholm, they remembered this story and tried to do something about it. They were armed only with the family story and the family name. Seeing as how Grünberger is not a Swedish name, they figured they had a decent shot at finding our long-lost family.

So they picked up the Stockholm phone book (as I said, this was a few years ago) and just started calling anyone with the last name Grünberger. I have to say, this took a lot of chutzpah. To just randomly start calling people from the phone book in a foreign country with only a name and a vague family story? Wow.

Well as you might imagine, they struck out a lot. But eventually, they talked to someone who said it sounded familiar. I believe they then got an older relative on the phone who discussed it further. Did they find them? Or could there possibly have been another set of Grünbergers with a lost family connection?

Well after much discussion, they finally found the clincher. They faxed family pictures back and forth. (As I said, it was a few years ago.) It turns out they both had the same family picture. It was them! We had found our long-lost Swedish cousins.

What followed was a bunch of people visiting their cousins across the sea. Over the years, several people on the US side went to Sweden to visit, and several on the Swedish side came to the US to visit. So for instance, my mom and her sister met a bunch of their 2nd cousins and vice versa. I met a 3rd cousin of mine, etc. It’s been great getting to know them. There are some similarities and some differences. But interestingly enough, they feel like family.

Oh, and we found out why the two sides had lost touch in the first place. It turns out Esther’s brother had gotten divorced and then moved. When that happened, his ex-wife didn’t forward his mail to him. Mystery solved!

One more mystery that just now occurred to me is what happened to the rest of the family back in their home town? Did they stay there? Did they end up leaving too? I probably need to ask my mom or my aunt. They might know.

DSC01261

So now that you know the story of my lovely Swedish cousins, let me tell you the story about this lovely Swedish cake. If this recipe is any indication of the deliciousness of Swedish recipes, I totally should have been asking my Swedish family for recipes. However, when I met them I did not know such a recipe existed, so I did not get it from them. I got it how I often get recipes, just randomly looking through the interwebs. It looked easy and delicious, and when I showed the picture to my wife to see if she was interested, it took her about .0001 seconds to give me a resounding yes.

Some dry ingredients.

Some dry ingredients.

Some melted butter.

Some melted butter.

Having decided to make it, I then tried to figure out what size pan to use. I went from the first recipe I found, to the one it linked to, to the one it came from originally, to an earlier version of that one. It took all that digging to figure out that the recipe called for a springform pan. I used mine which I believe is 9″.

Batter up!

Batter up!

I ended up using the second version from the original author, but I also used bits of info from the others, so I’m including those for reference. I’ll also note here that I didn’t have salted butter so I added 1/2 tsp salt, and I didn’t have vanilla sugar so I used vanilla extract.

Into the pan!

Into the pan!

It’s a very simple recipe. I measured out the dry ingredients and preheated the oven. Then I melted the butter and greased and floured the pan. I mixed the dry ingredients and the vanilla and eggs into the melted butter. Then I poured it into the pan.

DSC01270 DSC01271

Normally I wait to preheat the oven because it takes me longer than the recipe indicates to prepare it. But I had a sense of how quick the recipe would be, and I was right. The oven became ready just before I finished it. It really came together quickly. I put it in the oven and baked it for 20 minutes. It didn’t seem quite set around the edges so I put it back in for 5 more minutes. That seemed good.

DSC01279

I let it cool. It was a little bit hard to get it out of the pan. I used a plastic knife. I was able to pull it away from the sides, and I pulled the side of the springform pan off. I tried getting it off the bottom, but it was challenging. I was able to get part of it, but then it wouldn’t come all the way. So I left it in the pan. I sprinkled the powdered sugar on top. I was able to cut and pull pieces away with a plastic knife and a spatula.

DSC01282

I think it was because I didn’t grease it well enough. I used cooking spray, but there was something wrong with the nozzle and it wasn’t coming out right. I thought I had gotten it well-greased, but maybe not. (It’s also possible that I cooked it a little too long.)

DSC01283

It’s supposed to be warm, but we had it as is, which was a little bit warm, but basically room temperature. It was rich, chocolately, chewy, and moist. Subtle and delicious. Not too sweet. Nice crunchy outside. Nice contrast between the crunchy and the chewy. Yummy! I couldn’t eat more than a slice because it was so rich. (And I might have cut the slices too big.) It reminded me of flourless chocolate cake.

DSC01286

My wife referred to it as “happy chocolate cake”. Also, because of the troubles I had getting it out of the pan, she said that if I had to make it again to iron out the kinks, she would support that. Thanks, hon! 🙂

DSC01289

So there you have it. A little bit of cake and a little bit of history. The cake is very easy, and very much worth your time to make. I challenge you to find a quicker and more delicious cake. (Seriously.) And family history, I love that too. Feel free to share either below!

DSC01290

Recipe originally found at Confessions of a Frosting Fanatic.

Which pointed to the recipe at A Cozy Kitchen.

Who got the recipe from Top With Cinnamon. There were two listings of this recipe. The original one, and a revisited version, which I used.

Barbara’s Sour Cream Apple Cake

Welcome to a very special edition of Needs Baked. This is a special recipe, and you’ll soon see why. It’s not just that it’s delicious. It’s also an heirloom family recipe.

For Rosh Hashanah, we normally go to my wife’s dear friend’s family’s home to celebrate. My wife wasn’t feeling well that day, so we stayed home. I didn’t want us to miss out completely on the holiday, so I decided to make a dessert to bring some of the holiday to us. So I went looking through cookbooks.

We have a lot of cookbooks. Before my wife and I moved in together, I had a few, plus I keep getting them as presents from people. (Somehow they got the idea that I like to make food. ;)). My wife had also had some, and she got a lot more recently when her parents were getting rid of a lot of theirs. So I went on a search through all our cookbooks, knowing that we must have something in there. I knew that my wife’s books in particular had a lot of holiday specific recipes in them, so I had a particular focus on those.

As I was looking through them, my wife remembered her mom’s world-famous sour cream apple cake. Okay, maybe world-famous is stretching it a little bit. But it was definitely famous in her world. It sounded like a great recipe to use, so we tried to find it.

DSC00628

As the search continued, I found this amazing Calico book. As my wife explained to me, it was this book that her mom used when she taught herself how to cook. She gave a copy to my wife when my wife was on her way to law school and was going to need to know how to cook. It’s an old school cookbook with lots of great recipes. We thought the cake recipe might be in there. It wasn’t. But also, it was.

Let me explain. We didn’t know where the recipe was. We had already looked around through a bunch of books by this point, but we hadn’t found it. We had basically given up. But while looking through the Calico book, I found in the front of the book a lovely inscription from my mother-in-law to my wife telling her about the book and how important it was to her. In the back of the book were a couple of blank pages, pages her mother used to write in some other recipes. And lo and behold, one of the recipes was the one we were looking for!

DSC00550

Eureka! We had found it! In the book it’s called sour cream coffee cake. At the very bottom it says you can add chocolate chips or Comstock apple slices. Additionally, it says to cook it in a springform pan, but that it can also be baked in a loaf pan. According to my wife, her mom made all those different variations, with the different ingredients, in different pans, even mini bundt pans. She made it for Rosh Hashanah and all year round.

DSC00554

With recipe in hand, I had to get some ingredients. I went looking for Comstock apple slices, but I couldn’t find them. With my wife’s guidance, we decided on apple rings (dried apples).

DSC00555

The batter.

The recipe was very easy. Thank you again KitchenAid for helping to make short work of it. It creamed the butter and sugar in almost no time flat, before I even got the sour cream together. I didn’t sift the flour and baking powder, I just mixed them. I quartered the apple rings and mixed them in. I used pecans for the nuts.

The topping.

I baked it in a springform pan, but that almost didn’t happen. Let me run you through the process. First, I thought we didn’t have a springform pan, and I thought I would have to make it in a loaf pan. Then I worried that our loaf pan was woefully small. And finally, I remembered we actually had a springform pan, even though we had never used it. We had gotten one with a gift certificate from our wedding to a lovely local kitchen store (where we had registered).

The first layer.

The first layer.

So besides it being the first time making one of my mother-in-law’s recipes, it was the first time using a springform pan. I sprayed it with cooking spray, and threw some flour on as suggested. Following the instructions, I poured in half the batter, then layered half the topping (nuts, cinnamon, sugar). Wash, rinse, repeat.

The second layer. Ready to bake.

The second layer. Ready to bake.

I baked it for the minimum 45 minutes. It smelled wonderful while baking. After 45 minutes it was done. While testing, the toothpick almost got lost. The cake was too big and it couldn’t reach all the way down. I used a knife instead. Done, done, and done. I let it cool a bit before removing the sides of the pan. I cut slices with a spatula, as the pan is non-stick. It was very easy to cut because the cake was so moist.

Fresh from the oven!

Fresh from the oven!

The cake had risen a lot, which makes sense. There was lots of leavening in it, both baking powder and baking soda. There wasn’t a huge amount of batter before baking, but by the end it was almost bursting out of the pan. The top looked great. It was all sugary and crunchy. It had an unusual look because it was breaking open (due to how the topping had baked).

Look at how the topping had baked. Fun!

Look at how the topping had baked. Fun!

The rest of it looked great too. It had a lovely brown outside and a light inside. It was fluffy and moist. (It’s so fluffy!) Not too sweet. The apple bits were chewy, which was a different texture than the rest. It might have been better to just go with fresh apples, or even fresh apples that had been cooked a bit to soften them up. (The canned apples it called for were soft.) The top was good and crunchy. I also liked having the topping in the middle a bit. It broke up the cake a bit. Although either the topping sank a bit, or kept the dough under it from rising a bit because it was near the bottom. (Yes, I realize that’s a lot of bits, but I don’t regret them one bit.)

"I'm free!" says the cake.

“I’m free!” says the cake.

It was really yummy. “It tastes like home,” my wife said. We immediately thought of all the other versions we could make with it, but it was pretty amazing as it was.

Yum!

We wondered where the recipe came from originally. Was it another cookbook? Did she make it up? The cookbook itself had a similar recipe in it, but it wasn’t the same. (The recipe was hand written in the page next to the last page of the index which coincidentally had the sour cream cake recipe from the book, which is how I thought to check.) So it definitely came from somewhere else. Maybe we’ll find out, maybe we won’t, but we have the recipe now.

Extreme slice close-up!

Extreme slice close-up!

We ate it over the next few days, keeping it wrapped in plastic in the fridge. It kept being moist and delicious all week. It was a very big cake, and it was just the two of us. So when I say “all week”, I mean “all week”. 🙂

DSC00587

I asked my wife if it was okay to publish her mom’s recipe with this post. I said, I know it’s a secret family recipe, so I wanted to respect her wishes. She said it’s my family too, and that it was okay. (See below for the recipe.) I’m glad she said so, because this recipe is delicious and deserves to be shared. Thank you Barbara for bringing this delicious cake into the world. And more importantly, thank you for bringing your wonderful daughter into the world.

DSC00588

So there you have it. The story of Barbara’s cake in all its glory. Use it in good health. If you do, I’d love to hear about it. And as long as we’re sharing secret family recipes: I’m curious, do you have any that you’re willing to share? Are there recipes that you want your friends or family members to share but they won’t? I can’t wait to hear all about them.

Recipe courtesy of my lovely mother-in-law Barbara.

DSC00629

Lemon Cream Icebox Cake

For this recipe I ventured yet again into the wonderful world of icebox cakes. Like before, this one was also for my wife. But it’s not for the reasons you might think. Yes, she still likes icebox cakes. Yes, I still like making things for her. But, it wasn’t a birthday surprise this time. It was because of my new (un)favorite word of the day: anosmia.

DSC00479

It’s a condition where you lose your sense of smell, and it happens to her sometimes. As you might imagine, what comes along with it is that she also loses her sense of taste. Can you imagine not being able to taste anything? I surely can’t. It seems so integral to our experience of food. But it happens to her from time to time, and this time it hit her pretty hard.

DSC00480

She really couldn’t taste much of anything. The only things she could taste were very strong and basic: sweet, sour, salty, etc. I wanted to make her something, and she figured maybe the lemon would be strong enough for her to taste. She sent me a few recipes with lemons in them, and I decided on this one. It looked fairly straightforward, but it still took some time. I didn’t opt for making my own lemon curd. Maybe next time? 😉

DSC00481

After zesting.

As I said, it was pretty straightforward to make. I gathered the ingredients and measured things out. It took some time to zest and squeeze the lemons. (The lemons looked really bare without their peels on.) I used four small lemons instead of the two large ones the recipe called for. I used four packs of graham crackers.

DSC00482

I used the KitchenAid for the mixing. The butter took a while. It kept clumping to the beater without getting beaten. It probably wasn’t soft enough, but eventually I got it whipped. I put in the cream and combined it, then added the rest of the ingredients. I set the speed a little too high and stuff flew everywhere. I put it back down to a reasonable speed. The KitchenAid made quick work of it. I still love it. I was able to do other stuff while waiting: like cleaning up, getting the dish I was going to use down from a high cabinet, etc.

DSC00485

I layered the ingredients as directed. It’s a smart idea they gave putting a little cream down on the bottom to hold the graham crackers. I had a little trouble with the lemon curd. It was hard to drizzle. I shplooped it down and tried to separate it out. (Yes, for those keeping track, “shploop” is an industry term.) It was later that I realized that I had forgotten to warm it per the instructions. That would’ve helped.

The first layer of graham crackers.

The first layer of graham crackers.

I used one package of graham crackers per layer. I had to figure out exactly how much whipped cream to use. I was conservative at first, but then put more on so I could at least cover each layer. I’m experienced enough with icebox cakes now to know that you need a decent amount of whipped cream in between each layer to get it to work. I managed it okay, as I had enough for each layer. I had a little left at the end, so I probably coulda put a smidgen more in each layer, but I just threw it on top which was fine.

The first complete layer: graham crackers, lemon cream, and lemon curd.

The first complete layer: graham crackers, lemon cream, and lemon curd.

Also, because of the aforementioned non-warming of the lemon curd, I wasn’t able to get it to look quite as it was supposed to on the top layer. IMHO, it still looked nice, just not super fancy. I put it in the fridge to chill as directed.

Wash, rinse, repeat, and you end up with this.

Wash, rinse, repeat, and you end up with this.

My wife helped by doing most of the cleanup. I asked her if she wanted to lick the beater. She did. And lo and behold she could taste something! At first I thought she was joking, but she could actually taste it. It tasted like something. Citrusy something. It was the first thing she had tasted in a while. It had four lemons (juice and zest) and a whole jar of lemon curd in it. So I had been hopeful that she could.

A little peek inside.

A little peek inside.

I mean, it smelled very lemony to me. I tasted a little of the lemon cream. It was strong. Good, but very lemony. I also washed my hands a bazillion times, and I couldn’t really get the smell out. After the recommended 2 hours, we tried it. It was definitely ready.

Would you like a piece?

Would you like a piece?

And as for the taste? It was really good! You could taste the whipped cream and the mushy graham crackers a little, but the strongest taste was the lemon. It wasn’t super sweet, rather it was very tart. It was very good, but if you don’t like lemon, stay away. It wasn’t just a little bit of  lemon. It was a like lemon tree set up shop in your mouth. (Or punched you in the face.) In a good way.

Close-up!

Close-up!

And as for my wife? Well the preview was a sign of good things to come. She could really taste it! It tasted citrusy to her which was huge. She could tell all the different textures and she could feel her mouth puckering up from the lemon. Yay! Mission accomplished! Thankfully her taste has come back since then, but it’s good to know that we can turn to this if we need to.

Have you or someone close to you ever lost their sense of smell or taste? How did you or they deal with it? Do you have any recipes that are able to make a difference? It can’t hurt to stockpile them just in case. Thanks in advance!

Recipe courtesy of Bakeless Sweets, by Faith Durand, via the Kitchn.

Icebox Cake – Homemade Edition – Part 2

In case you think you’re having déjà vu, you’re not. Well you might be, but not because of this week’s recipe. I did just make an icebox cake, wafers and all, but that was two weeks before this one. That one only used about half of the wafers. I had enough left over for a second cake. And who wouldn’t want a second icebox cake?

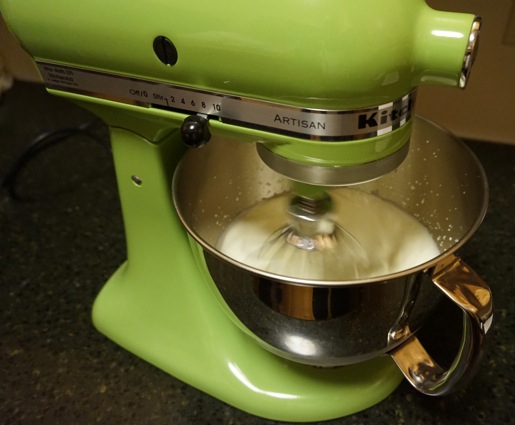
Our lovely KitchenAid, in action.

Our lovely KitchenAid, in action.

Look at it go!

Look at it go!

I had used 40 wafers in the previous one, and after having tasted a couple on their own, there were 37 wafers left for this cake. It was a couple of weeks later, because I was out-of-town the week in between. (See last week’s post if you want to know the wonderful story why.) The wafers were supposed to last that long, and they did.

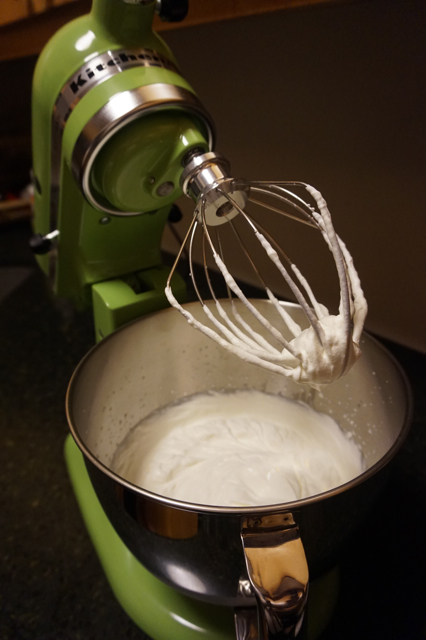
Whipped cream anyone?

Whipped cream, anyone?

Seriously. There's plenty of whipped cream here.

Seriously. There’s plenty of whipped cream here.

Since it was no longer her birthday, and there was no reason to keep it a surprise, I asked my wife if she wanted to help make the second cake. She did. And for the first time, we used our KitchenAid stand mixer. It was a wedding gift. After we got it, it sat there for a while. Then eventually, we unboxed it. Then it sat there a while again, as neither of us wanted to use it for the first time without the other. We had gotten married 3 1/2 years earlier. So yes, we were a little bit slow, but finally, we were making something together that we could use it on. It was her idea to add it our wedding registry in the first place, and I’m so glad we did.

Making stacks of cookies.

Making stacks of cookies.

Lots of little stacks of yummy cookies.

Lots of little stacks of yummy cookies.

I have to say, it’s kinda awesome. Making the whipped cream was so easy! It took maybe 5 minutes, and the KitchenAid did all the work. It was so much easier than using a hand mixer. I can easily see how this would make a difference in recipe prep times. It’s quicker and you can do other stuff while it’s going. I’m not saying it changed my life. But just between you and me, I think it did. I know I sound maybe a little bit too excited about it, but I’m telling you it’s as great as you think it is. As a side note, you might recall I used my in-laws’ KitchenAid for the previous recipe, and it was interesting to see how little it had changed since theirs was made.

Frosting the cake.

Frosting the cake.

After making the whipped cream, we started assembling the cookies. My wife and I took turns making stacks of 10 cookies, as I had done last time. Because we didn’t have 40 cookies, the last couple stacks were a little smaller. And once all the stacks were done, we took turns frosting the whole thing. Because a couple of the stacks were shorter, it ended up being short on one end. We used whipped cream to even it out. It was all a lie for appearance’s sake, but it did look nicer that way.

DSC00285

We ended up having a lot of whipped cream left over. We might have been a little too spartan on the whipped cream between the cookies. That was my call as I wanted to make sure we had enough (after a previous experience of not having enough). Also contributing to the leftover whipped cream was the fact that we were a few cookies short. We put a lot of frosting on the top and sides to even it out. But even so, we still had a bunch left over. We made fruit parfaits to use up some more.

DSC00289

Ready for your close-up?

Ready for your close-up?

We waited for it to be ready, and then we tried it. It’s still a great dessert. This time the cookies were not absorbed by the whipped cream as much because we had used too little whipped cream between them. So the texture was different. It was a little bit crunchier, but it was still delicious. The cookies had managed to stay fresh. I would say it was equally as good as the previous cake.

DSC00296

I’m glad I decided to break it up into two cakes, as we got to enjoy it over a much longer period of time. It was a lot of fun to get to use the KitchenAid. (Vroom!) And it was a lot of fun to get to make the cake with my wife. We have fun when we make food together.

DSC00299

Have you ever made such a big batch of something that you had to break it up into two batches? Do you ever make desserts with other people? Also, I hear about a lot of different icebox cake recipes out there. Do you have a favorite one? Let me know!

DSC00302

Chocolate wafer recipe courtesy of smitten kitchen. Icebox cake recipe courtesy of Nabisco.

Icebox Cake – Homemade Edition

As some of you may remember from last year, icebox cake is my wife’s favorite birthday cake. I decided to make it again this year, but instead of trying to find those wafers, and in an attempt to make it more special, I decided to make the wafers myself.

DSC00067

On smitten kitchen, I found a recipe for icebox cupcakes that had a chocolate wafer recipe in it. I used that recipe to make the wafers and then used those wafers in the traditional Nabisco recipe. I bought brand new cocoa, sugar, and baking powder for this recipe because I was out. I also used skim milk instead of whole milk.

It was very easy to make the dough. From start to finish (including some cleaning), maybe 40 minutes. About 5 – 10 minutes of that was rolling, measuring, rerolling, and remeasuring the dough to get it to the right size. (It was supposed to be 1 3/4 inch. Mine was closer to 2 inches, but it was close enough.)

Every cookie starts somewhere...

Every cookie starts somewhere.

It went mostly pretty smoothly, with just a couple of small blips. When using the food processor, I hadn’t put in the piece to cover the hole, and some of the mixture went flying. (Whee!) And when I tried to carefully add the milk mixture, some of it dripped out. But blips aside, it was done pretty quick. I transferred it to a bowl to knead. It almost wasn’t big enough. (I know, my bowl rule.) But it didn’t really matter, because it wasn’t staying there long. I should have just used a cutting board though, cause I used one when I needed a space to roll it out anyway.

Here's the dough all mixed.

Here’s the dough all mixed.

It took a few minutes to roll out, measure, reroll, remeasure, and reroll again. After getting it just right (or close enough, really), I wrapped it in aluminum foil. Then I stuck it in the fridge to chill. At that point, it was 11:15pm. I was able to do it then and still keep the surprise, as my wife was out at a concert (the night before her birthday).

Hey look, I'm on a roll!

Hey look, I’m on a roll!

I didn’t think I was going to finish it in time that night, because I didn’t want her to walk in while I was making it. I thought I would have to finish it the next day. Unless I was going to bake it while she was sleeping, which would have had its own difficulties. But, after it became clear she would still be out for a while, I decided to keep working on it. It was late. I had let it sit for about 2 hours.

Not exactly circles.

Not exactly circles.

I had rolled the log into what turned out to be not exactly a circle, so the cookies that I cut ended up looking more like Melba toast or fruit slices and less like circles. And as I cut, the dough got warmer, and stuck to the foil. (I was cutting it on the foil for simplicity’s sake.) The first few cuts were not good. I put those to the side and reused them later. Some ended up thicker, some thinner, but I eventually got the hang of it. I put my fingers up close to the end and cut as close as I could without it being too thin. Still a little bit got stuck on the bottom, so I kept moving the dough to a clean part of the foil. For the first round, I ended up with 30 cookies total on two baking sheets.

All lined up and ready to bake.

All lined up and ready to bake.

I had preheated the oven. I moved the oven racks and did the top/bottom and front/back rotation as directed. Since some cookies looked to be on the small side, I baked them on the lower end of the scale – 12 minutes – with the changeover at 6 minutes. After 12 minutes they looked done. Some of the smaller ones were possibly a little overcooked, but they were still good.

The first batch, fresh from the oven.

The first batch, fresh from the oven.

First batch close-up.

First batch close-up.

After the first batch, I moved both pieces of parchment paper with the cookies still on them onto the cooling rack. I put down new parchment paper, pulled the remains of the log out of the fridge and repeated. The second batch was better. It was 30 cookies again. I moved the first batch (which had cooled and crisped at this point) off the cooling rack and moved the second batch on.

Second batch, ready to go.

Second batch, ready to go.

Second batch, ready to go, extreme close-up.

Second batch, ready to go, close-up.

Second batch, fresh from the oven.

Second batch, fresh from the oven.

Yum!

Yum!

Double yum!

Double yum!

I moved on to the third batch. I reused the parchment paper from the first batch. I ended up with 19 more for a total of 79 cookies. I didn’t have a chance to reform all the previously messed-up ones because it would have meant a whole nother batch. So I quickly reformed them into a ball, then a bit like a log, but it was smaller and smooshier (because it was warm). So I cut them a little bit thicker and just smooshed them which means they were less well-formed.

Third batch. Notice the smooshy shapes. And the grease stains from the previous batches.

Third batch. Notice the smooshed shapes. And the grease stains from the previous batch.

Cookie friends!

Cookie friends!

What a great looking batch, eh?

What a great looking batch, eh?

Third batch close-up!

Third batch close-up!

They smelled good. Not overpowering, but good. They looked really nice. I’m happy with how they turned out. I let them cool. I took lots of pictures. I put them away so my wife wouldn’t see them in the morning. (She normally gets up before I do.) She had actually come back home in the middle of me baking, but she didn’t want to spoil the surprise (even though I said it would be okay). So every time she walked by the kitchen, she would consciously shield her eyes so she wouldn’t see anything.

All the cookies.

All the cookies.

With the cookies done, I still had to make the whipped cream, assemble the cake, and let it chill. Last year I used two packages (a double recipe) which was 80 cookies. I got 79 out of this recipe, so that was pretty close. It was the middle of the night at this point, so I figured I would wait until the next day.

Whipped cream.

Whipped cream.

I didn’t want to take time away from her birthday that I would otherwise be spending with her. So I didn’t get to finish it till later. In fact the birthday celebrations ran late, and I didn’t have a chance to put the cake together till after that. To save time, coupled with the fact that we were going out-of-town soon after, I used just a single recipe: 2 cups of whipping cream and 40 cookies. (BTW, it doesn’t tell you how many are in the package, so I had to do a little reverse engineering to figure out how many I needed.) I followed the traditional instructions to make them. I beat the cream on high. It took about 10 minutes to make the whipped cream. Then I added in the vanilla.

Making stacks of cookies.

Making stacks of cookies.

Forty cookies, ready to be iced.

Forty cookies, ready to be frosted.

I took out a plate and prepared them in stacks of 10 cookies at a time. I didn’t measure the whipped cream. I just shplurped some on. (That’s an industry term.) I did one stack of 10, set it aside, and did another stack of 10. Then I put them together. Then I repeated that with two more stacks of 10. Then I started frosting them. Because the cookies were irregular, some bits stuck out more than others and I had to smoosh them into shape and add more frosting. (“Smoosh” is another industry term.) I was in a rush, so it wasn’t my best work, but it was done. I let it sit about 2 hours till we ate it.

Getting there.

Getting there.

All done! We have cake. Repeat, we have cake.

All done! We have cake. Repeat, we have cake.

Cake close-up

Cake close-up.

How did it go over? She was kinda blown away. She knew I was going to make her something, but since I often don’t repeat recipes, she wasn’t expecting this. She was really surprised. She’s a smart cookie (pun intended), so she figured out right away that I had baked the wafers. (She knew I was baking something the night before, and there’s nothing else I could have baked for this cake.) She was really moved that I had made the cake for her, and even more so that I had gone to the trouble of making the cookies by hand.

Mmm, cake.

Mmm, cake.

Besides the metaphorical sweetness, she thought the cake was amazing. She described the cookies as not too sweet, sturdier than the regular ones, with a good, but different texture. They had a nice chocolately taste. Not chocolate flavored like some store-bought cookies, actual chocolate.

Did someone say cake?

Did someone say cake?

Also, while the whipped cream itself was not sweet, it took on some of the sweetness from the cookies after a while. It got better and better each day. For instance, after the third day – there was a lot of restraint involved – it got even better.

While it was a little bit of work to make the cookies, it wasn’t really any more work than running around to try and find the store-bought ones. And it was totally worth it in taste and in smiles. Have you ever created a store-bought dessert from scratch? Have you ever made this or other versions of an icebox cake? Let me know in the comments below.

Chocolate wafer recipe courtesy of smitten kitchen. Icebox cake recipe courtesy of Nabisco.

Mini Sweet Potato Cheesecakes

I know you’ve been waiting on the edge of your keyboard to find out what happened with all of the leftover filling from the sweet potato cheesecake I made.

As you may remember, the recipe made a lot of filling. I had two 16 ounce yogurt containers worth left over. That was the difference between a 9 inch cake pan which I used, and a 10 inch springform pan which the recipe called for. I have since gotten a springform pan and I realize the difference. It’s huge. The springform pan is about twice as tall, and in this case a little wider.

The "crust".

The “crust”.

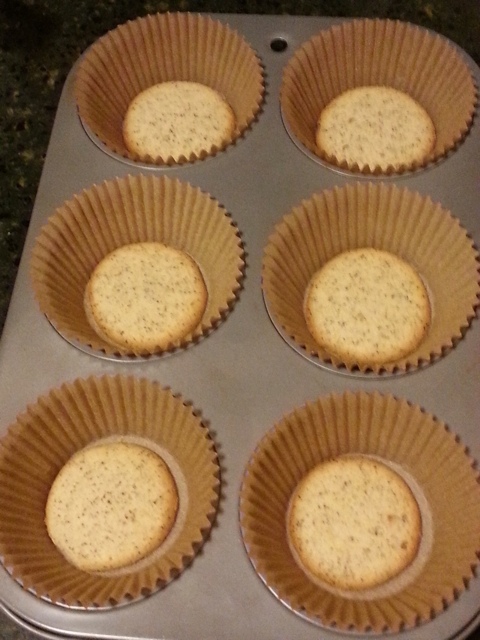
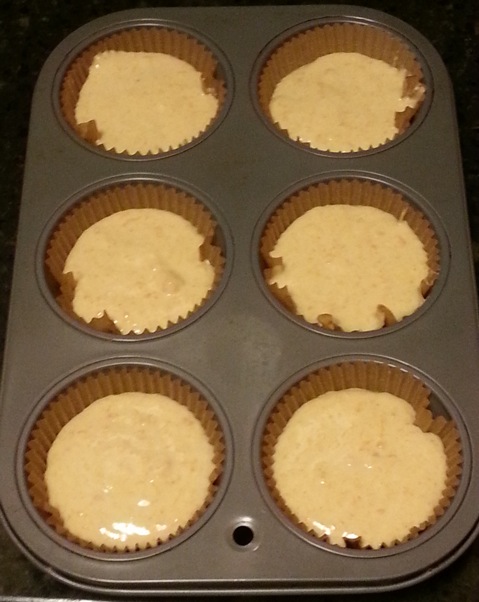
With so much leftover, I had to figure out what to do with it all. I looked around for ideas and I settled on this one. It’s actually remarkably simple. Put liners in a muffin tin, put a vanilla wafer on the bottom for the crust, fill it with filling and bake. Voilà! Instant mini sweet potato cheesecakes. I’d love to take the credit for coming up with such an awesome idea, but I can’t. I got the idea from here. I used baking instructions from here.

Filled up and ready to bake.

Filled up and ready to bake.

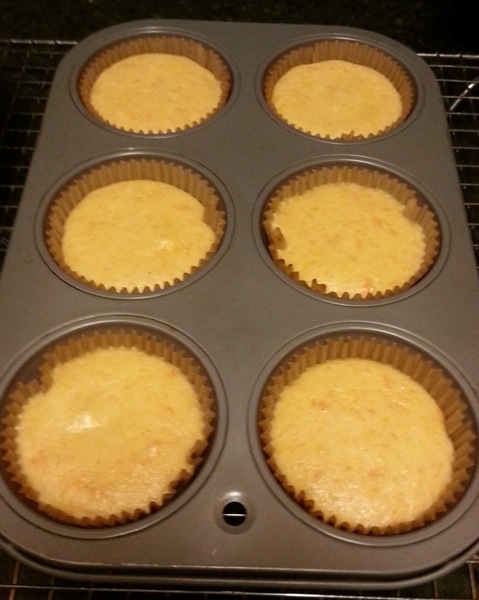
I used Trader Joe’s Ultimate Vanilla Wafers. I put a couple of spoonfuls of filling for each cheesecake. At that size, each container had enough filling for a dozen mini cheesecakes. So that made 2 dozen total. I baked them for 20 minutes at 325°. I let them cool on a cooling rack then chilled them in the fridge.

Fresh from the oven.

Fresh from the oven.

Even though I made 24 total, keen-eyed readers will notice there are only 22 in the picture. (Bonus points for you!) My wife and I taste tested them before I got to take the picture, and they went into the fridge. They were yummy, they just needed to chill.

How many cheesecakes can you spot?

How many cheesecakes can you spot?

I feel a little bit like I cheated in making these. I could have gotten more graham crackers, crushed them, and made more crust, but it was late. I had worked all day, and then picked up supplies for the cookie competition. I wanted to use up the filling before it went bad, so I didn’t want to wait any longer to make them. And as my wife mentioned, I did make the filling. And I did assemble them. It just seemed too easy, which I guess it was after I put in all the work of making the filling in the first place.

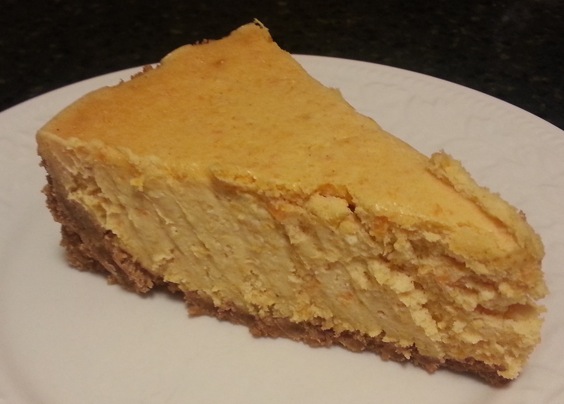
Check out that texture. You can also see the "crust" peeking out at the bottom.

Check out that texture. You can also see the “crust” peeking out at the bottom.

They were just as delicious the second time around, and they made everyone (including a bunch of people at work) very happy. I thought it was a pretty easy way to use up the extra filling. But I’d also love to hear your ideas. What would you make in this situation? What kinds of “day after” recipes have you come up with? Let me know!

Original cheesecake recipe courtesy of Chef Keith Snow, Harvest Eating, via Mambo Sprouts. Mini cheesecake recipe idea from this discussion on Chow. Baking instructions courtesy of this recipe at AllRecipes.

Sweet Potato Cheesecake

20141129_011902

Did you ever want to have your cake and it eat it too? Here’s your chance. This is a delicious cheesecake packed with the nutritious power of sweet potatoes. At first glance, you might be thinking there’s no way this thing works, but trust me. It does, in spades. (And in your belly.)

This recipe was given to me by a friend. Actually the same friend whom I had made the Salted Caramel Apple Pie for. (And yes, I meant to end that sentence with a preposition. You’re allowed to.) She had given me the recipe a long time ago, but I hadn’t gotten a chance to try it yet. So I tried it for Thanksgiving. (Yes, I realize that Thanksgiving was a while ago, but I bake things a while ahead of when I write about them.) I have made pumpkin pie in the past, but this year I thought I would try something different.

The first thing to do was roast the sweet potatoes. I had originally looked for sweet potato purée in the grocery store when I went shopping in order to save myself the trouble. They didn’t have any, so I got some sweet potatoes. I was worried that it was going to be difficult to roast and purée them. I was pleasantly surprised.

I found and followed some very easy instructions. I laid them out on foil, pierced them with a fork, and baked them. (Those of you who read last week’s post know that I baked them while I was waiting for my bread to rise.) It was fun to hear them whistle and see them ooze while they baked. (Whistle and Ooze would be a good band name, IMHO.) When they were done, I peeled them. The peel came right off. Easy peasy. I thought, “Why don’t I do this more often?” I then mashed them with a masher and stuck them in the fridge overnight, so I could make the cake in the morning to be ready in time for Thanksgiving dinner.

Making the crust was pretty easy. The hard part was figuring out how many crackers equaled how much in the way of crumbs. In case you’re wondering, it was a pack of crackers for a cup of crumbs. (I think 9 crackers in a pack.) I made crumbs via the rolling pin/plastic bag route. (I’m old-fashioned that way.) Some of the crackers were already a little crumbly and some were already crumbs. I joked they were overachievers getting ready for the crust ahead of time.

I’ve often used Annie’s Bunny Grahams to make graham cracker crust. They’re much harder than your run of the mill graham crackers, so they take a bit of effort to turn into crumbs. This time I used Trader Joe’s graham crackers and they were much softer and easier to crush. Even so it takes a little bit of work. 2 cups is much more than I thought. I ended up needing a bigger bowl. (This seems to be an ongoing issue. One day I’m going to write up a list of things that I learned while baking. A set of baking “rules” or something. This will be one of them. Always use a bigger bowl than you think you’ll need.)

20141127_130152

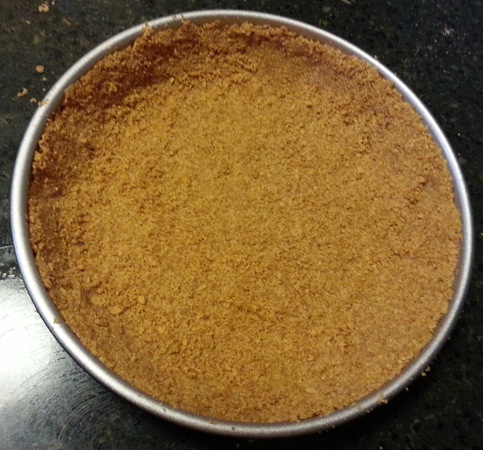
The recipe called for a 10″ springform pan. I didn’t have one. I used a 9″ cake pan. I knew it would be a little smaller, but I didn’t realize till later just how much smaller. However, the crust didn’t seem too big. At the time I thought that the crumbs seemed to be just enough. In retrospect, they probably would’ve worked fine for a bigger pan if they had just filled in the bottom, and not gone up the side. I think my crust was a little thicker and later I realized it was bunched up where the bottom met the side. (See below.)

When I was mixing the cream cheese, it reminded me of making the red velvet frosting. At first, it looks like nothing. Then for a while, it continues to look like nothing, and like it will never be anything. But after a while it makes something awesome. (When I make this “rulebook,” perhaps the next one will be: always have patience, especially where cream cheese is involved.)

20141127_134418

Before the sweet potatoes.

The cream cheese mixture was very thick. There was cream cheese flying everywhere while I mixed it. After adding just a couple of eggs, the consistency changed completely. It became smooth. With a capital smoo. After adding the sweet potato purée it looked like peach yogurt. (Mmm. Peach yogurt. I used to eat a lot of that.) When it was all done, there was a lot of it. I mean, it was two pounds of cream cheese and at least a pound or so of sweet potatoes.

20141127_134845

With the sweet potatoes. Apologies for the bad lighting.

I put the cheesecake together and then I setup the cheesecake bath. Fun! I got a baking pan full of hot water and put the cheesecake in. I had never made cheesecake before, but you learn something new every day.

20141127_135619

Before baking.

I had a whole bunch of filling left. And when I say a whole bunch, I mean a lot. The dish I used was a bit smaller than the one the recipe needs. It wasn’t just being an inch smaller. I didn’t realize how much bigger springform pans are. I ended up with two containers worth of filling left. So I had to start looking for ideas on how to use it. (You’ll hear about what I came up with in next week’s installment.)

I hadn’t gotten started on it as early as I had wanted to. So the turkey had to wait a little bit till after the cheesecake was done before it went in. It delayed our expected start time by a little bit, but it was just my wife and I and one friend. It wasn’t how I planned it, but thankfully it wasn’t a big hungry crowd waiting for food.

And now to the important question. How was it?

20141127_205535

Fresh out of the oven.

It was delicious. Absolutely delicious. Who knew the humble sweet potato could be so delicious? It was even better the next day, according to one source who got to try it two days in a row. It had a yummy cheesecake taste and texture. It also had the taste of sweet potato. It was a great combination.

20141129_011730

Look at all that extra crust on the bottom left.

One note about the crust: as you can see in the pictures, the crust bunched up at the seam between the side and the bottom. That was all me. I was trying to make sure it wasn’t too thin on the side or at the seam. I was also trying to make sure it all held together. I’ll try things differently next time.

While I enjoy pumpkin pie and sweet potato pie, this was definitely a good way to mix things up. What’s your go-to Thanksgiving dessert? For that matter, what’s your favorite cheesecake? How does graham cracker crust treat you? Let me know in the comments below!

Recipe courtesy of Chef Keith Snow, Harvest Eating, via Mambo Sprouts.

20141129_012026