Monthly Archives: November 2014

The Baked Brownie with Pretzels and Toffee

20140112_221110

A long time ago I had found a recipe for brownies with pretzels and toffee, but I had failed to bookmark it. I wanted to make them again, so I went looking for the recipe. I couldn’t find the one I was looking for, but I found a bunch of other options. I narrowed it down to a couple of recipes, and I let my wife pick the one I used. She chose this one. Baked is a great bakery in our neighborhood with amazing baked goods, so I figured it was worth giving their recipe a try.

Now you might be asking yourself: why did I let my wife pick the recipe? Was it because I’m a nice guy? Was it because she’s an enthusiastic supporter and taste tester? Yes and yes. But mainly I let her pick because I was making it for her. It was the night of the Golden Globe Awards. (As regular readers of this blog know, I bake and write up these posts far in advance of when I post them.) The Golden Globe Awards are a big thing for her. It’s not because she was nominated for anything, even though I do think she deserves several awards. Rather, it’s because she’s a big fan of awards shows.

It’s a big night, and she has a special ritual. (As she has said, it’s like her Super Bowl.) She starts watching it early, to see all the pre-show coverage, flipping back and forth between a couple different channels, to get the best information. She has a dear friend, who long ago moved to a  different town, who she still watches it with via phone and text. She has particular foods that she prepares and eats.

Along with these particular foods, she was going to get something for dessert. I interjected and said I could make something. I could tell she was pleasantly surprised. Her eyes lit up, and her tone of voice changed. She said, “I didn’t know that was an option!”

I try not to have too much dessert in the house. I generally don’t make a new dessert until the old one is finished. But the previous night we had just finished off the previous recipe. And I figure it’s better to have homemade desserts (or homemade anything really) than buying something in a store.

20140112_221057

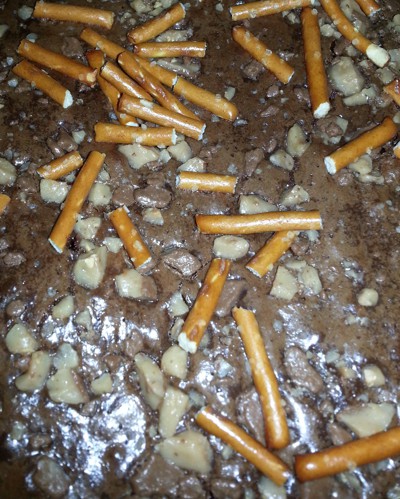
So I set about to make this recipe. And I have to say it’s an awesome recipe, and it turned out great. There were a couple of details about the ingredients, though. The supermarket didn’t have a ton of choice for toffee, so I picked up the milk chocolate toffee they had. And I ended up using regular semisweet chocolate chips for the chocolate, because I happened to have them handy. Also, I thought about making it gluten-free. I don’t know how it would have turned out, but I didn’t have gluten-free pretzels, so I figured it was moot anyway.

In fact, I didn’t really have great pretzels at all. All the supermarket had was Rold Gold pretzels. I have nothing against them. They’re perfectly fine if you want a generic, middle of the road pretzel. But they’re no Snyder’s of Hanover or even Utz. Yes, I’m a little bit of a snack food snob. (You can read more about my snack food snobbery here.)

And as long as we’re talking about the pretzels, it would have been great to have a measurement of the pretzels in weight or mass, instead of volume. Depending on how you break them, pretzels can have a vastly different weight for the same volume. (You can read more about my thoughts on measuring here.) Also, while the recipe calls for crushed pretzels, the pictures look more like broken pretzels, which is what I ended up using.

Between prep and actual time to make, these only took about an hour. Sometimes I feel I take a little bit longer than what the recipe says you should. I think part of that is due to being methodical and careful. But I also think part of that reflects a familiarity with the recipe already, masterful baking skills, and/or wishful thinking on the part of the recipe makers. This time I think it also took a little bit longer because I did all the mixing by hand. It’s a little bit more work, but it’s fun, and it really makes me feel connected to the recipe and to baking. It also feels a little bit like I’m stepping back in time. Like I’m baking how people baked before electricity.

Something that saved me time in the long run, however, is measuring out the ingredients ahead of time. It’s a little bit more prep ahead of time, but when it comes to doing each step, it doesn’t interrupt your baking rhythm or mojo. You can just keep going with the flow.

20140112_192156

Something that added a little bit more time though is doing what I call the “brown sugar trick”. If you’re like me, you will inevitably end up with brown sugar that is no longer usable because it has turned into one solid block. I can’t remember where I first learned about it, but there’s an easy way to make it usable again. Break a piece of it off, stick in a bowl, cover that bowl with a wet paper towel, and microwave it. Microwave it for 30 seconds and then check on it. Microwave it in 30 second increments until it reaches the consistency you need. It will eventually absorb the moisture from the paper towel and become usable again. It works! You should try it. Let me clarify that. Really, you should take better care of your brown sugar than I do, but if you’re in the same boat as me, you should try it. (Unfortunately for me, I had to do it twice this time. Once when I originally measured it, and then once again when I actually used it, as it had hardened again.)

The directions were a little unclear in step 3. I ended up adding the sugar to the saucepan I was using, then I removed it from the stove and poured it into a mixing bowl. I think it would have been easier to deal with if I added the sugar in after pouring it into the mixing bowl.

Other interesting things to note about the process: I added the eggs in one at a time like they said. I’ve usually just added in all the eggs at once in a recipe, but I figured I would follow their lead. Also, instead of greasing the pan, I used parchment paper. I figured there was a lot of butter in there already. And I used a regular spatula to smooth out the batter, not a greased one. I baked them for 30 minutes in a 9 x 13 glass baking dish and cooled them on a wire rack.

They were so fudgey, some of them were hard to remove from the parchment paper. I ended up with 33 brownies. I know it’s an odd number, but since they were so hard to remove, I ended up cutting some of them smaller to make it easier. Also, some of them fell apart differently than how I had originally cut them.

20140112_192129

Before even eating them, they looked and smelled delicious. And once it came to actually eating them, they were delicious. Absolutely delicious. Fudgey. Yummy. I had almost put more pretzels and toffee on top, because I thought they needed it. But they were so rich, they didn’t need anything. Writing this up, I can still remember what they looked and tasted like. I kind of want to make them again right now.

Instead, I will do the next best thing. I will ask you to make them and let me know what you think. Alternatively, if you have a better brownie recipe, send it along so I can try it out. I think this is one of the better brownie recipes I’ve tried, but I’d be happy to be proven wrong.

Recipe courtesy of Baked, via The Crepes of Wrath.

Try My Cookies At The Brooklyn Cookie Takedown!

If you’re like most people in the US, you’re probably just starting to think about eating again after the massive amounts of food at Thanksgiving. If your thinking includes thinking about cookies, you’ve come to the right place.

Maybe you’ve been reading my posts and wondering how you could get your hands on some yummy cookies that I made? Well wonder no further. I’ll be bringing cookies to the Brooklyn Cookie Takedown. It’s next Saturday & Sunday (December 6 & 7) at the Bell House in Brooklyn, NY.

In case you’re not familiar with the Cookie Takedown, it’s a massive cookie competition. Whole bunches of cookie makers (like me) bring their cookies. Then whole bunches of cookie eaters (like you) come in and sample all the cookies. People vote. Winners win stuff.

I’ve never been to it before (although I’ve heard about their various Takedowns), but it sounds like a blast. I’ve never been to a cookie competition before, actually. I’ll have to bake huge multitudes of cookies before going. I’ll have the assistance of my lovely wife, but it’s still a big undertaking. I’m excited and up for the challenge!

I’m going to make my Millionaire’s Shortbread. It’s a cookie I’m very familiar with, it’s delicious, and it’s always a crowd pleaser.

If you’re in or near Brooklyn, you should come check it out. I’d be honored if you thought my cookies were the best, but I wouldn’t be offended if you liked someone else’s better. I’m sure there’s bound to be some intense competition.

It’s happening next Saturday and Sunday. I’ll be there Saturday. See you there?

Peanut Butter Chip Chocolate Cookies – Gluten-Free

20131224_213536

If you’ve been following this blog, you know that I like to make some recipes gluten-free. One of my chief baking cheerleaders/taste testers/inspirations (my wife) does better when she eats less wheat, so I make gluten-free recipes specifically for her. I know there’s a difference between gluten-free and wheat-free, but since any gluten-free recipe will have to be wheat-free, and since I’ve found many more gluten-free resources than wheat-free resources, I find it easier to make things gluten-free.

This particular batch of cookies was made as a surprise for her. She’s a big fan of peanut butter and chocolate. Truth be told, I am, too. Growing up we used to scoop out peanut butter right from the jar and sprinkle chocolate chips on it. It was simple, it was a little bit of guerilla dessert making (we didn’t really have much in the way of sweets in the house), and it was delicious. I don’t know if I was a fan of peanut butter and chocolate because of that experience, or I undertook that experience because I was already a fan, but in either case enjoying peanut butter and chocolate together has stuck with me.

So, while these were for her, I knew they would be enjoyed all around. And I had just happened to pick up some peanut butter chips recently, so this recipe was perfect. Well, almost perfect. The original recipe is not gluten-free, but that was easy enough to remedy. I simply substituted gluten-free flour for the regular flour.

20131224_213520

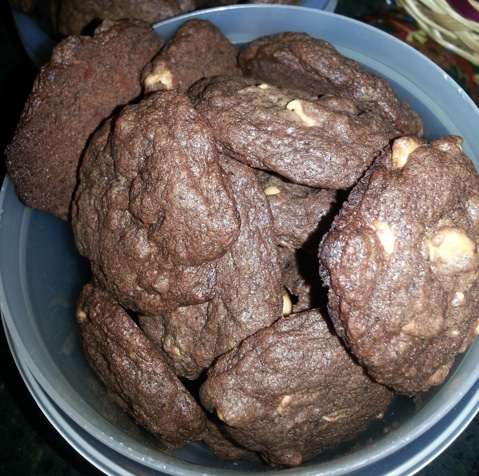
It is a super easy and quick recipe. In my methodical way, I often take a little bit longer to make recipes than the recipes indicate they will take. But this one only took an hour from start to finish. This includes the baking time, which included having to bake a few different batches because there were so many cookies. How many? I ended up with 47 cookies. Some were bigger and some were smaller, because I wasn’t being an exacting chef about it. The exacting chef in me would have tried to get an even 48 (4 dozen) out of them, but that didn’t happen either. The original recipe also only made 2 dozen cookies, so I can only imagine how big those were.

I cooked them for 8 minutes. They were a little crumbly when warm, which means I had to be careful sliding them off the cookie sheet so they didn’t break apart. They are a little grainy due to the texture of the gluten-free flour, but not any more so than anything else made with this flour. They are soft and have a good texture. They also have a “good cookie to chip ratio”, according to my wife. She knows about such things, so I take her word for it.

Overall, I would say these are a quick, simple, yummy peanut butter and chocolate dessert. But don’t take my word for it, try them yourselves. Let me know how they turn out in either original or gluten-free versions.

Recipe courtesy of Allrecipes.com.

Peanut Butter Banana Chocolate Chip Muffins – Gluten-Free

20131006_211745

Muffins! Muffins are great. I love muffins. Just the sound of the word itself is delicious, don’t you think? This recipe is the first to use the “Muffin” category on the blog. The first of many, I hope.

I was looking for fun recipes to make one day, and I found this one. I kinda had to agree with the author when I read their post about the recipe. I mean, peanut butter, chocolate, and banana? Awesome, right? Right. I made these gluten-free by substituting gluten-free flour for the regular flour. They turned out delicious but a little bit grainy (from the gluten-free flour). More so as the days went on. The recipe ended up making so many, I had to freeze them.

20131006_211735

As regular readers of this blog may know, I make these recipes some time in advance, write down notes about them, and then eventually write out the blog posts when I get a chance. Unfortunately, I didn’t write much down for this one. So I don’t have much more to say. Perhaps one day I will make these again and be able to expound upon them further. However, for now this will have to suffice.

But fret not! Using the recipe below, you can make these yourselves. If you do, please let me know how they turned out. You could even write a guest post for the blog!

Recipe originally from Cooking Light Bulletin Boards, via adaptation by Noble Pig.

Chocolate Pretzel Pecan Pie

20131212_180349

For those of you who love pie, you’re in for another treat this week, as I bring to you another awesome pie recipe I found. In this case, found is actually a bit of a stretch. It’s more accurate to say “given”. I will often find recipes when I’m looking for something in particular. But this one was specifically recommended by a friend of mine, and I just had to give it a shot.

I had always seen pecan pie from afar, but I’m not really a big nut fan, so I had never ventured near it, let alone made it. But when this recipe was recommended to me, I was forced to examine it, and upon closer inspection, it looked interesting. As it turns out, pecan pie is a bit of a trip on its own. Plus this one had chocolate and pretzels in it, so that pushed it right over the top, right into “let’s make this” territory. And I’m glad I did.

I had some dough left over from the pumpkin pie, so I didn’t have to start from scratch with making the dough. The night before I was going to make this pie, I took the dough out of the freezer, and put it in the fridge. When it came time to make this pie, I rolled out the dough and used it following the same instructions as I did the last time. (I actually still had a little bit of dough left over after this time, which I put back in the fridge, and eventually the freezer. Not enough for another pie, but maybe something else?)

I made a few minor adjustments to the recipe. I used sea salt instead of kosher salt. Also, after adding the amount of pretzels requested, it definitely needed more, so I added another handful. Typically, measuring something like pretzels is hard to do using volume, because the amount of pretzels you get for a particular volume will depend on how small you break the pretzels. (See my thoughts on measuring here.) Thankfully, they specified a certain amount, but, as I mentioned, more were needed. And finally, instead of using chocolate chips, I used a dark chocolate bar. I figured out the mass of the chocolate chips and used an equal amount of dark chocolate instead. I chopped it up into small pieces so it would work like the chips were intended to work.

I learned a couple of things about corn syrup when making this pie. For one, it is hard to stir. Maybe that should be obvious, but I hadn’t had much experience with corn syrup previously, mostly just a dab or two when making caramel for millionaire’s shortbread. This recipe calls for a whole cup of corn syrup. A cup may not sound like a lot, and in many cases, that’s true. A cup of flour or sugar is not hard to stir. Neither is a cup of milk or a cup of chocolate chips. But a cup of corn syrup is hard to stir, especially once you add in all the other stuff that gets added in for this recipe.

Another thing I learned is that corn syrup is super sweet. I mean that in a literal sense. When I was cleaning out the bowl, I tasted a little bit. Corn syrup is in a lot of the foods we eat, but I had never tasted it straight. Obviously, I knew it was sweet, but I didn’t know how sweet. Wow.

There was also some excitement when making this pie. Normally, there is some excitement when making any new recipe. It’s like exploring uncharted territory. You don’t know what you’re going to find or how you’ll need to react. But this time was a different kind of excitement. When cooking it for the second half with the foil on, I cooked it for 20 minutes more. However, a couple minutes of that was it cooking with the oven door open, because there was a smoke issue.

The pie was fine. It wasn’t smoking. It hadn’t done anything wrong. But I had. I had neglected to clean something up in the oven. Whatever that something was had started smoking. So smoke started pouring out of the oven while I’m trying to finish baking the pie. I had to open the oven, turn on the exhaust in the kitchen, try to clear the smoke out, and try to clean up whatever had been smoking in the first place.

After a few minutes of that, the smoke finally cleared up enough, and I was able to close the door and finish baking it normally. So while it was on the 20 minutes side of things, if the oven door had been closed the whole time, it might have only needed 15. (What I’m trying to say is YMMV.) At that point, while it was kinda hard to tell, it seemed like the pie had set. The crust looked nice, and it was definitely done. At that point, I let it sit out to cool, per the instructions. I was on my way out anyway. (Yes, I made a pie right before I had to leave. I know. Great timing.)

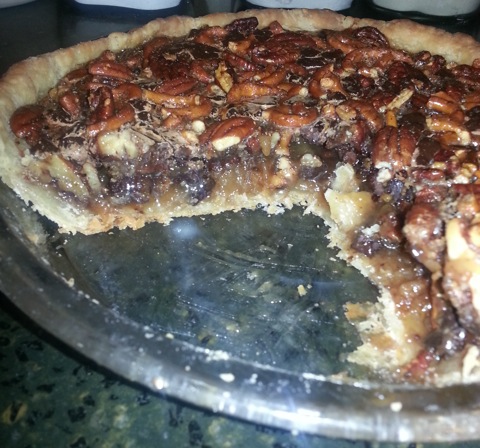
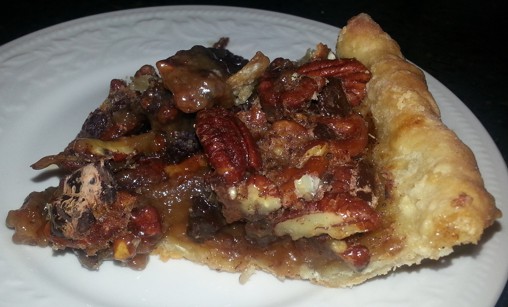
And after all that, how did it turn out? It is a ridiculous pie. In a good way, of course. It has all the yummy goopiness of pecan pie, plus the chocolate, plus the pretzels, plus the orange zest. There’s so much going on, it’s hard not to love it on ambitiousness alone. Don’t get me wrong, it tastes really good, but that’s only part of the reason to love it. At some point I should try making a regular pecan pie to see how it is without all the bells and whistles, but if this pie is any indication, it should be yummy fun as well.

20131213_003642

There were a couple of minor issues that didn’t greatly detract from the pie, but were at least worth mentioning. One issue was that I couldn’t really taste the cinnamon. I wouldn’t necessarily blame the pie. Maybe it needs more cinnamon, but it could just as easily be that my cinnamon is a little bit old and has lost its flavor. (Yes, it has checked behind the couch and under the fridge.) It’s also possible that I don’t have a sensitive enough palette to be able to taste an individual ingredient like that, but that it is doing its job behind the scenes nonetheless.

The crust was also a little bit hard in places. That may be a result of having cooked the pie too long, because it was hard to tell when it was set. It could also have been my not yet perfected pie crust skills making the crust a little uneven and resulting in uneven cooking. Again, blame me, not the pie.

Also, the orange flavor was a little inconsistent at first. Some parts of the pie were super orangey. (Worst superhero name ever, BTW.) Some parts were not that orangey at all. Maybe I did a terrible job of mixing the orange zest in, so blame me, not the pie. Maybe I would put in a little less orange zest next time, or at the very least make sure I mix it better.

It’s also possible that I don’t really need to worry about the orange zest too much. Upon tasting the pie again over the next few days, the orange flavor tasted much better. It was much more evenly spread throughout. So maybe there were just a couple slices that were flukes. Overall, the pie tasted great for the few days it lasted. It was possibly even better as time went on.

I think the moral of the story is that this is a great pie. Many of the (minor) issues I had with it can probably be blamed on me. As they say, all pies are innocent until proven guilty delicious until proven otherwise.

Go ahead and try making this pie. You will be glad you did. And then let me know: how was your pie making experience? How did you handle the pretzels? How long did you bake it? How was your crust? How even was the orange flavor? And have you called your mother recently? (Okay, that last one isn’t necessarily pie related, but it’s a nice thing to do.)

Recipe courtesy of Woman’s Day.

20131213_003700

Pumpkin Pie

wpid-20131118_224633.jpg

Who wants more pie? Now as much I as would love to hand each and every one of you a piece of pie, that’s kinda hard over the internet. I’m sure they’re working on it, but it’s not quite there yet. In the meantime, I can bring you another post about pie. I know it’s not the same thing, but I think you’ll agree it’s pretty good. I mean, this one is pumpkin after all.

This may sound a little bit corny, but I still have memories of eating pumpkin pie at Thanksgiving celebrations when I was younger. My wife is a big fan of all things pumpkin, so we picked some up at the grocery store. I didn’t know then quite what I was going to do with it, but I knew I wanted to do something. I had also never really made a pie from scratch.

Well not never, never. I had made my yummy s’mores pie. But that used a graham cracker crust, which while awesome, is a different kind of pie altogether. I had never made regular pie crust from scratch. So pumpkin + pie = pumpkin pie.

The pumpkin pie I remember from my youth was one that we had at Thanksgiving that we celebrated with friends. They had made the pie, not us, so I didn’t have a family recipe to turn to. I looked around a bit until I found one I liked. This one looked delicious, and it had a pie crust recipe with it, to boot. So as they say, done and done.

Making the pie dough from scratch was fun. I mean, it was a lot of work, but there was something joyful in doing the work. I actually didn’t have a pastry blender at the beginning, but I thought I could muddle through it with other utensils. Bad idea. A potato masher just didn’t cut it. I actually popped out in the middle of making it just to get the pastry blender. Thankfully there’s a great kitchen supply/cooking store right in the neighborhood, so I popped the half done dough into the fridge, popped out and got the pastry blender, and then finished it up. (Yes, there was quite a lot of popping that day.)

Once I had the pastry blender, I finished up making the dough pretty quickly and easily. The evening is probably my favorite time to bake, but this time I had started late. It was too late to make and bake the pie, so I stuck the finished dough into the fridge after completion, leaving the pumpkin part till the next day.

So, about the pumpkin part: the recipe calls for yams. Given the confusion in this country between yams and sweet potatoes, and my not searching too hard for actual yams, I ended up getting sweet potatoes. But it was pureed sweet potatoes. I think it was okay. It turned out tasty, in any case. The other thing was that I wasn’t paying attention, and I accidentally added the whole can of sweet potatoes instead of just the cup needed by the recipe, so I ended up with a bunch of extra filling. (I had intended to use the extra filling, but I didn’t get to it in time.)

Perhaps because I used pureed sweet potatoes instead of candied yams, using the strainer wasn’t as much of a challenge as the recipe made it sound like it was going to be. It still took a while, but it wasn’t too bad. And boy was that pie smooth! (This guy can tell you how smooth it was.)

One issue I had was that in the end, I didn’t cook it long enough. I cooked it on the low-end of the range mentioned, just in case, and it seemed to have set enough to finish cooking out of the oven as the recipe said. Perhaps it was because I filled the pie up a little extra full (trying to use up the extra filling), or perhaps it just wasn’t set enough when I took it out, but it didn’t end up cooking enough. It ended up being more custard than pie.

wpid-20131118_225614.jpg

I stuck it in the fridge for a while to firm it up. That seemed to help it a bit. But once you dug into it, and it got to room temperature, it didn’t really hold together. It was delicious, but it wasn’t exactly pie. On the other hand, the crust was delicious. I’m a big fan of bread products in general, and pie crust for sure. And this was a nice pie crust. Everyone told me the crust was the hard part, so I should be pleased.

So, pie crust: yum! Pumpkin pie flavor: yum! Pumpkin pie texture: yum, but not quite pie. So as mistakes go, not too bad.

I still have the other half of the pie dough left. This recipe, like many I’ve seen, makes enough for two pies (or a top and a bottom crust if the pie calls for it). So the other one is sitting in the freezer, waiting for my next pie idea.

Did you try this recipe? How did it turn out? Any ideas for what pie I should make next? Let me know in the comments below.

Pie recipe from smitten kitchen. Pie crust recipe also from smitten kitchen.